für Deutsch scrollen / faire défiler pour le français
Hello everyone!
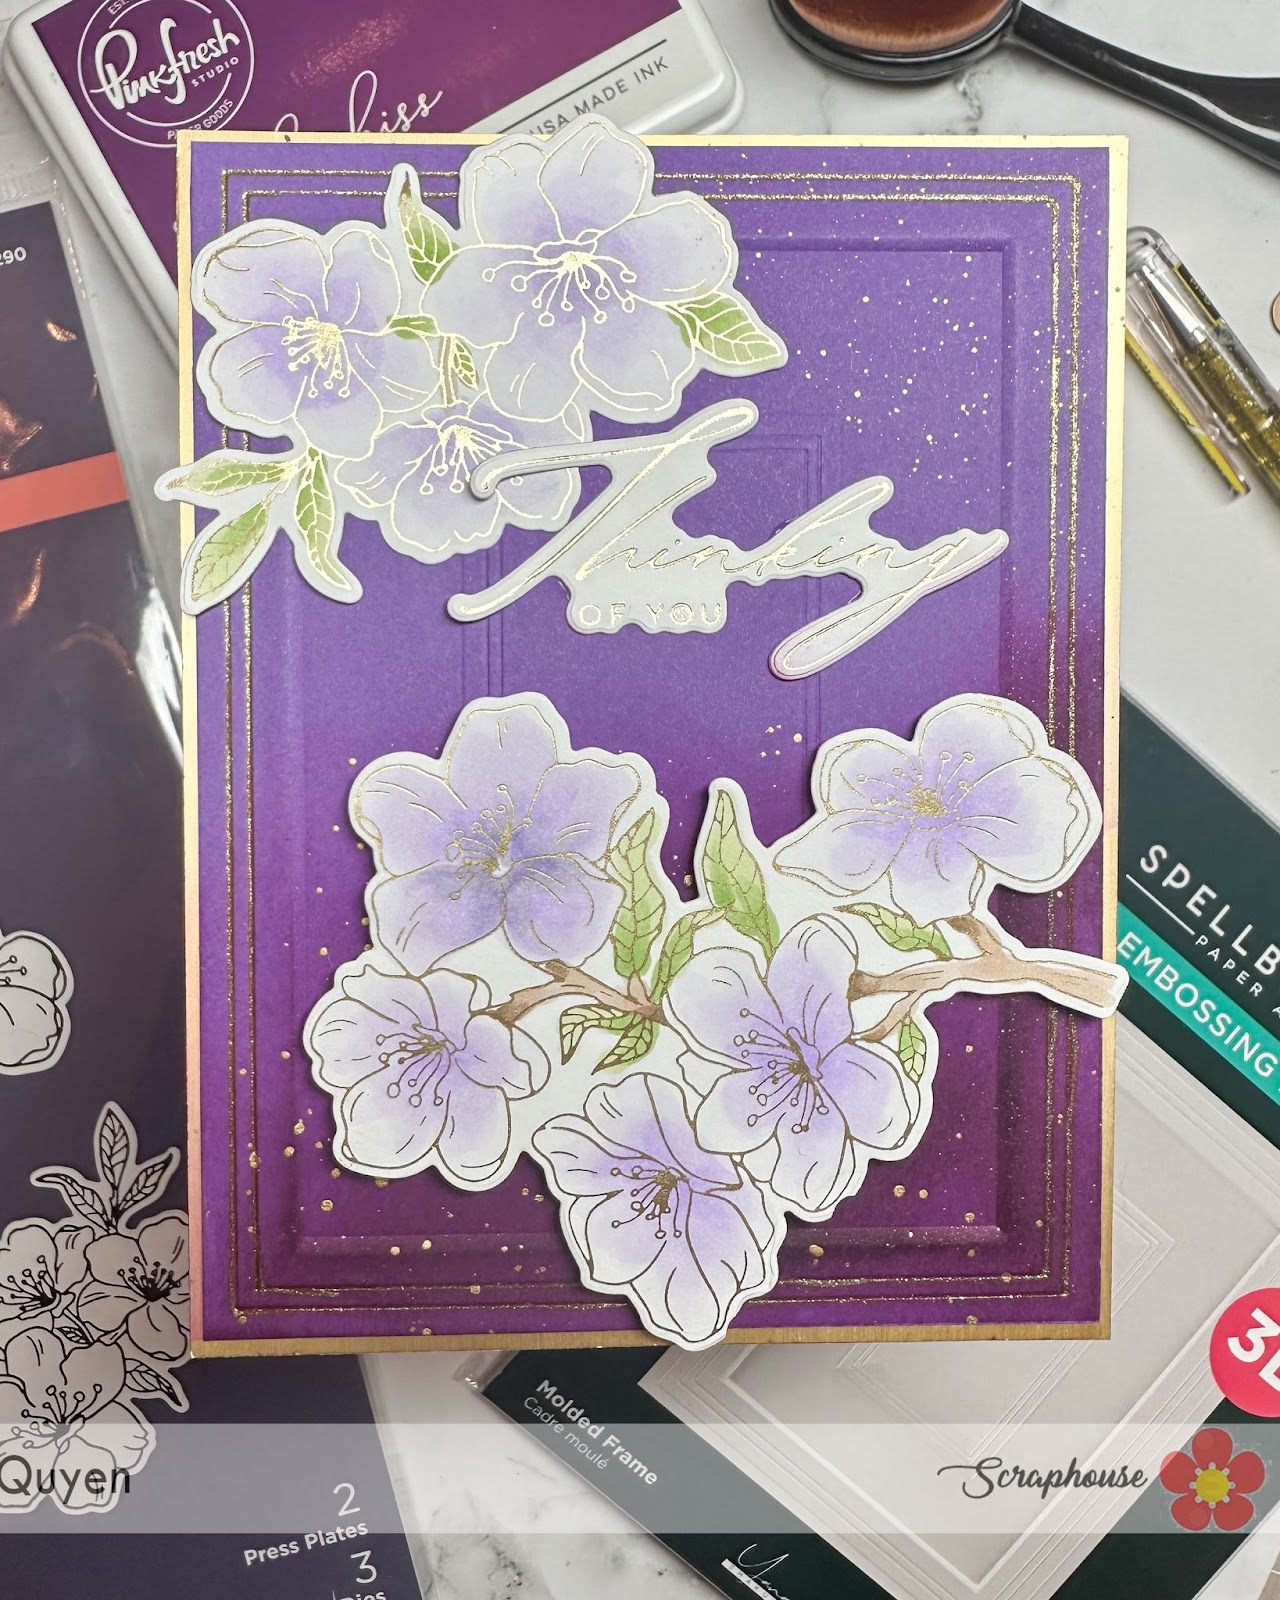
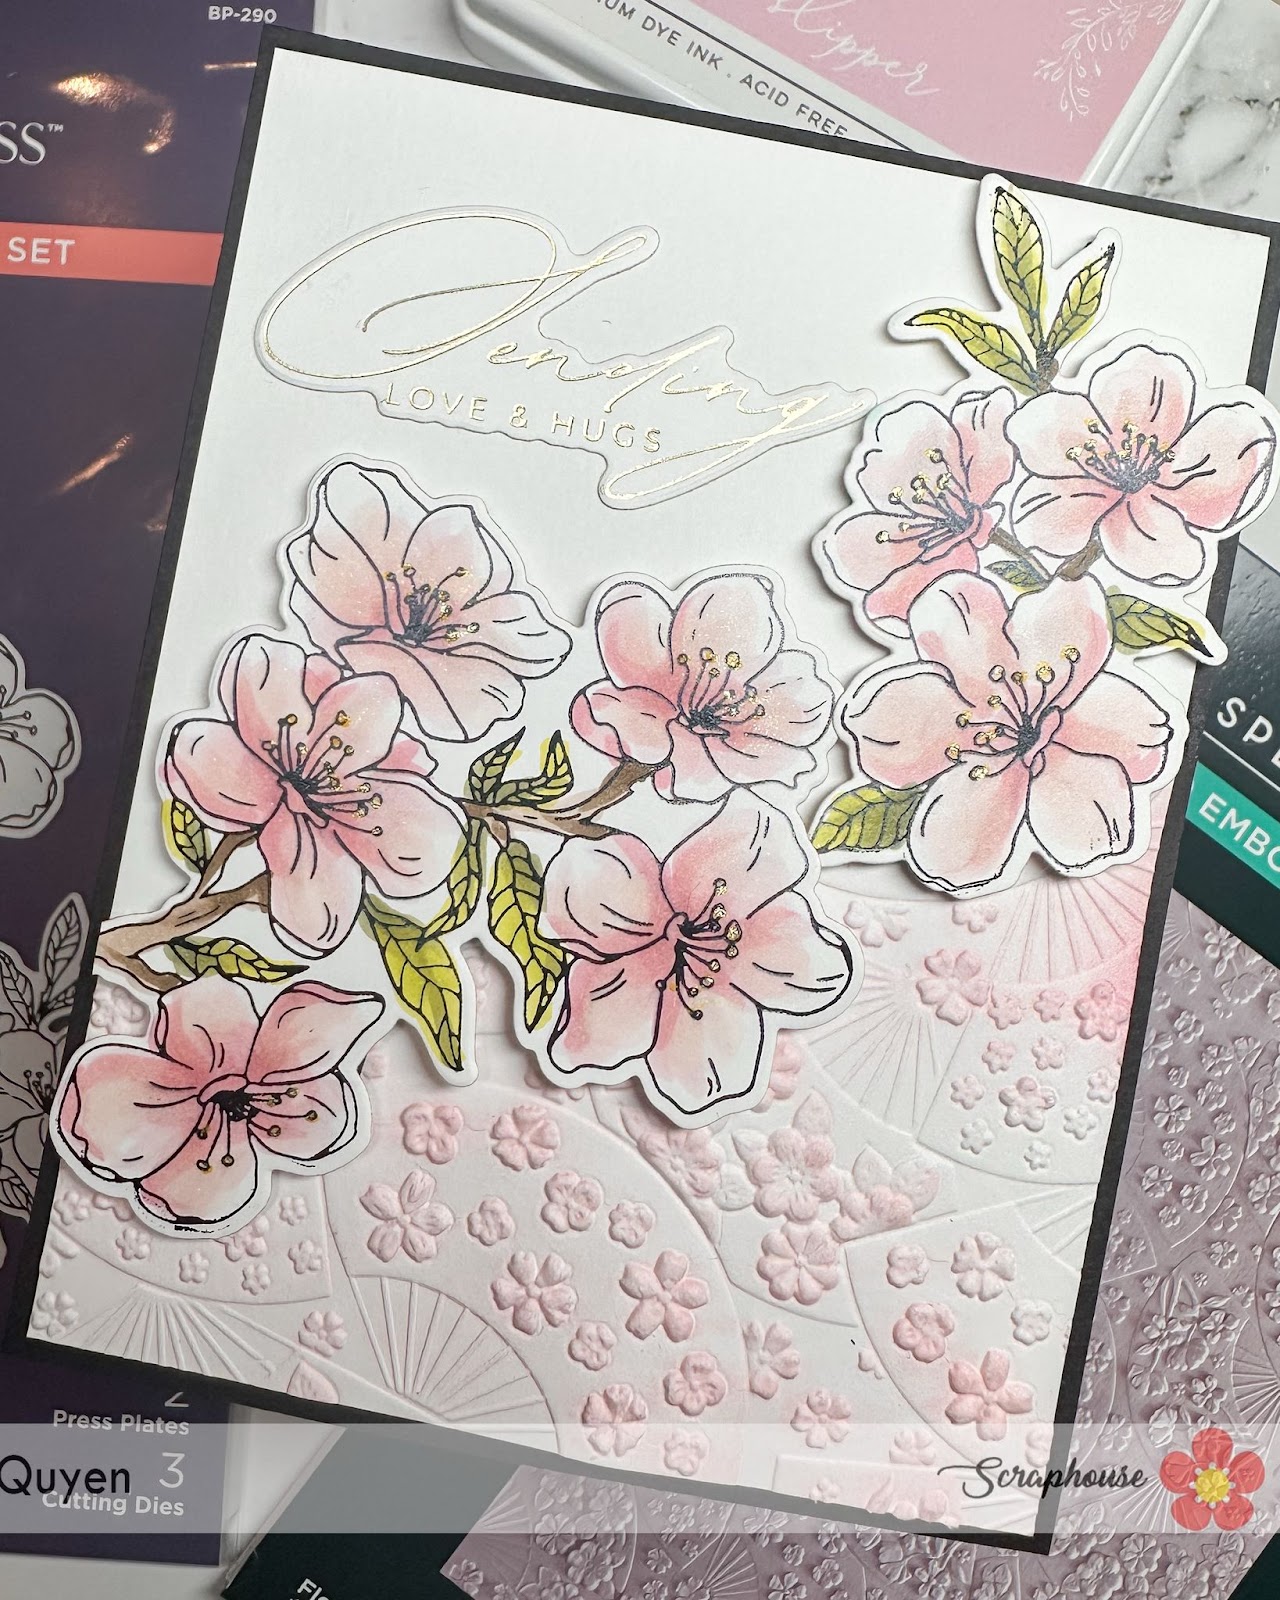
Sharing a card today with a little fun window. This really creates a surprise when you open it.

I started by creating an impression with the Spotlight Circle Pressplate on A2 card base. I also tried to do it directly on my card base, but because this is thicker it made a too deep impression, that comes out on the back of the card. After that I glued the cardstock inside of a card base. Then I used a circle die und positioned upside down over the circle and run it through my die cut machine. You can do this with any geometric die you have.

Then I added some colored cardstock which I had cut with the Scored and Pierced Rectangle and did the same again.

Then used the Blossoms & Sentiments to create some flowers, I added leaves from the Vivid Bloom Die Set and also created some centers for my flowers, do add more dimension. Then I glued everything around the circle. Here you have to make sure, that you only adds glue on the outside of the circle.

As sentiment I used the German Sentiments Press Plate.
Thanks for stopping by.
Adriana
Hallo zusammen!
Heute möchte ich eine Karte mit einem kleinen lustigen Fenster teilen. Das ist wirklich eine Überraschung, wenn man es öffnet.
Zuerst habe ich mit der Spotlight Circle Pressplate einen Abdruck auf dem A2-Kartenkarton gemacht. Ich habe auch versucht, den Abdruck direkt auf der Kartenunterlage zu machen, aber da diese dicker ist, hat sie einen zu tiefen Abdruck hinterlassen, der auf der Rückseite der Karte zu sehen ist. Danach habe ich das Papier in die Kartenbasis geklebt. Dann habe ich eine Kreisstanze verwendet und sie umgedreht über den Kreis gelegt und durch meine Stanzmaschine laufen lassen. Das kann man mit jeder geometrischen Stanze machen, die man hat. Dann fügte ich farbiges Papier hinzu, das ich mit der Stanze Scored & Pierced Rectangle ausgeschnitten hatte, und machte dasselbe noch einmal.
Dann habe ich mit der Stanze Blossom & Sentiments gestaltet, Blätter aus dem Set Vivid Blooms hinzugefügt und auch einige Zentren für meine Blumen erstellt, um ihnen mehr Dimension zu verleihen. Dann habe ich alles um den Kreis herum geklebt. Hier muss man darauf achten, dass man nur an der Außenseite des Kreises Kleber aufträgt.
Als Sentiment habe ich die German Sentiments Press Plate verwendet.
Danke fürs Vorbeischauen.
Adriana
Bonjour à tous !
Je partage aujourd'hui une carte avec une petite fenêtre amusante. Cela crée vraiment une surprise lorsque vous l'ouvrez.
J'ai commencé par créer une impression avec le
Spotlight Circle Pressplate sur une base de carte A2. J'ai aussi essayé de le faire directement sur le fond de carte, mais comme il est plus épais, l'impression est trop profonde et ressort au dos de la carte. J'ai ensuite collé le cardstock à l'intérieur d'un fond de carte. J'ai ensuite utilisé un emporte-pièce circulaire positionné à l'envers sur le cercle et je l'ai passé dans ma machine à découper. Vous pouvez faire cela avec n'importe quel outil géométrique que vous possédez. J'ai ensuite ajouté du cardstock coloré que j'avais découpé avec le Scored and Pierced Rectangle et j'ai refait la même chose.
J'ai ensuite utilisé le Blossoms & Sentiments pour créer des fleurs, j'ai ajouté des feuilles du Vivid Bloom Die Set et j'ai également créé des centres pour mes fleurs, afin d'ajouter plus de dimension. J'ai ensuite collé le tout autour du cercle. Il faut veiller à ne mettre de la colle qu'à l'extérieur du cercle.
Pour le sentiment, j'ai utilisé la plaque de presse German Sentiments.
Merci de votre visite.
Adriana