vendredi 18 avril 2025

Flower Wreath

für Deutsch scrollen / faire défiler pour le français


Hello Friends

I’m sharing a card today I created with the Vivid Blooms and the Gorgeous You Flowers. These two sets go nicely together. I started by die cutting lots of flowers and leaves from different colors of cardstock. But I tried to use the same colors for the flower centers, so the flowers match better. 


I decided to arrange the flowers over a metal wreath. You can use any wreath you have or create your own with circle dies. I try to overlap the leaves and the flowers, so it creates more of a realistic look. I added my favorite Merci sentiment and also added a little Butterfly from the Butterfly Swirl Press Plate Set. I really love to crated a wreath - you can add any sentiment or its also perfect for a adding names for a wedding card.


Happy Easter to you all and thanks for stopping by.

Adriana


Hallo Freunde

heute zeige ich Euch eine Karte, die ich mit den Vivid Blooms und den Gorgeous You Flowers gestaltet habe. Diese beiden Sets passen sehr gut zusammen. Zunächst habe ich viele Blumen und Blätter aus verschiedenfarbigem Cardstock ausgestanzt. Aber ich habe versucht, die gleichen Farben für die Blumenmitte zu verwenden, damit die Blumen besser zusammenpassen. 

Ich habe beschlossen, die Blumen auf einem Metallkranz zu arrangieren. Du kannst jeden Kranz verwenden, den du hast, oder einen eigenen Kranz mit einer Kreisform herstellen. Ich versuche, die Blätter und die Blumen zu überlappen, damit es realistischer aussieht. Ich habe meinen Lieblingsspruch „Merci“ und einen kleinen Schmetterling aus dem Set „Butterfly Swirl Press Plate“ hinzugefügt. Ich liebe es, einen Kranz zu gestalten - man kann jeden beliebigen Spruch hinzufügen oder auch Namen für eine Hochzeitskarte einfügen.


Frohe Ostern euch allen und danke fürs Vorbeischauen.

Adriana


Bonjour les amis

Je partage aujourd'hui une carte que j'ai créée avec les Vivid Blooms et les Gorgeous You Flowers. Ces deux sets vont très bien ensemble. J'ai commencé par découper à l'emporte-pièce de nombreuses fleurs et feuilles dans différentes couleurs de cardstock. Mais j'ai essayé d'utiliser les mêmes couleurs pour les centres des fleurs, afin que les fleurs s'harmonisent mieux. 

J'ai décidé de disposer les fleurs sur une couronne métallique. Vous pouvez utiliser n'importe quelle couronne que vous avez ou créer la vôtre à l'aide d'outils à découper les cercles. J'essaie de faire se chevaucher les feuilles et les fleurs, afin de créer un effet plus réaliste. J'ai ajouté mon sentiment préféré Merci ainsi qu'un petit papillon du Butterfly Swirl Press Plate Set. J'aime beaucoup créer une couronne - vous pouvez y ajouter n'importe quel sentiment ou elle est également parfaite pour ajouter des noms sur une carte de mariage.


Joyeuses Pâques à tous et merci de votre visite.

Adriana

samedi 12 avril 2025

Quick Cards using Betterpress Florals Through the Year Bundle


Buongiorno care creative, 

sono qui oggi per mostrarvi queste 3 card usando le press plate Florals Through the Year Bundle. Trovo che questi fiori siano proprio carini e delicati e si posson creare card semplici e veloci, e non solo per il creare le pagine del calendario annuale.


Good morning crafty friends, 

I am here today to show you these 3 cards using the Florals Through the Year Bundle press plates. I find that these flowers are just so pretty and delicate and you can make quick and easy cards, and not just for creating the annual calendar pages.


Questa prima card ho usato un washi tape finissimo per contortare i bordi che volevo restassero bianchi ed in un secondo momento ho colorato lo sfondo con i distress inks : Spun sugar, Shaded lilac e Cracked pistachio. Poi con un pennello d'acquarello ho spruzzato delle macchie d'acqua per dare allo sfondo un po' di interesse. Con un fineliner nero ho contornato il fiore e il rettangolo bianco ed ho completato con un sentiment in italiano della Press plate Italian sentiments.

This first card I used a very fine washi tape to contort the edges that I wanted to remain white and in a second step I colored the background with distress inks : Spun sugar, Shaded lilac and Cracked pistachio. Then with a watercolor brush I sprayed water spots to give the background some interest. With a black fineliner I outlined the flower and the white rectangle and completed with a Press plate Italian sentiment.


Questa seconda card ho creato uno sfondo arcobaleno acquarellato con i Karin markers e aggiunto dei puntini dorati sui fiori con un fineliner dorato.

This second card I created a watercolor rainbow background with Karin markers and added gold dots on the flowers with a gold fineliner.


Infine la mia terza card ho aquarellato dei cerchi viola e rosa e sprayato con il Distress Spritz Worn Lipstick .
Cosa ne pensate? Spero vi piacciano! Vi auguro uno splendido weekend,


Finally my third card I aquarelled purple and pink circles and sprayed with Distress Spritz Worn Lipstick .
What do you think of them? I hope you enjoy them! Have a wonderful weekend,


Quyen


mercredi 9 avril 2025

Party Balloons

für Deutsch scrollen / faire défiler pour le français


 Hello everyone!

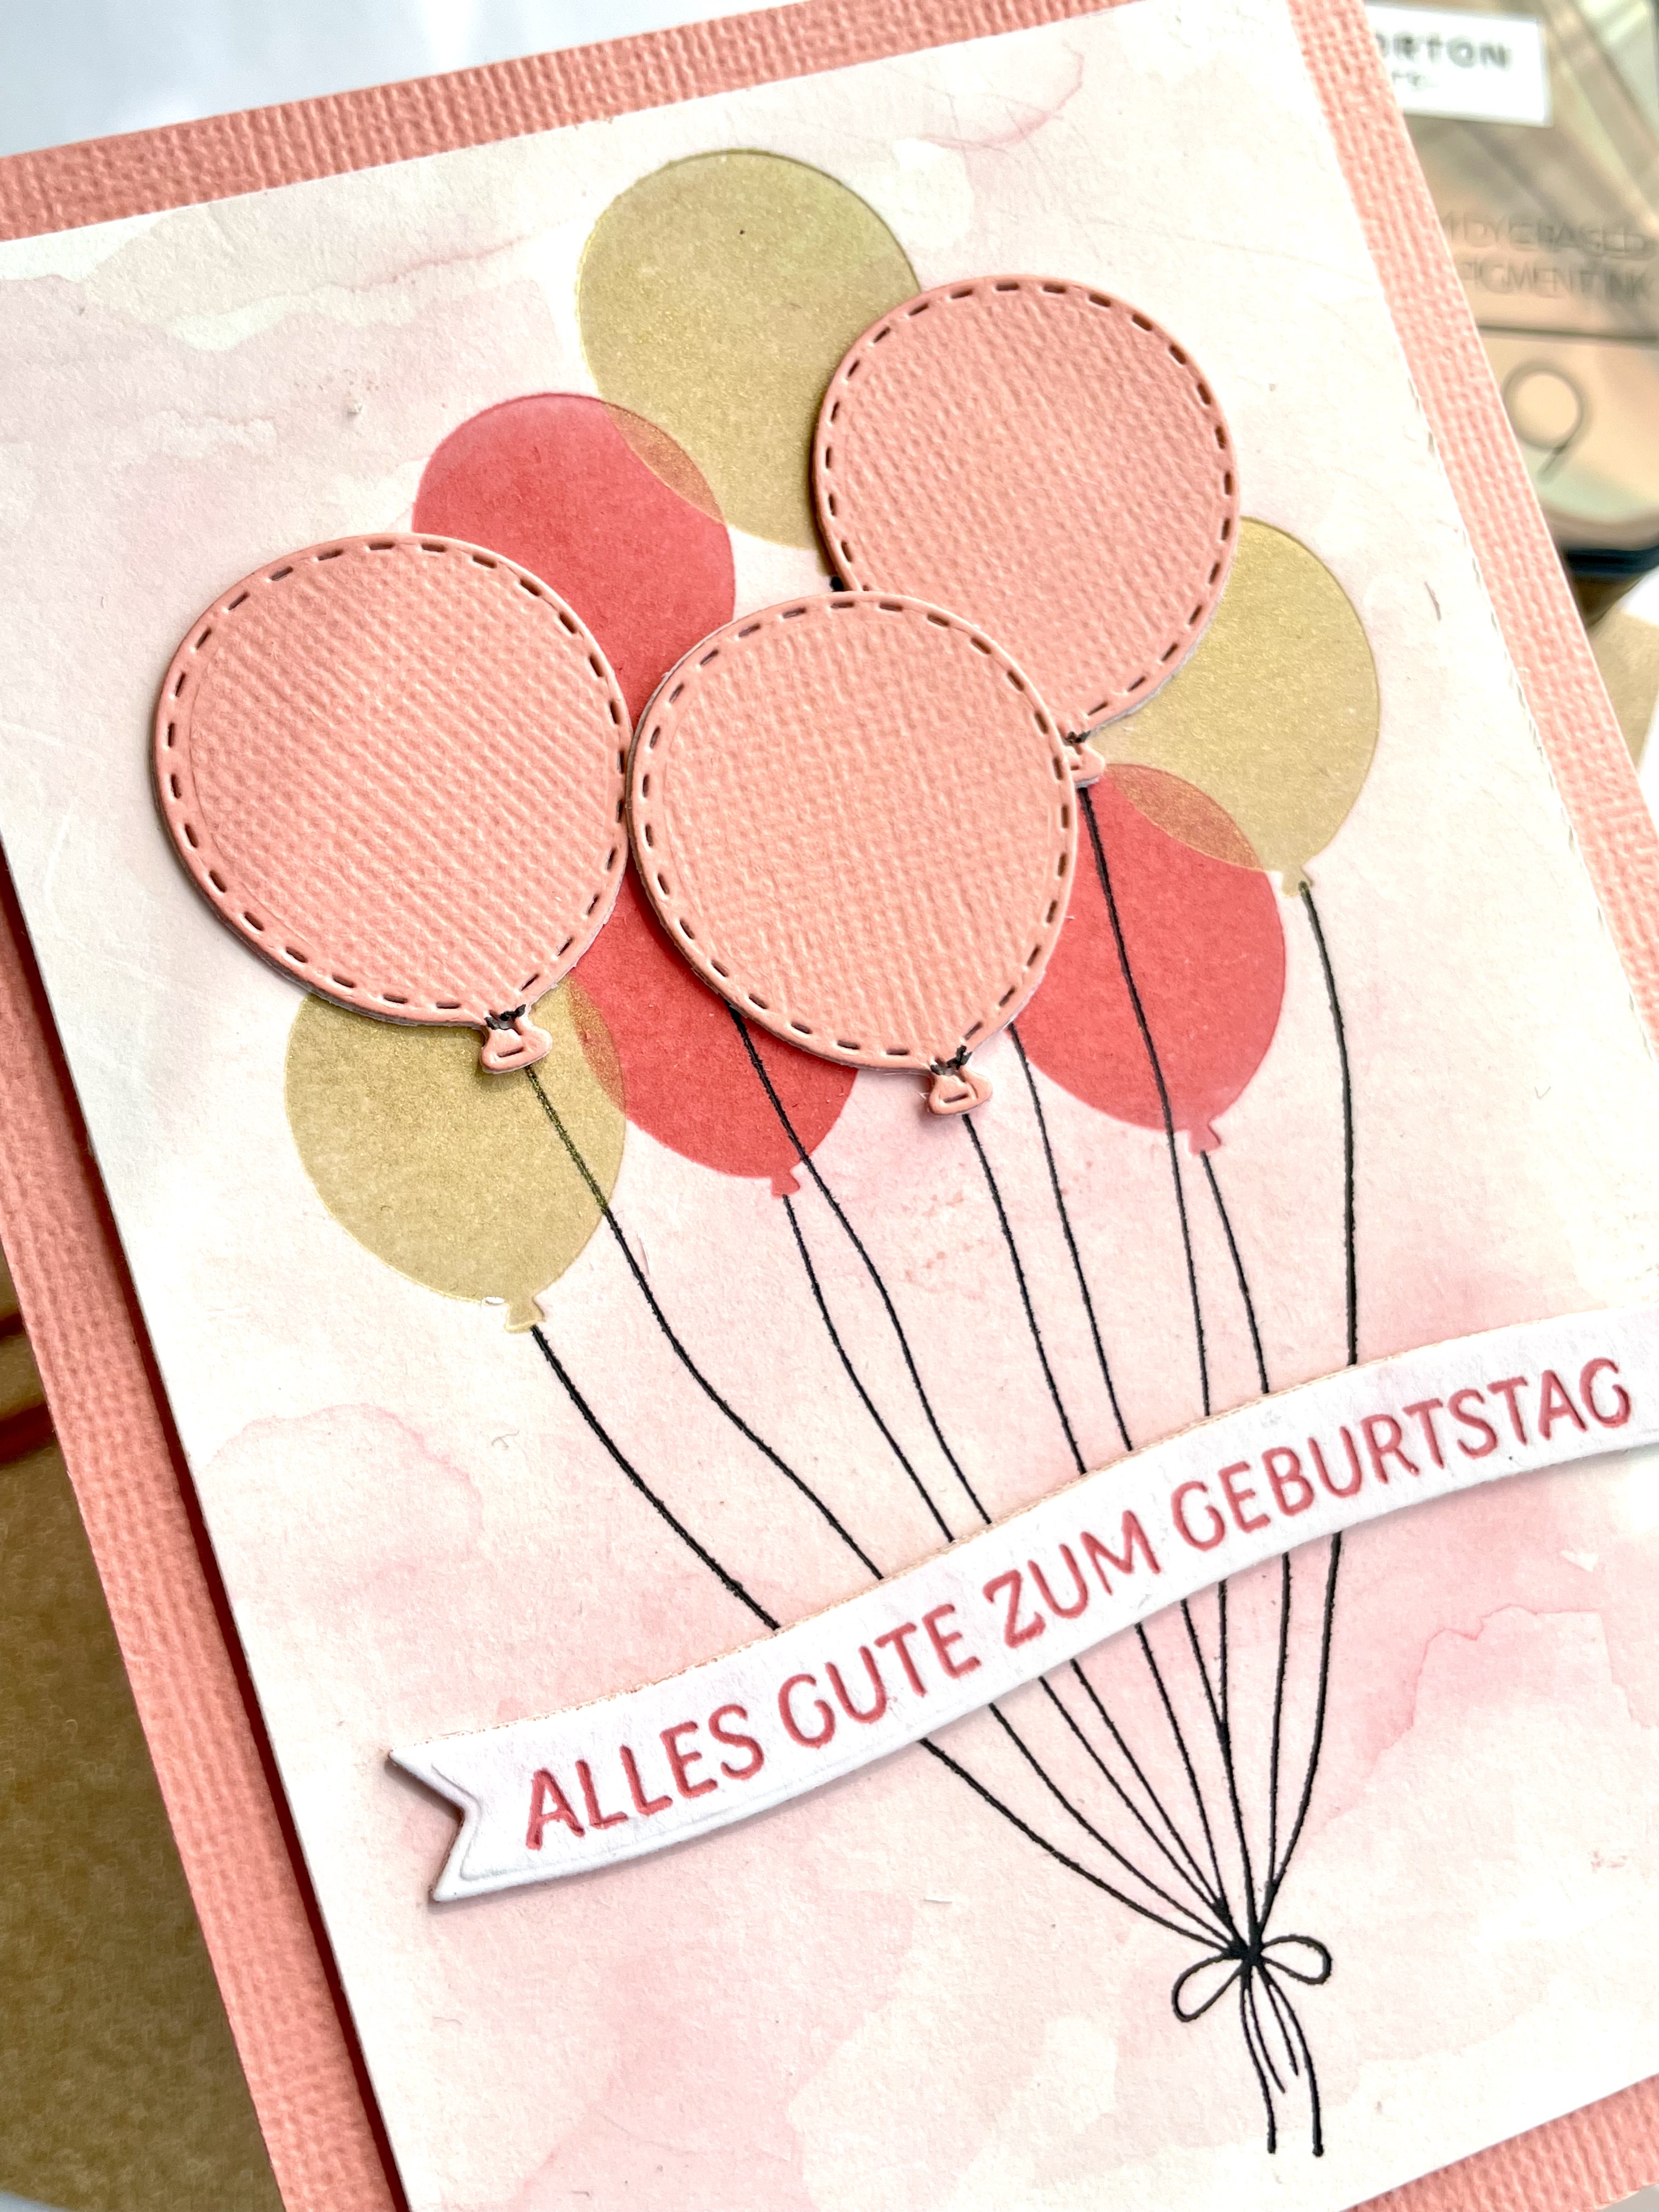
Today I’m sharing a Birthday card I created with the Party Balloon Press Plate. 

I started to do a light watercolor wash the ink I’m going to use to stamp. So, my background will not be just white and the color will match my balloons. 

Then I used the guide that comes with the die set and start to do the strings with the press plate. The strings are quite sharp – so you need to take quite thick paper and maybe take the shims out of your Betterpress, so it won’t cut your paper.


Then I created the balloons with different inks. I also used the Lisa Horton Metallic inks that created a nice shine.

But somehow, I didn’t like how the card turned out. But then thanks a crafty friend I decided do add some dimension with an older balloon die set I had. That really makes a different. I added my sentiment from the German Sentiments die Set. I also added some dimension behind my background. This again steps the card up.


Have wonderful day!

Adriana


Hallo zusammen!


Heute zeige ich euch eine Geburtstagskarte, die ich mit der Party Balloon Press Plate gestaltet habe. 

Ich habe damit begonnen, die Tinte, die ich zum Stempeln verwenden werde, mit einem leichten Aquarell zu waschen. Damit mein Hintergrund nicht nur weiß ist und die Farbe zu meinen Ballons passt. 

Dann habe ich die Anleitung benutzt, die dem Stempelset beiliegt, und mit der Pressplatte begonnen, die Schnüre zu stempeln. Die Schnüre sind ziemlich scharf - man muss also ziemlich dickes Papier nehmen und vielleicht die Unterlegscheiben aus der Betterpress herausnehmen, damit sie das Papier nicht durchschneiden.

Dann habe ich die Ballons mit verschiedenen Farben gestaltet. Ich habe auch die Lisa Horton Metallic-Tinten verwendet, die einen schönen Glanz erzeugen.

Aber irgendwie hat mir die Karte nicht gefallen. Aber dann habe ich dank einer Freundin beschlossen, mit einem älteren Ballonstempelset, das ich noch hatte, etwas Dimension hinzuzufügen. Das macht wirklich einen Unterschied. Ich habe meinen Spruch aus dem Stanzenset German Sentiments hinzugefügt. Ich habe auch etwas Dimension hinter meinem Hintergrund hinzugefügt. Das wertet die Karte noch einmal auf,


Schönen Tag euch allen!

Adriana


Bonjour à tous !


Aujourd'hui, je partage une carte d'anniversaire que j'ai créée avec la plaque de presse Party Balloon. 

J'ai commencé à faire un léger lavis d'aquarelle sur l'encre que je vais utiliser pour tamponner. Ainsi, mon fond ne sera pas seulement blanc et la couleur sera assortie à mes ballons. 

Ensuite, j'ai utilisé le guide fourni avec le die set et j'ai commencé à faire les ficelles avec la plaque de presse. Les ficelles sont assez pointues - il faut donc prendre du papier assez épais et peut-être enlever les cales de votre Betterpress, pour qu'il ne coupe pas votre papier.

J'ai ensuite créé les ballons avec différentes encres. J'ai également utilisé les

encres métallisées de Lisa Horton qui ont créé une belle brillance.

Mais d'une certaine manière, je n'aimais pas le résultat de la carte. Puis, grâce à une amie bricoleuse, j'ai décidé d'ajouter un peu de dimension avec un ancien jeu de matrices pour ballons que j'avais. Cela fait vraiment la différence. J'ai ajouté mon sentiment à partir du set d'emporte-pièce Sentiments allemands. J'ai également ajouté une dimension derrière mon arrière-plan. Cela améliore encore la carte,


Passez une merveilleuse journée !

Adriana


jeudi 3 avril 2025

Flower cart etched dies


Buongiorno creative,

spero che stiate bene! Oggi voglio parlarvi delle difficoltà che ho avuto a creare queste 3 card. Appena ho visto questa fustella di Spellbinders Flower cart etched dies son rimasta ammaliata e non vedevo l'ora di poterla usare. Una volta visto il numero delle fustelle son andata un po' in confusione senza sapere che colori abbinare insieme. Così ho cercato su google una foto di riferimento per aiutarmi al progetto. Ecco qui la foto che alla quale mi son ispirata. Una volta ritagliato i pezzi ed assemblato il carretto, mi son accorta che facevo fatica a bilanciare gli elementi neri e bianchi e che per avere un bel risultato bisogna davvero fare attenzione che nessuno dei due colori predomini sul progetto.


Good morning creative,

I hope you are doing well! Today I want to tell you about the difficulties I had in creating these 3 cards. As soon as I saw this Spellbinders Flower cart die etched dies I was hooked and couldn't wait to be able to use it. Once I saw the number of dies I got a little confused not knowing what colors to match together. So I googled for a reference photo to help me with the project. Here is the photo I was inspired by. Once I cut out the pieces and assembled the cart, I realized that I was having a hard time balancing the black and white elements and that to get a nice result you really have to be careful that neither color predominates on the project.


Ecco qui la mia prima versione e dove ho realizzato che non era così semplice equilibrare il nero e bianco. Per lo sfondo ho usato la Press plate Floral celebration senza inchiostro e ritagliato con la fustella Notched corner frames etched dies.

Here is my first version and where I realized it was not so easy to balance the black and white. For the background I used Press plate Floral celebration without ink and cut out with Notched corner frames etched dies.


La seconda versione e la terza ero più cosciente e sono riuscita a trovare la soluzione molto poi in fretta.

The second version and the third version I was more conscious and was able to find the solution very then quickly.


Spero vi piacciano i risultati che ho ottenuto, grazie per esser passate qui, 

buona giornata


I hope you like the results I got, thank you for stopping by, 

have a nice day

Quyen