Affichage des articles dont le libellé est gold. Afficher tous les articles

mardi 9 juillet 2024

Flaunt Your Feathers!


Buongiorno care creative! 
come state? spero tutto bene!
ormai mi conoscete e sapete che ho questo debole per gli embossing folder, in special modo quelli di Spellbinders!
Cominciamo dal principio... ho preso un cartoncino verde petrolio dal paper pad Lemonade di StudioLight.

Good morning dear creatives! 
how are you? hope all is well!
you know me by now and you know that I have a soft spot for embossing folders, especially the ones from Spellbinders!
Let's start at the beginning...I got a petrol green cardstock from StudioLight's Lemonade paper pad.


 Poi ho spruzzato dell'acqua con il mio nuovo fantastico Mighty mister spray di Spellbinders sul cartoncino in modo che una volta messo nell'embossing folder Feather Flourish e  passato attraverso la die cut machine, la carta non si spezzi.

 Then I sprayed some water with my new Mighty mister spray from Spellbinders on the cardstock so that once I put it in the Feather Flourish embossing folder and ran it through the die cut machine, the paper would not break.


Dopo che ho ottenuto la mia embossatura, ho sprayato del Distress Mica stain per dare l'effetto un po' perlato alla carta

After I got my embossing, I sprayed some Distress Mica stain to give the paper a slightly pearly effect


Per dare un effetto di rilievo ho usato l'inchiostro di Altenew Enchanted gold pigment ink ed ho fatto degli schizzi con Pale gold japanese watercolor.

To give a raised effect, I used Altenew Enchanted gold pigment ink and made sketches with Pale gold japanese watercolor.
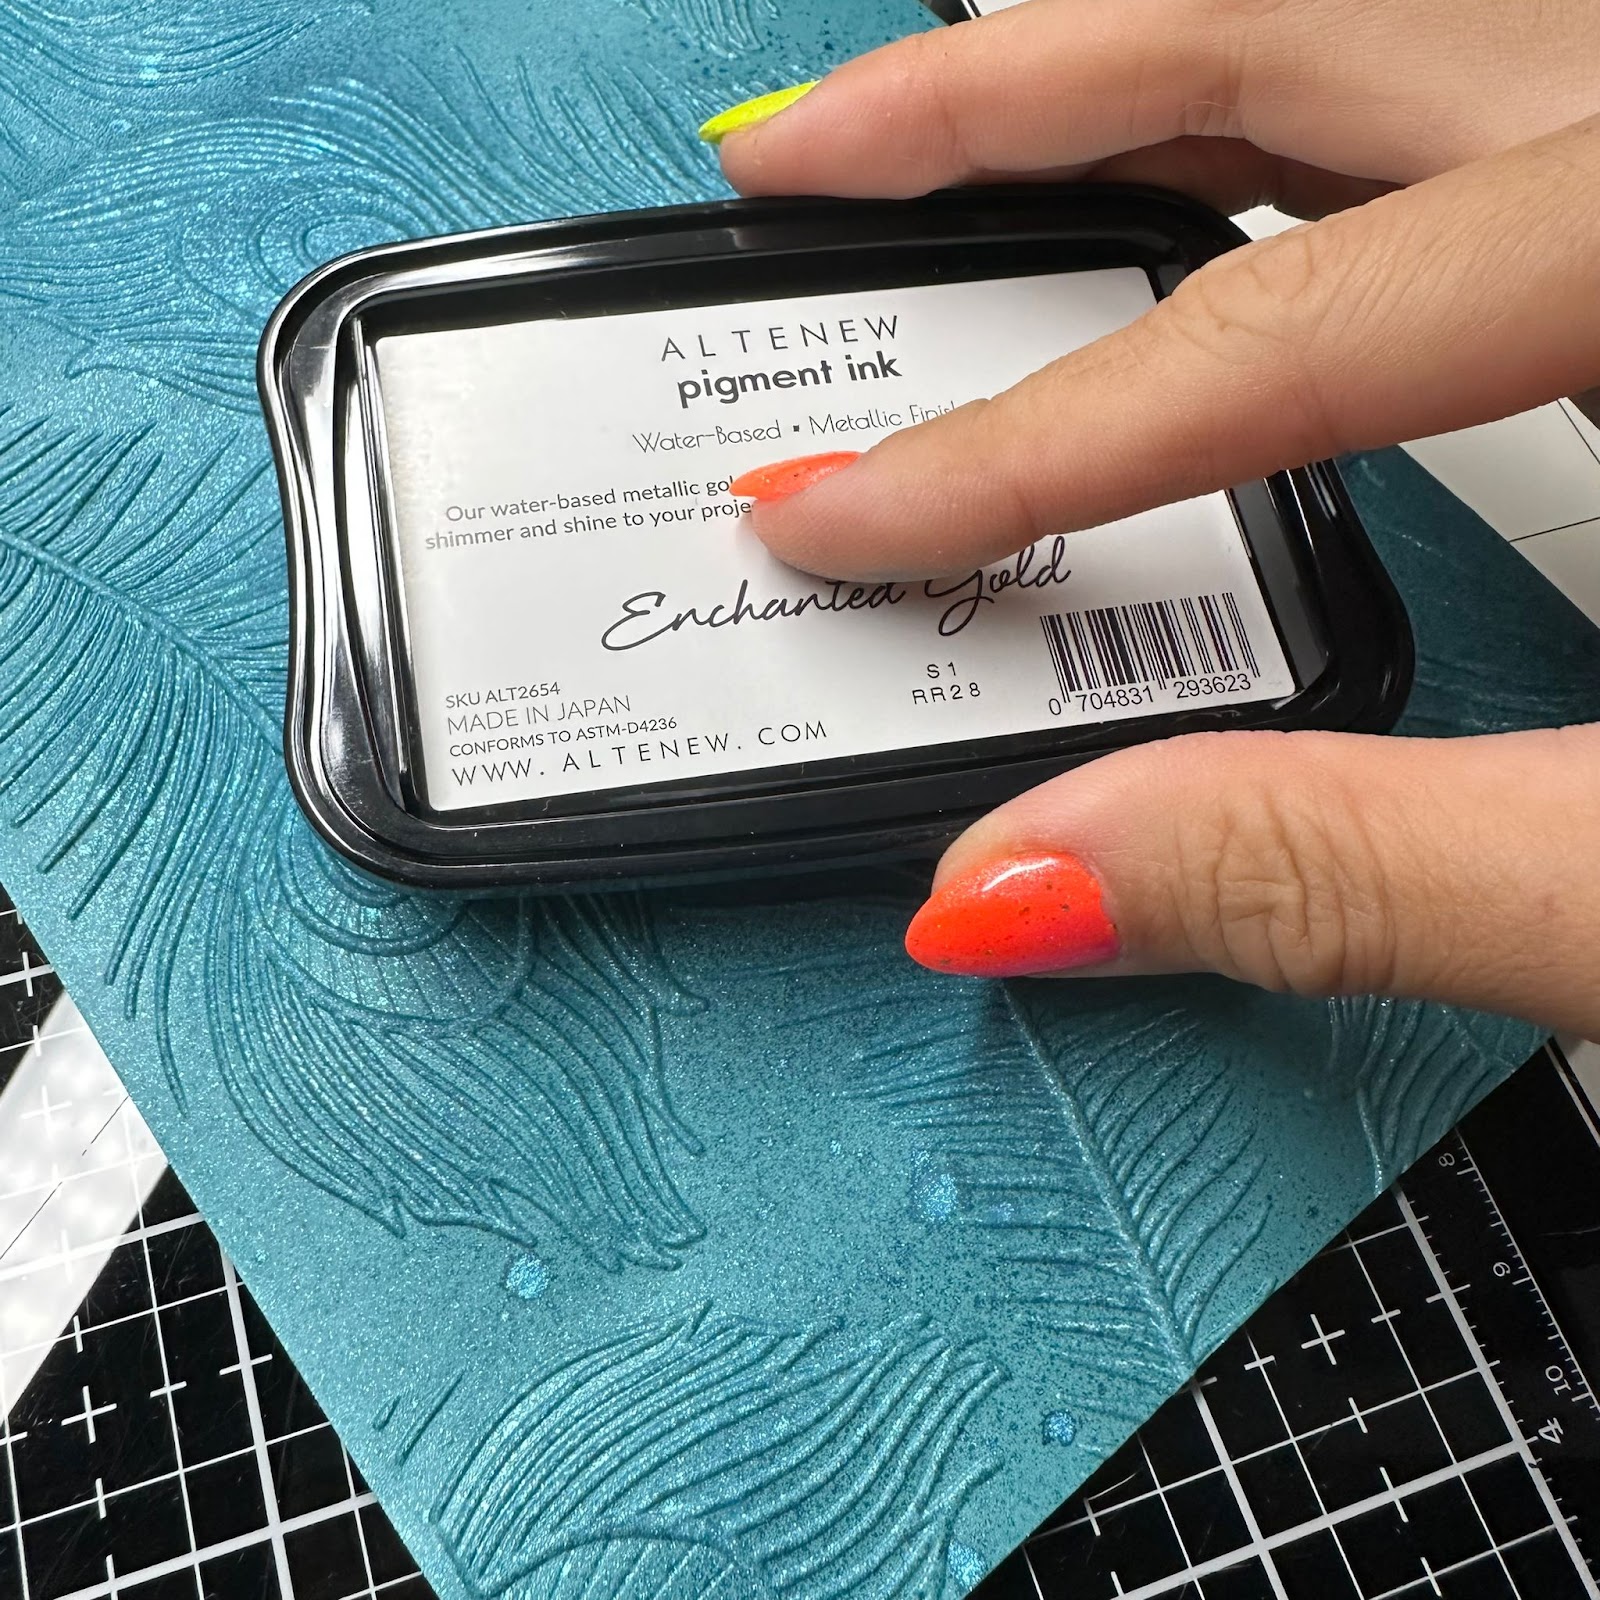
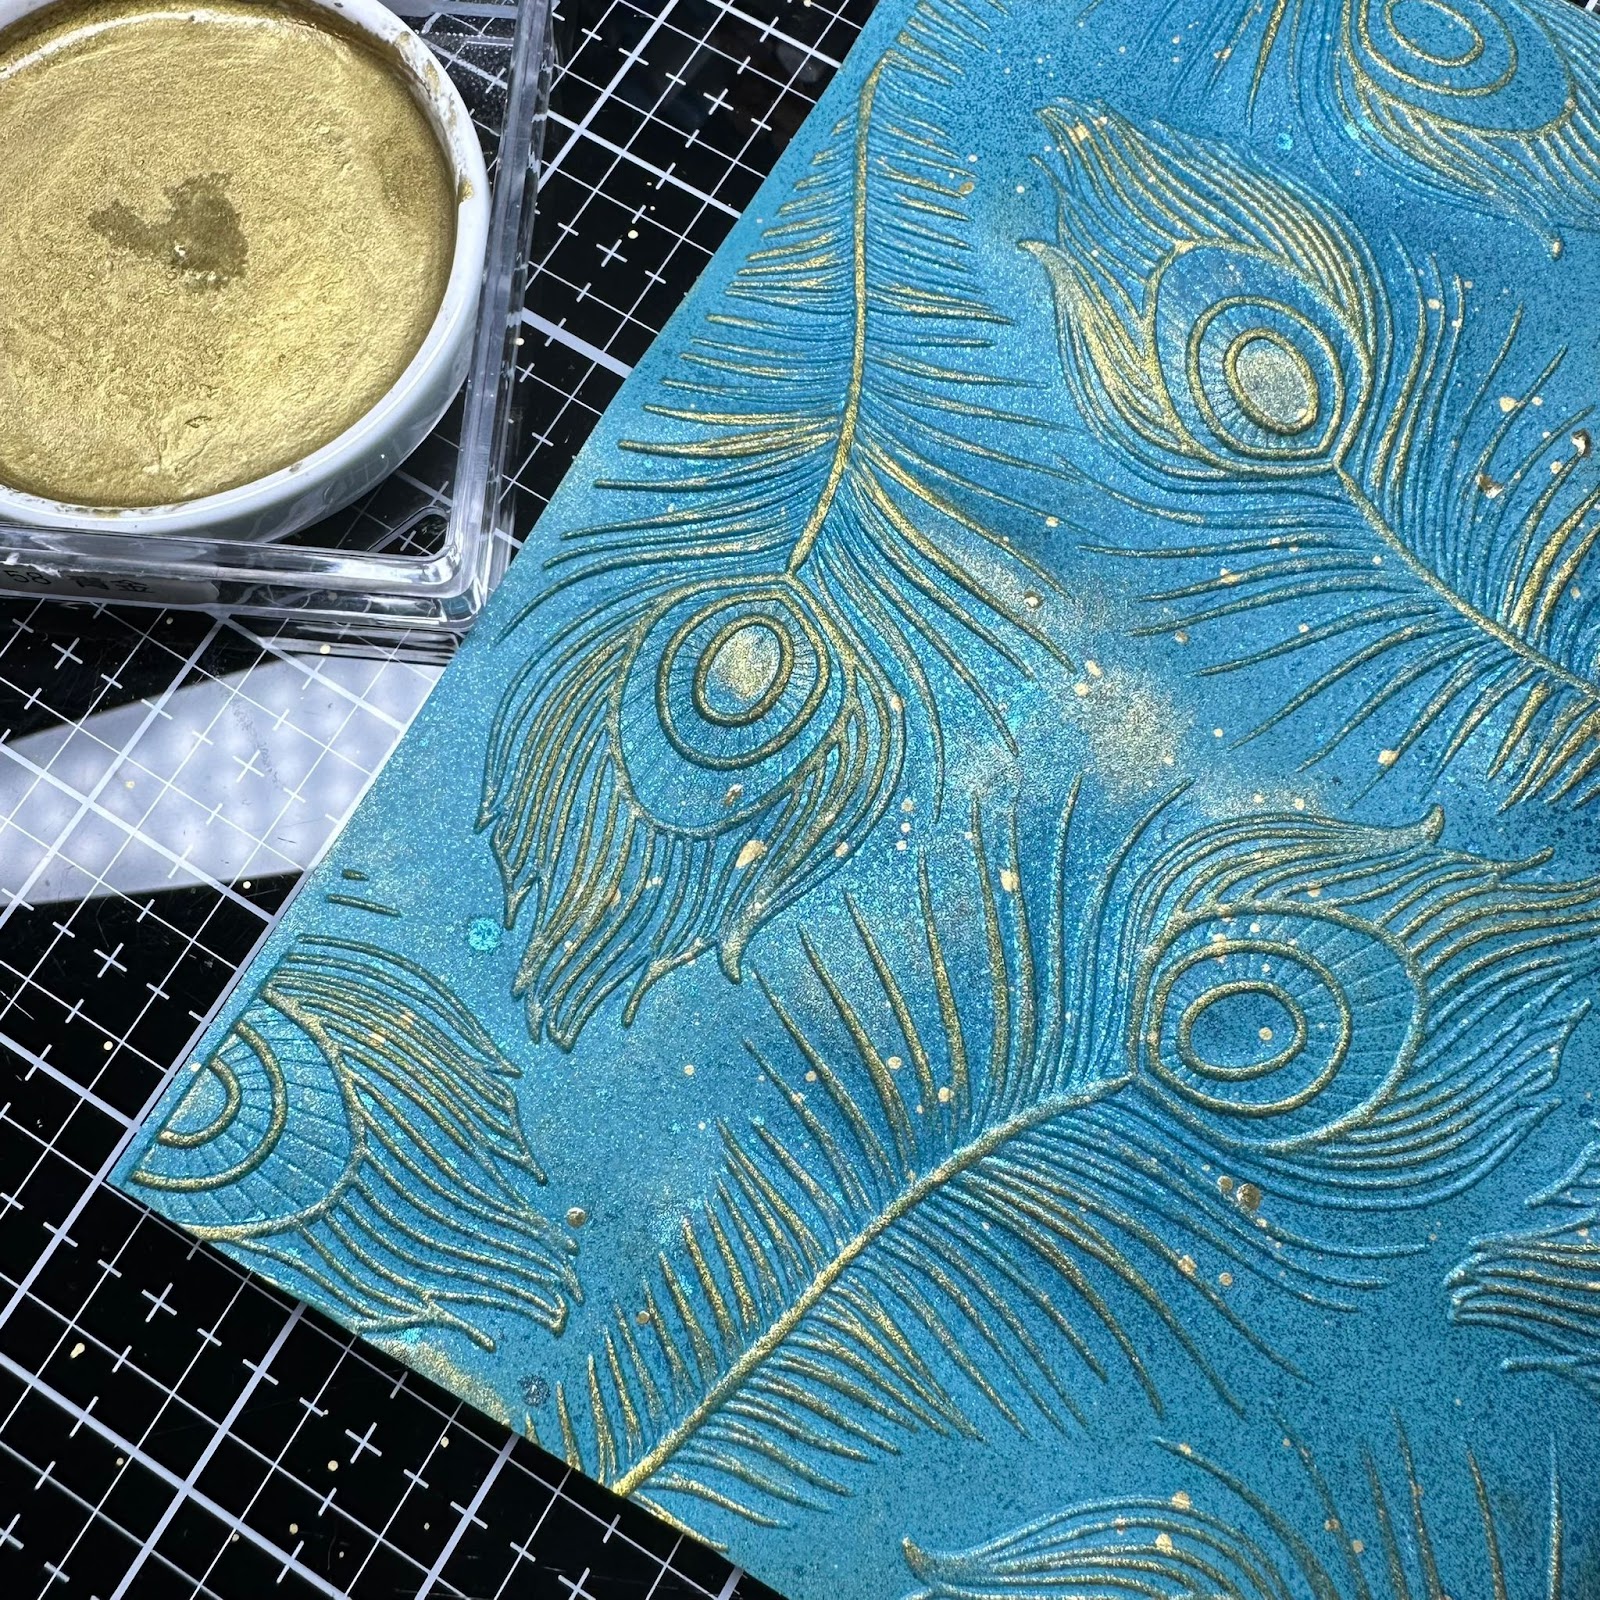
Poi ho pensato di voler creare la  card con una forma diversa dalle classiche e quindi ho usato la fustella Essential Arches per ritagliare la card. Una volta ritagliato il cartoncino, l'effetto 3d era svanito, per cui l'ho ripassato ancora nell'embossing folder. Per dare alla card un ho ritagliato con la fustella arches della misura più grande un cartoncino dorato dal Gold assortment treasured cardstock.
Per dare un ulteriore tocco di glitter ho solorato l'interno delle piume con la Lunar paste Midnight snack e lo stickles d'oro.
Infine ho usato il sentiment dal set Betterpress elegant peacock press plate die set per completare la mia card.

Then I thought I wanted to create the card with a different shape than the classic ones, so I used the Essential Arches dies to cut out the card. Once the card was cut out, the 3d effect had faded, so I ran it through the embossing folder again. To give the card a I cut out with the largest size arches die cutter a gold cardstock from the Gold assortment treasured cardstock.
To give it an extra touch of glitter, I gilded the inside of the feathers with Lunar paste Midnight snack and gold Stickles.
Finally I used the sentiment from the Betterpress elegant peacock press plate die set to complete my card.


Spero vi piaccia e vi auguro una fantastica giornata !

I hope you enjoy it and have a great day !

Quyen


mercredi 2 août 2023

3D Embossing folder

 Salve carissime,

oggi vi mostro una card semplice semplice ma di grande effetto!
materiale necessario:
- embossing folder 3d ( io ho usato Beautiful butterflies 3d embossing folder di Spellbinders)
-carta acquarello ( ho usato quella della Florence)
- distress ink reinkers ( ho usato scattered straw, picked raspberry, mermaid lagoon)
- embossing powders + ink for embossing powders ( ho usato wow Metallic gold sparkle)
- gold ink pad ( ho usato versa color gold)
- pennarello nero

Hello darlings,

today I show you a simple simple but impressive card!
materials needed:
- 3d embossing folder ( I used Beautiful butterflies 3d embossing folder from Spellbinders)
-watercolor paper ( i used the one from Florence)
- distress ink reinkers ( I used scattered straw, picked raspberry, mermaid lagoon)
- embossing powders + ink for embossing powders ( I used wow Metallic gold sparkle)
- gold ink pads ( I used versa color gold)
- black pen


Ho cominciato colorando la carta con i miei 3 inchiostri, mettendo il colore a casaccio e sfumandoli tra di loro. Una volta che lo sfondo era asciutto, l'ho embossato con la placca della Spellbinders. 
Ho passato sulla parte in rilievo il tampone dorato, aspettato che l'inchiostro fosse asciutto e poi ho passato il tampone versamark per le polveri da embossing e poi buttato la polvere della WOW. Ho rimosso con un pennellino d'acquarello pulito ogni eccesso di povere nei punti dove non volevo che ci fosse. 
Per creare lo sfondo nero invece ho colorato con un semplice pennarellino nero tutte le parti che non erano in rilievo.
Spero che vi piaccia, buona serata

I started by coloring the paper with my 3 inks, putting color randomly and blending them together. Once the background was dry, I embossed it with the Spellbinders plate. 
I swabbed the embossed part with the gold pad, waited until the ink was dry, and then swabbed the versamark pad for the embossing powders and then tossed in the WOW powder. I removed with a clean watercolor brush any excess powder in places where I didn't want it to be. 
To create the black background instead, I colored with a simple black marker all the parts that were not embossed.
I hope you like it, have a good evening

Quyen


dimanche 16 juillet 2023

Happy Birthday Card

 Buongiorno carissime creative! 

spero di trovarvi bene! Oggi vi presento un'altra card usando ancora la Betterpress, aggiungendo però anche la colorazione con i marker ad alcool. Ho usato la plate Butterfly Garden Press Plate & Die Set from the BetterPress Collection con il loro inchiostro nero. Di questo set ho adoperato solamente la plate che fa da cornice senza usare il sentiment ed una volta ottenuta la stampa, ho usato uno spray dorato per dargli un po' di colore. Dato che c'era uno spazio vuoto al centro della stampa ho deciso di coprirlo con una fustellata dal set Essential Hexi-Gems Etched Dies from the Hexi-Gems Collection di Spellbinders. Il mio obiettivo finale era che la protagonista della card fosse questa bimbetta , per cui ho cercato di usare colori neutri per lo sfondo in modo di poter risaltar a pieno la colorazione.

Good morning dear creatives! 

I hope to find you well! Today I am presenting another card using Betterpress again, but also adding coloring with alcohol markers. I used the Butterfly Garden Press Plate & Die Set from the BetterPress Collection with their black ink. Of this set, I only used the plate that serves as the frame without using the sentiment and once I got the press, I used a gold spray to give it some color. Since there was a blank space in the center of the print, I decided to cover it with a die cut from the Essential Hexi-Gems Etched Dies set from the Hexi-Gems Collection by Spellbinders. My ultimate goal was for this little girl to be the star of the card , so I tried to use neutral colors for the background so that I could fully bring out the coloring.
I immediately loved this Gorjuss Every summer has a story stamp with the watermelon dress. I stamped it on a special card for coloring with alcohol markers. For coloring this time I used Spectrum noir Illustrators, because being a bit drier than Copic I had less difficulty coloring small subjects.


Ho subito adorato questo timbro di Gorjuss Every summer has a story con il vestito d'anguria. L'ho timbrato su un cartoncino apposito per la colorazione con marker alcolici. Per la colorazione questa volta ho usato gli Illustrator della Spectrum noir, perché essendo un po' più secchi rispetto ai Copic ho avuto meno difficoltà a colorare soggetti piccoli.

I immediately loved this Gorjuss Every summer has a story stamp with the watermelon dress. I stamped it on a special card for coloring with alcohol markers. For coloring this time I used Spectrum noir Illustrators, because being a bit drier than Copic I had less difficulty coloring small subjects.


In seguito ho aggiunto il sentiment "Happy birthday to you" dal set A Little Message Sentiments Press Plate & Die Set from the BetterPress Collection ed abbellito con  delle farfalle del set Butterfly Swirl Press Plate & Die Set from the BetterPress Collection con un tampone d'inchiostro Gold di Versacolor. Spero vi piaccia questo mix, buona domenica di sole

ext I added the sentiment "Happy birthday to you" from the A Little Message Sentiments Press Plate & Die Set from the BetterPress Collection and embellished with butterflies from the Butterfly Swirl Press Plate & Die Set from the BetterPress Collection with a Gold ink pad from Versacolor. Hope you enjoy this mix, have a sunny Sunday

Quyen


mercredi 12 avril 2023

Sending Health and Happiness

 Buona sera carissime creative!

spero che stiate bene! Scusate per questo post serale , solitamente pubblico la mattina, ma purtroppo stiamo avendo dei problemi con la rete internet a casa e stasera gentilmente la mia famiglia mi ha ospitata per attingere al loro wifi :D 
Ormai cosa ve lo dico a fare che amo i prodotti di Spellbinders? sono molto grata a Marjolein di aver le novità in negozio!
Oggi ho voluto usare un embossing folder Tufted 3 D, la fustella Four Petal Floral edged e la hot foil plate Making me smile.


Good evening dear creative darlings!

I hope you are all well! Sorry for this evening post , I usually post in the morning, but unfortunately we are having some problems with the internet at home and tonight kindly my family hosted me to tap into their wifi :D 
By now, what can I tell you that I love Spellbinders products? I am very grateful to Marjolein for having the new items in the store!
Today I wanted to use a Tufted 3D embossing folder, the Four Petal Floral edged die and the Making me smile hot foil plate.


Son partita con la placca da embossing ed ho embossato un cartoncino nero. Per far risaltare di più la texture, ho usato una pasta dorata della Nuvo che ho poi spalmano con il mio indice. Sapevo che avrei voluto aggiungere dei dettagli color oro, quindi mi sembrava una buon abbinamento e devo ammettere che il risultato mi piace parecchio.
Ho fustellato i fiori con i bellissimi vellum di Tonic Studio Craft perfect pearled gold e pearled silver vellum,  li ho un sovrapposti per aver un gioco di colori, mentre il gambo ed il centro dei fiori di ho fustellati con un cartoncino oro matte.

I started with the embossing plate and embossed a black cardstock. To make the texture stand out more, I used a gold paste from Nuvo that I then smeared with my index finger. I knew I wanted to add some gold details, so it seemed like a good match and I have to admit I like the result quite a bit.
I die-cut the flowers with beautiful Tonic Studio Craft perfect pearled gold and pearled silver vellum, I overlapped them to have a play of colors, while the stem and the center of the flowers I die-cut with a matte gold cardstock.

Per completare la card ho aggiungo un sentiment ottenuto con l'hot foil ed aggiunto un fiocchetto al gambo della composizione floreale. Spero vi piaccia e vi auguro una buonanotte!

un abbraccio Quyen

To complete the card I added a sentiment obtained with hot foil and added a bow to the stem of the flower arrangement. I hope you like it and wish you a good night!

a hug Quyen