Affichage des articles dont le libellé est 3dembossingfolder. Afficher tous les articles

samedi 29 août 2026

Season of sparkle


Ciao creative, come state? spero tutto bene! Dopo questa lunga estate, son felice di partire finalmente per le vacanze!! Ma prima di partire voglio mostrarvi un'altra card natalizia! Son tanto carini questi nuovi timbri di AALL&Create! Qui ho colorato con i Copic markers il timbro Season of sparkle.
Per lo sfondo invece ho usato il 3D embossing folder di Spellbinders Holiday Lights. Ho voluto dare un po' di luce e con il tampone di Lisa Horton Solid Gold, ho colorato le parti in rilievo.

Hi, crafters! How are you? I hope everything’s going well! After this long summer, I’m so happy to finally be heading off on vacation!! But before I go, I want to show you another Christmas card! These new stamps from AALL&Create are so cute! Here, I colored the “Season of Sparkle” stamp with Copic markers.
For the background, I used the Spellbinders “Holiday Lights” 3D embossing folder. I wanted to add a little sparkle, so I used Lisa Horton’s “Solid Gold” ink pad to color the embossed areas.


Con un sentiment foilizzato la mia card natalizia é pronta! Ti piace?
Buon weekend 

With a foil-embossed sentiment, my Christmas card is ready! Do you like it?
Have a great weekend
Quyen


mercredi 5 août 2026

Christmas cats


Buongiorno Card makers, 
come state? 
Nonostante questa estate caldissima che sembra non finire mai, é ora di pensare al Natale! Quindi eccomi qui con le mie prime due card natalizie, restando sempre sulla scia di una cat lover.:D 
Questa volta, anziché un timbro, ho usato il nuovo set di fustelle di Spellbinders Christmas cats etched dies combinandolo con un altro set vecchio Delivering joy etched dies
Ho voluto ricreare una scena dove il gatto, invece di arrampicarsi su un albero di Natale, lo facesse su una pila di regali che ne ricordasse la forma.
Per dare alla card un tocco speciale, ho usato il 3 d embossing folder Diamond blocks come sfondo.

Good morning card makers,
How are you? 
Even though this scorching summer seems to go on forever, it’s time to start thinking about Christmas! So here I am with my first two Christmas cards, staying true to my cat-loving style. :D
This time, instead of a stamp, I used the new Spellbinders “Christmas Cats Etched Dies” set, combining it with another older set, “Delivering Joy Etched Dies.
I wanted to recreate a scene where the cat, instead of climbing a Christmas tree, climbs a stack of presents shaped like one.
To give the card a special touch, I used the “Diamond Blocks” 3D embossing folder as the background.


Invece per la seconda car ho usato un 3d Embossing differente , Herringbone decor
Cosa ne pensate? Quale dei due vi ha colpito di più?
Vi auguro una buona giornata

For the second card, however, I used a different 3D embossing pattern: Herringbone Decor.
What do you think? Which one did you like best?
Have a great day!

Quyen


lundi 3 août 2026

Heureux comme un chat au jardin


Buongiorno Creative, come state? 
In battibaleno siamo già arrivate ad agosto! Con il grande caldo estivo di quest'anno, non ho avuto l'energie di creare card, ma dopo un giorno trascorso con un'amica cardmaker, mi é ritornata il craft mojo!
Per chi mi conosce, sa che ho un gran debole per i gatti, quindi non ho resistito ed ho preso questo timbro di  L'encre et l'image Heureux comme un chat au jardin. Non trovate adorabili i due micetti in questo set? Io li adoro!!!
Ho timbrato i mici sulla carta apposita per la colorazione con i marker ad alcool e li ho colorati con i Copic markers. 
In seguito ho pensato che sarebbe stata una buona idea "incorniciare" il gattino e quindi ho usato il nuovo embossing folder di Spellbinders Ornate Molded frame 3D . 

Good morning, Creative Friends! 
How are you all doing?
Before we knew it, it’s already August! With this year’s intense summer heat, I didn’t have the energy to make cards, but after spending a day with a fellow cardmaker friend, my crafting mojo is back!
Anyone who knows me knows I have a huge soft spot for cats, so I couldn’t resist and picked up this stamp set from L’encre et l’image called “Heureux comme un chat au jardin.” Don’t you think the two kittens in this set are adorable? I absolutely love them!!!
I stamped the kittens onto paper designed for coloring with alcohol markers and colored them with Copic markers.
Then I thought it would be a good idea to “frame” the kitten, so I used the new Spellbinders “Ornate Molded Frame 3D” embossing folder.


Per restare in tema del soggetto della mia card, il gatto nel vaso di fiori, ho pensato di usare lo stencil della Lawnfawn Daisy bloom outline background con il tampone bianco Yeti ed ho creato delle macchie dorate e pitturato il bordo della cornice con la Nuvo Sparkle Spray.

To stay on theme with the subject of my card—the cat in the vase of flowers—I decided to use the Lawnfawn Daisy Bloom Outline Background stencil with the white Yeti ink pad, and I created some golden splotches and painted the edge of the frame with Nuvo Sparkle Spray.


Infine un nel sentiment foilizzato e voilà , card pronta!
Spero vi piaccia, vi auguro un splendido inizio settimana,

Finally, add a foil-stamped sentiment, and voilà—the card is ready!
I hope you like it. Have a wonderful start to the week,

Quyen


mardi 2 juin 2026

Floral Day Dream


Buongiorno creative, 
come state? 
Questo caldo improvviso vi ha travolto? Devo dire che mi ha colto alla sprovvista, e di solito mi viene molta stanchezza quando é così caldo, ma nonostante tutto mi sono sentita super ispirata da questo set di Pinkfresh Studio Floral Day Dream che ho creato in diverse varianti , che vi mostrerò prossimamente su instagram. :D
Per adesso ecco qui la versione Green! Mi son divertita a giocare con diverse tonalità di verde ed ho colpo ispirazione dalle cards fatte dal design team di Pinkfresh.
Ho usato il timbro, stencil e fustella del set Floral day dream.
Ho colorato i fiori con 2 inchiostri verdi di Pinkfresh Studioevergreen e fresh pear, ed usando pressioni differenti con il blending tool, ho ottenuto sfumature differenti.
Per entrambi gli sfondi delle due cards ho usato i ritagli ottenuti dalla fustella di Spellbinders Infinity Punch&Pierce Plate. La card che vedete a destra invece ho aggiunto in più un cartoncino bianco embossato con un 3d embossing folder di Lisa Horton ed abbellito con il sentiment di Spellbinders Layered Happy Birthday etches dies.
Spero vi piacciano,
vi auguro una splendida giornata


Good morning, crafters, 
how are you? 
Has this sudden heatwave caught you off guard? I have to say it took me by surprise, and I usually get really tired when it’s this hot, but despite everything, I felt super inspired by this Pinkfresh Studio Floral Day Dream set, which I’ve created in several variations—I’ll be showing them to you soon on Instagram. :D
For now, here’s the Green version! I had fun playing with different shades of green and drew inspiration from the cards made by the Pinkfresh design team.
I used the stamp, stencil, and die from the Floral Day Dream set.
I colored the flowers with two green inks from Pinkfresh Studio, Evergreen and Fresh Pear, and by applying different pressures with the blending tool, I achieved various shades.
For the backgrounds of both cards, I used the cutouts from the Spellbinders Infinity Punch & Pierce Plate die. On the card you see on the right, I also added a white cardstock piece embossed with a 3D embossing folder by Lisa Horton and embellished with the sentiment from the Spellbinders Layered Happy Birthday Etches Dies.
I hope you like them,
have a wonderful day


Quyen


vendredi 27 mars 2026

Tupips and Daffodils Card


 Buongiorno creative, come state? 

Oggi vi mostro questa card usando la nuova collezione disegnata da Yana Smakulaper Spellbinders. Il set che ho usato comprende una press plate e lo stencil coordinato Tulips and Daffodils.


Good morning, crafters! 

How are you? 

Today I’m showing you this card made with the new collection designed by Yana Smakulaper for Spellbinders. The set I used includes a press plate and the matching “Tulips and Daffodils” stencils.


Ho preparato con la hot foil machine 4 stampe , di cui 3 colorate con i Copic markers, mentre quella in basso a destra l'ho colorato con i Distress Oxide aiutandomi son gli stencil del set. Una volta confrontate le varie colorazioni, ho deciso di scegliere l'immagine che più ritenevo idonea con uno sfondo nero. Una volta riagliati i bordi del mazzo di fiori, le parte rimanenti bianche le ho colorate con un marker nero.

I created four foiled card using the hot foil machine, three of which I colored with Copic markers, while I colored the one in the bottom right corner with Distress Oxide ink, using the stencils from the set. After comparing the different color schemes, I decided to choose the image I thought worked best with a black background. After trimming the edges of the bouquet, I colored the remaining white areas with a black marker.


Infine ho usato l'embossing folder Molded frame con un cartoncino nero per creare lo sfondo ed ho fatto degli schizzi dorati con dell'acquarello oro ed aggiunto un sentiment foilizzato dal set  Betterpress foil and die Bouquet of Hugs.

Spero possa esservi di ispirazione, vi auguro una splendida giornata e buon weekend!

Finally, I used the Molded Frame embossing folder with black cardstock to create the background, added some gold splashes using gold watercolor paint, and included a foil-stamped sentiment from the Betterpress Foil and Die Bouquet of Hugs set.

I hope this inspires you. Have a wonderful day and a great weekend!

Quyen


vendredi 2 mai 2025

Japanese Cherry Blossom


Buongiorno creative, come state? 
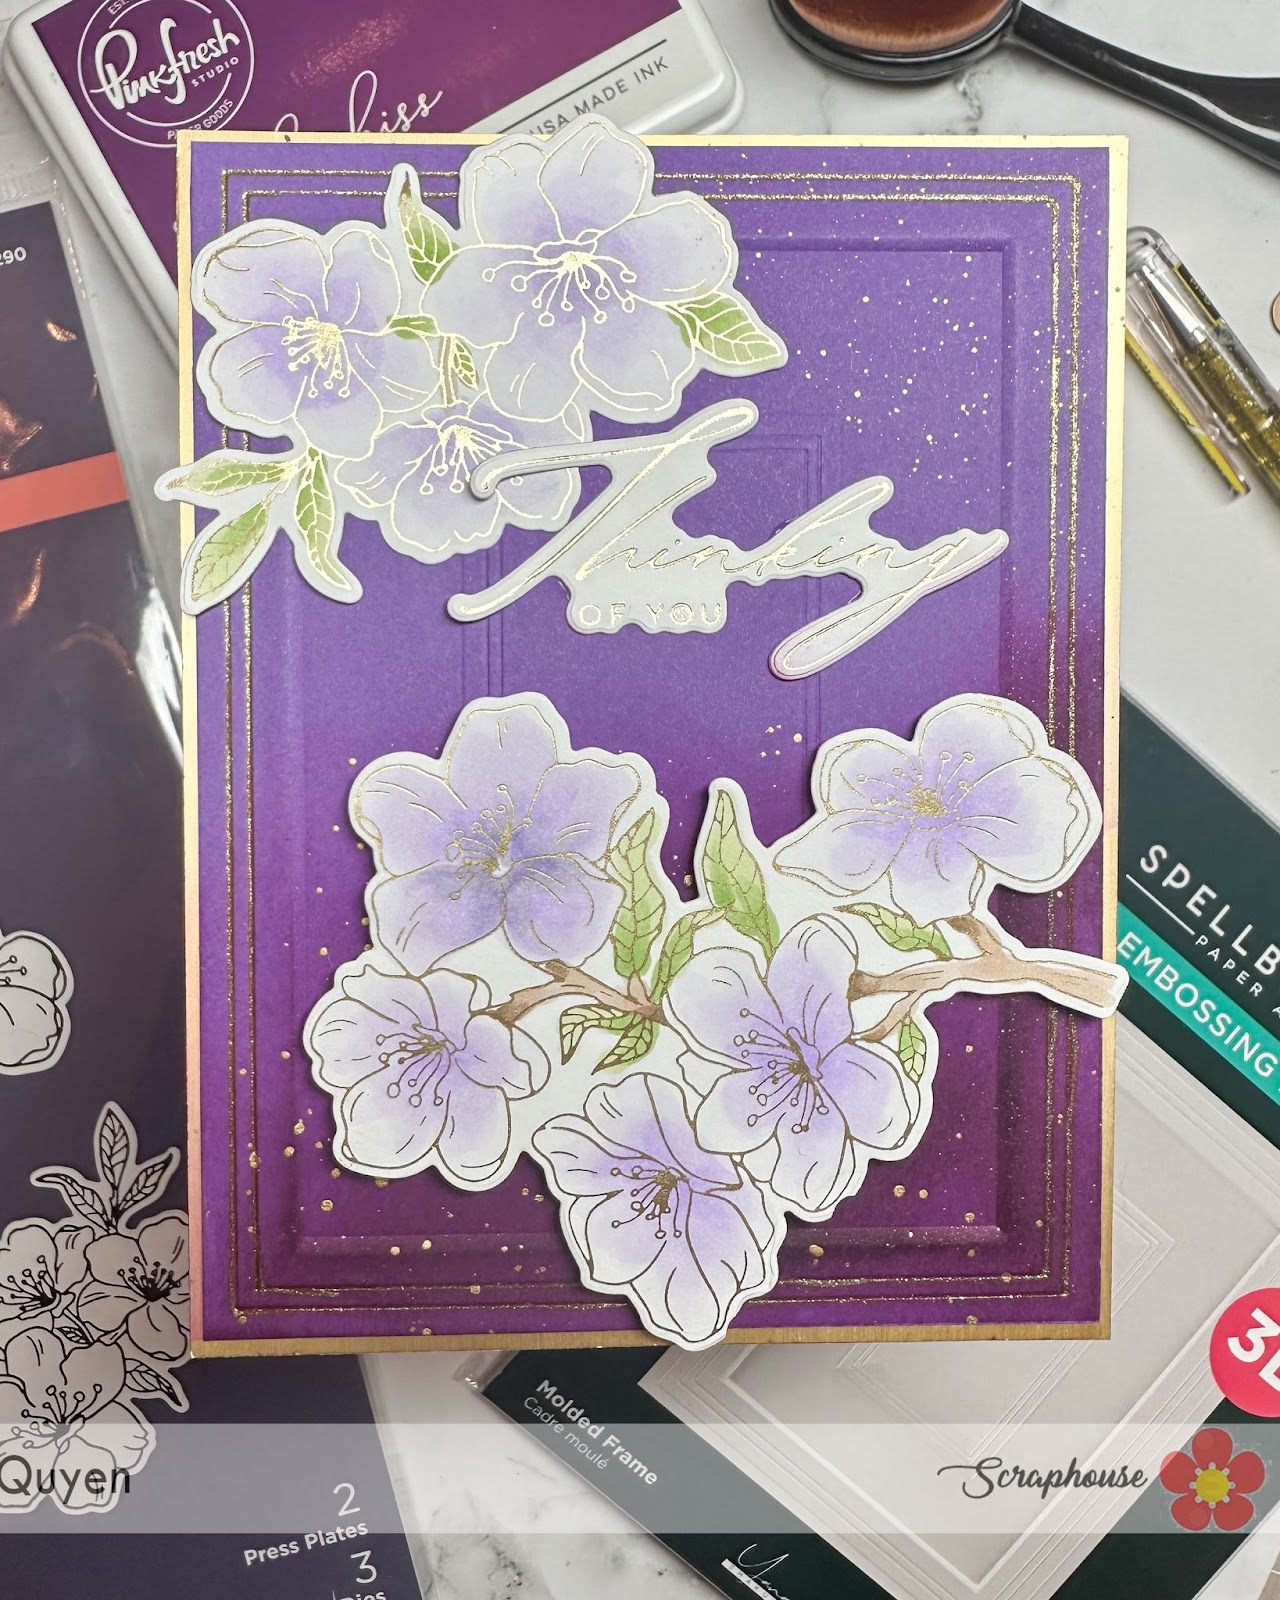
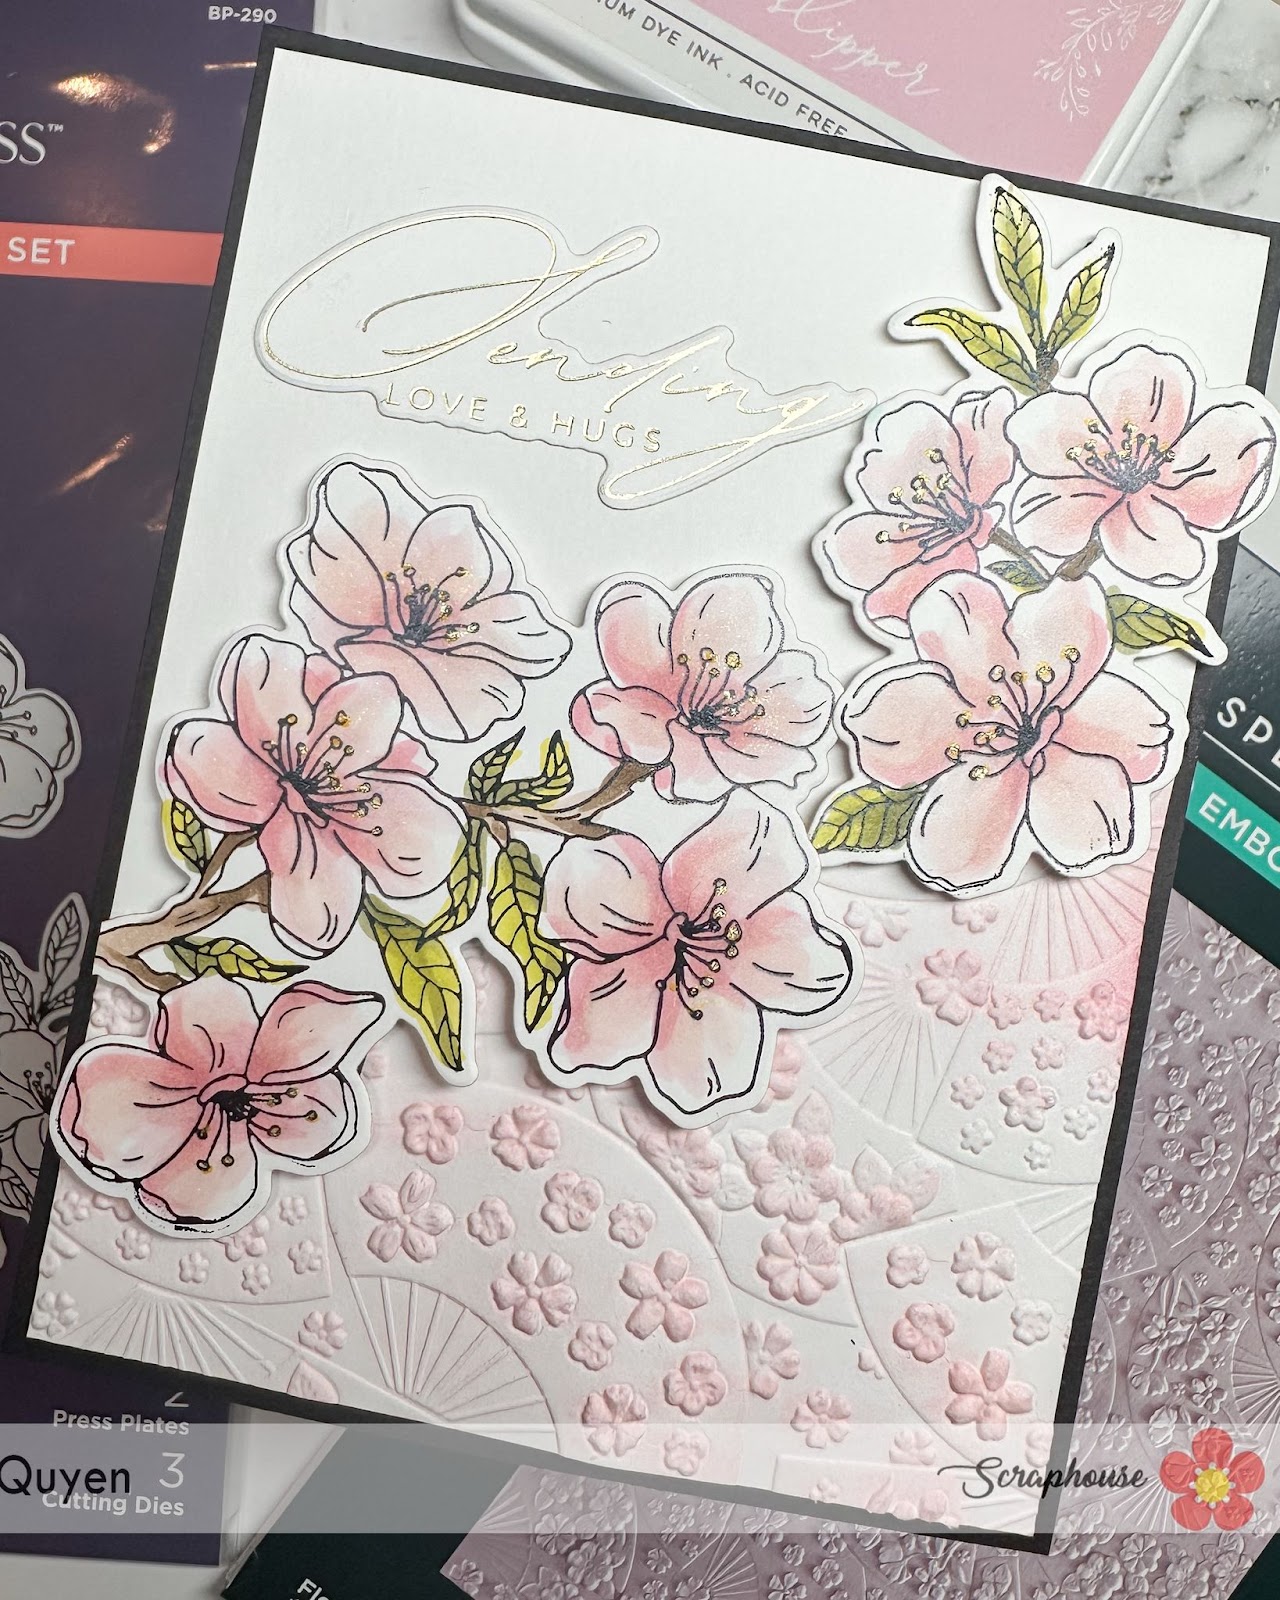
oggi vi mostro queste due card fatte con le novità di Spellbinders che potete trovare sul sito di Scraphouse!
Non son stupendi questi fiori di ciliegio? Li adoro! Ho usato la press plate Cherry blossoms spring in Kyoto per foilizzare in oro ed in nero. Una volta ritagliato i fiori con la loro apposita fustella, li ho colorati con dei marker ad alcohol, in questo caso gli OLO.

Good morning creatives, how are you? 
Today I show you these two cards made with new Spellbinders that you can find on the Scraphouse website!
Aren't these cherry blossoms gorgeous? I love them! I used the Cherry blossoms spring press plate in Kyoto to foil in gold and black. Once I cut out the flowers with their appropriate die cut, I colored them with alcohol markers, in this case OLOs.


Per questa prima card preso un cartoncino viola ed embossato con il 3D embossing folder Molded frame , nella parte inferiore ho sfumato l'inchiostro Regal kiss di Pinkfresh studio, creato delle macchie dorate con un'acquarello oro e marcato i bordi del frame con una gel pen dorata.

For this first card I took a purple cardstock and embossed it with the 3D embossing folder Molded frame , at the bottom I blended Regal kiss ink from Pinkfresh studio, created gold flecks with a gold watercolor and marked the edges of the frame with a gold gel pen.


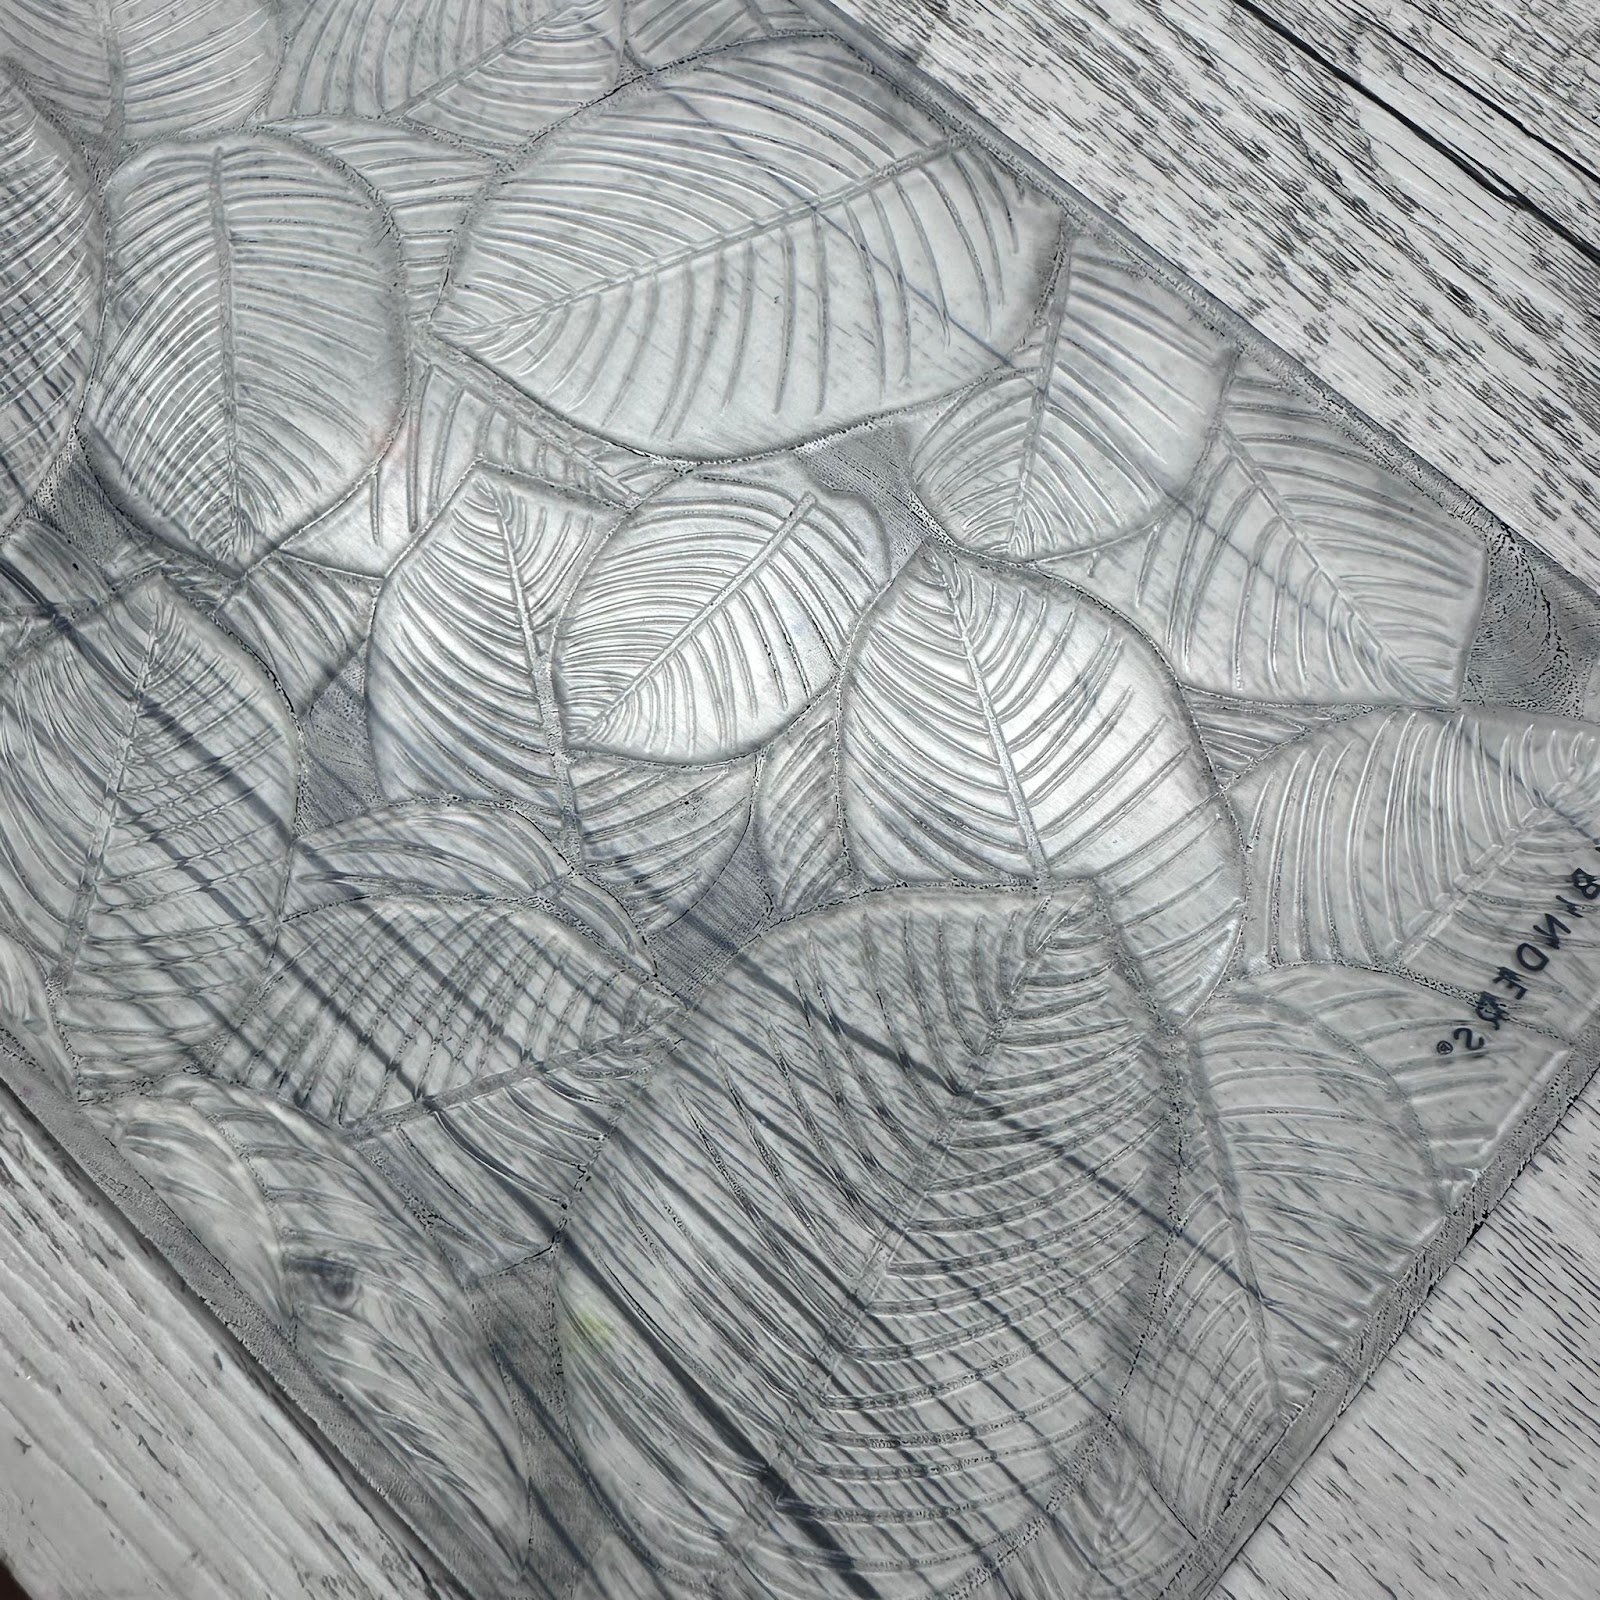
invece per questa seconda card , ho usato un embossing folder differente, Floral fans spring in Kyoto , e passato sulla parte in rilievo l'inchiostro Ballet slippers di Pinkfresh Studio. come puoi notare dall' immagine sottostante, ho embossato solo un angolo del mio cartoncino.

instead for this second card , I used a different embossing folder, Floral fans spring in Kyoto , and passed on the embossed part the Ballet slippers ink from Pinkfresh Studio. as you can see from the 'image below, I embossed only one corner of my card.


Entrambe le card le ho abbellite con dei sentiment della Betterpress plate Crafty hugs.
Spero di avervi ispirato con queste card,
buon Venerdì,

Both cards I embellished with sentiments from Betterpress plate Crafty hugs.
I hope I have inspired you with these cards,
happy Friday,

Quyen


vendredi 21 février 2025

Playing with distress reinkers


Buongiorno creative,

anche stavolta vi mostro una card usando l'embossing folder Blooming butterfly di Spellbinders, ma utilizzando la parte floreale. Ho usato un pezzo di vellum ed una volta embossato ho colorato con l'inchiostro rose gold di altenew e uno nero le parti in rilievo.


Good morning creative,

once again I show you a card using the


from Spellbinders, but using the floral part. I used a piece of vellum and once embossed I colored the embossed parts with altenew's rose gold ink and a black one.


In seguito usando un cartoncino d'acquarello, con un pennello ho bagnato la carta e poi lasciato scivolare una goccia di colore del Distress ink reinker in modo da far colare il colore per tutto il cartoncino. Ho ripetuto questo passaggio con i colori: dried marigold ,  squeezed lemonade, shabby shutters, peacock feathers, wilted violet, seedless preserves and picked raspberry.

Next using a watercolor card, I wet the paper with a brush and then let a drop of color from the Distress ink reinker slide in so that the color ran all over the card. I repeated this step with the colors: dried marigold , squeezed lemonade, shabby shutters, peacock feathers, wilted violet, seedless preserves and picked raspberry.


Per completare la mia card ho incollato il vellum , timbrato un sentiment dal set Crafty life stamp di Altenew ed incollato una farfalla di Spellbinders.
Spero vi piaccia, vi auguro una splendida giornata.

o complete my card I glued the vellum , stamped a sentiment from Altenew's Crafty life stamp set and glued a butterfly from Spellbinders.
I hope you like it, have a wonderful day.

Quyen


mercredi 12 février 2025

3D bufferlies


 Buongiorno creative!

oggi sono qui a mostrarvi questa card con le farfalle! Rimango sempre affascinata dai 3D embossing folder che hanno compreso la fustella per tagliarne le sagome , e voi? In questo caso ho usato l'embossing folder Blooming butterflies di Spellbinders. Una volta ottenuto le sagome delle farfalle da un cartoncino per acquarello, le ho colorate con i distress reinkers : picked raspberry, wilted violet, scattered straw e peacock feathers. In seguito con un tampone nero le ho colorato le superficie in rilievo delle farfalle e passato i bordi ed il corpo con l'acquarello oro.


 Good morning crafters!

I am here today to show you this card with butterflies! I am always fascinated by the 3D embossing folders that have included the die cut to cut out the shapes , how about you? In this case I used the Blooming butterflies embossing folder from Spellbinders. Once I got the butterfly shapes from a watercolor cardstock, I colored them with distress reinkers : picked raspberry, wilted violet, scattered straw and peacock feathers. Later with a black pad I colored the raised surfaces of the butterflies and went over the edges and body with gold watercolor.


Per lo sfondo ho usato un cartoncino per la betterpress cotton card panels color Pebble sulla quale ho impresso la scritta For you dal set Sweeping script sentiments.

For the background I used a betterpress cotton card panels Pebble color on which I embossed the words For you from the set Sweeping script sentiments.


In seguito per dare maggiore interesse allo sfondo ho usato il timbro Linen texture cercando di lasciare pulito il sentiment , coprendolo con un pezzo di carta durante la timbratura.

Later to give more interest to the background I used the Linen texture stamp trying to leave the sentiment clean, covering it with a piece of paper while stamping.


ecco qui il risultato finale una volta incollate anche le farfalle! cosa ne pensate? vi piace? grazie per esser qui sul blog oggi, vi auguro buona giornata,

here is the final result once the butterflies were also glued! what do you think? do you like it? thanks for being here on the blog today, have a nice day,

Quyen


vendredi 29 novembre 2024

Combining differerent techniques

 Buona sera creative!

come state? questo blog post é inerente al reel che trovate sul profilo ig delle shop @scraphouse.ch e @shiny_scrap. Ho voluto subito provare queste nuove betterpress plate: Bold color mix numbers plate e Sweeping celebration sentiments

Ho usato gli inchiostri Interference Lavender Fields Shimmer e Tropical Paradise Shimmer di Lisa Horton per i numeri , mentre per la scritta happy birthday ho usato il classico inchiostro nero per la betterpress. 

In seguito ho messo il mio cartoncino nel 3d embossing folder Amaryllis Garden perché volevo vedere che effetto avrei ottenuto. Poi visto che avevo macchiato la mia card con gli inchiostri Interference, ho deciso di nascondere l'errore con delle macchie di Lindy's del set Kissing Klimt.  Infine ho aggiunto qualche paillettes dorata e mattato con un cartoncino dal blocco di Studio Light Shades of Pink.

Grazie per esser passate da qui, ricordatevi che avete ancora un po' di tempo per sfruttare lo sconto per il Black Friday!

un abbraccio 


 Good evening creative!

how are you? this blog post is inherent to the reel you can find on the ig profile of the shops @scraphouse.ch and @shiny_scrap. I immediately wanted to try these new Betterpress plates: Bold color mix numbers plate and Sweeping celebration sentiments

I used Lisa Horton's Interference Lavender Fields Shimmer and Tropical Paradise Shimmer inks for the numbers , while I used the classic black Betterpress ink for the happy birthday lettering. 

Later I put my cardstock in the 3d embossing folder Amaryllis Garden because I wanted to see what effect I would get. Then since I had stained my card with Interference inks, I decided to hide the mistake with some Lindy's stains from the Kissing Klimt set.  Finally, I added some gold sequins and matted with a cardstock from the Studio Light Shades of Pink block.

Thanks for stopping by, remember you still have some time to take advantage of the Black Friday discount!

a hug 

Quyen


mardi 29 octobre 2024

Christmas ornaments card


Buongiorno crafty friends!

Spero di trovarvi bene! Siete curiose di sapere tutti gli step che ho eseguito per creare questa card? :)

Ho cominciato a sfumare queste 6 Solar paste ( Beluga, Royal flush, Cross my heart, Overheated, Golden hour, Crocodile tears ) su un cartoncino nero con un ink blend tool cambiando le spugnette per ogni colore.


Good morning crafty friends!

I hope to find you well! Are you curious about all the steps I performed to create this card? :)

I started blending these 6 Solar pastes ( Beluga, Royal flush, Cross my heart, Overheated, Golden hour, Crocodile tears ) on a black card with an ink blend tool changing the sponges for each color.


Una volta che ho verificato che le paste si siano asciugate, ho posizionato una fustella Make a wish labels etched dies e passato attraverso la BigShot ricavanto così una sorte di cornice.

Once I had verified that the pastes had dried, I placed the Make a wish labels etched dies and ran them through the BigShot thus obtaining a  sort of frame.


Ho messo questa cornice nell'embossing folder Holiday light set 3D al rovescio, per ottenere l'effetto "deembossato" sulla parte colorata.


I put this frame in the Holiday light set 3D embossing folder on the reverse, to get the “deembossed” effect on the colored part.


In seguito ho usato un inchiostro nero per colorare la superficie del cartoncino rimasto in rilievo.

Afterwards, I used a black ink to color the surface of the remaining raised cardboard.


Ho usato lo scarto della mia fustellata ad arco, per ricavare le 2 bocce di Natale con la fustella Vintage Layered ornaments .

I used the scrap from my bow die cut, to make the 2 Christmas bowls with the Vintage Layered ornaments die cut .


Infine ho scelto un cartoncino grigio dal pad Let it Shine snowflakes di Lawnfawn e decorato con un sentiment.
Cosa ne pensate? Vi piace? 
Buona giornata


Finally, I chose a gray card from Lawnfawn's Let it Shine snowflakes pad and decorated it with a sentiment.
What do you guys think? Do you like it? 
Have a great day

Quyen


lundi 12 août 2024

Cloud 9 dye pigment ink

Buona sera creative! 

Come state? questi giorni di canicola mi hanno ispirato a creare questa card tropicale!

Good evening creative! 

How are you? these hot days have inspired me to create this tropical card!


Per lo sfondo ho usato i nuovissimi inchiostri Cloud 9 che hanno una resa fantastica ed adoro che siano perlati. Su una carta d'acquarello ho mischiato a caso questi 3 colori: Lemon candy, Summer Garden e Mermaid Lagoon.

For the background I used the brand new Cloud 9 inks which have fantastic rendering and I love that they are pearlescent. On a watercolor paper I randomly mixed these 3 colors: Lemon candy, Summer Garden and Mermaid Lagoon.


In seguito ho inchiostrato l'embossing folder Lush Leaves di Spellbinders con dell'inchiostro nero , messo il mio cartoncino colorato e passato nella Platinum 6.

Next I inked Spellbinders' Lush Leaves embossing folder with black ink , put on my colored cardstock and ran it through my Platinum 6.


Ho ritagliato una parte del cartoncino per creare un apertura dove posizionare il mio tucano ottenuto con la fustella Tropical dream di Modascrap ed i Paper pad di Studiolight: Shades of green e Shades of pink.
Ho colorato due cartoncini sempre con i tamponi Cloud 9 che ho poi fustellato sentiment Hello dal set Hello smile etched dies


I cut out part of the cardstock to create an opening where I could place my toucan obtained with Modascrap's Tropical dream die cut and Studiolight's Paper pads: Shades of green and Shades of pink.
I ink blended two small piece of watercolor paper also with Cloud 9 pads, then I die-cut the sentiment Hello from the Hello smile etched dies set. 


Spero vi sia piaciuta, 
Buona serata 

I hope you enjoyed it, 
Have a nice evening 

Quyen