mercredi 12 février 2025

3D bufferlies


 Buongiorno creative!

oggi sono qui a mostrarvi questa card con le farfalle! Rimango sempre affascinata dai 3D embossing folder che hanno compreso la fustella per tagliarne le sagome , e voi? In questo caso ho usato l'embossing folder Blooming butterflies di Spellbinders. Una volta ottenuto le sagome delle farfalle da un cartoncino per acquarello, le ho colorate con i distress reinkers : picked raspberry, wilted violet, scattered straw e peacock feathers. In seguito con un tampone nero le ho colorato le superficie in rilievo delle farfalle e passato i bordi ed il corpo con l'acquarello oro.


 Good morning crafters!

I am here today to show you this card with butterflies! I am always fascinated by the 3D embossing folders that have included the die cut to cut out the shapes , how about you? In this case I used the Blooming butterflies embossing folder from Spellbinders. Once I got the butterfly shapes from a watercolor cardstock, I colored them with distress reinkers : picked raspberry, wilted violet, scattered straw and peacock feathers. Later with a black pad I colored the raised surfaces of the butterflies and went over the edges and body with gold watercolor.


Per lo sfondo ho usato un cartoncino per la betterpress cotton card panels color Pebble sulla quale ho impresso la scritta For you dal set Sweeping script sentiments.

For the background I used a betterpress cotton card panels Pebble color on which I embossed the words For you from the set Sweeping script sentiments.


In seguito per dare maggiore interesse allo sfondo ho usato il timbro Linen texture cercando di lasciare pulito il sentiment , coprendolo con un pezzo di carta durante la timbratura.

Later to give more interest to the background I used the Linen texture stamp trying to leave the sentiment clean, covering it with a piece of paper while stamping.


ecco qui il risultato finale una volta incollate anche le farfalle! cosa ne pensate? vi piace? grazie per esser qui sul blog oggi, vi auguro buona giornata,

here is the final result once the butterflies were also glued! what do you think? do you like it? thanks for being here on the blog today, have a nice day,

Quyen


samedi 8 février 2025

Busy backgrounds Part II

Hello Crafty friends

Here comes my second Part about how to use these gorgeous backgrounds.

I used again the Winter Florals Press plate and colored it with the coordinating stencils. The more I use this the more I love it.


The first card is quite simple, but I really like how the background can be the star but you still can add a sentiment. For this I cut off a little bit from the bottom of the background, so that my sentiment can fit there. I added a bit of the same cardstock I I already used and stamped there my sentiment. To give it a finished loo I added a little stripe. 


My second card I a two for one card. I cut my card in two panel on an angle. One a little bit bigger. When I cut I make sure a can use both sides.


Then I used the bigger panel on a matching cardstock. Added again a stripe and stamped my sentiment. To add a little more interest, I used the Spellbinders Scored and Pierced Rectangles. 


For my second card my green cardstock was a little bit too plain. So, I added a subtle texture with the Linen Texture Stamp from Craft Consortium. And this time I used the Lawn Fawn Merci Sentiment. I also added a little bit of greenery from the Spellbinders Vivid Blooms set because the sentiment looked e little bit lost. 


What is your favorite way to use these backgrounds?

Thanks for stopping by, Adriana.


Hallo Bastelfreunde

hier kommt mein zweiter Teil über die Verwendung dieser herrlichen Hintergründe.

Ich habe wieder die Winter Florals Press Platte verwendet und sie mit den passenden Schablonen koloriert. Je öfter ich sie benutze, desto mehr liebe ich sie.


Die erste Karte ist recht einfach, aber ich mag es sehr, dass der Hintergrund der Star sein kann und man trotzdem einen Spruch hinzufügen kann. Hierfür habe ich ein kleines Stück vom unteren Teil des Hintergrunds abgeschnitten, damit mein Spruch dort Platz hat. Ich habe ein Stück desselben Cardstocks, den ich bereits verwendet habe, hinzugefügt und dort meinen Spruch gestempelt. Um die Karte zu veredeln, habe ich einen kleinen Streifen hinzugefügt. 


Meine zweite Karte ist eine Zwei-für-Eins-Karte. Ich habe meine Karte schräg in zwei Teile geschnitten. Die eine ist etwas größer. Wenn ich schneide, achte ich darauf, dass ich beide Seiten verwenden kann.

Dann habe ich die größere Seite auf einem passenden Papier verwendet. Ich habe wieder einen Streifen hinzugefügt und meinen Spruch gestempelt. Um die Karte noch interessanter zu machen, habe ich die Spellbinders Rechtecke Pierce and Scored verwendet. 


Für meine zweite Karte war mein grünes Papier ein bisschen zu schlicht. Also habe ich mit dem Texturstempel von Craft Consortium eine dezente Textur hinzugefügt. Und dieses Mal habe ich den Lawn Fawn Merci Sentiment verwendet. Außerdem habe ich ein wenig Blätter aus dem Spellbinders Vivid Bloom Set hinzugefügt, weil der Spruch etwas verloren aussah. 


Wie verwendest du diese Hintergründe am liebsten?

Danke fürs Vorbeischauen, Adriana.


mardi 4 février 2025

FESTIVE POINSETTIA PLATE : THIS IS NOT A CHRISTMAS CARD!:D


Buongiorno creative! 

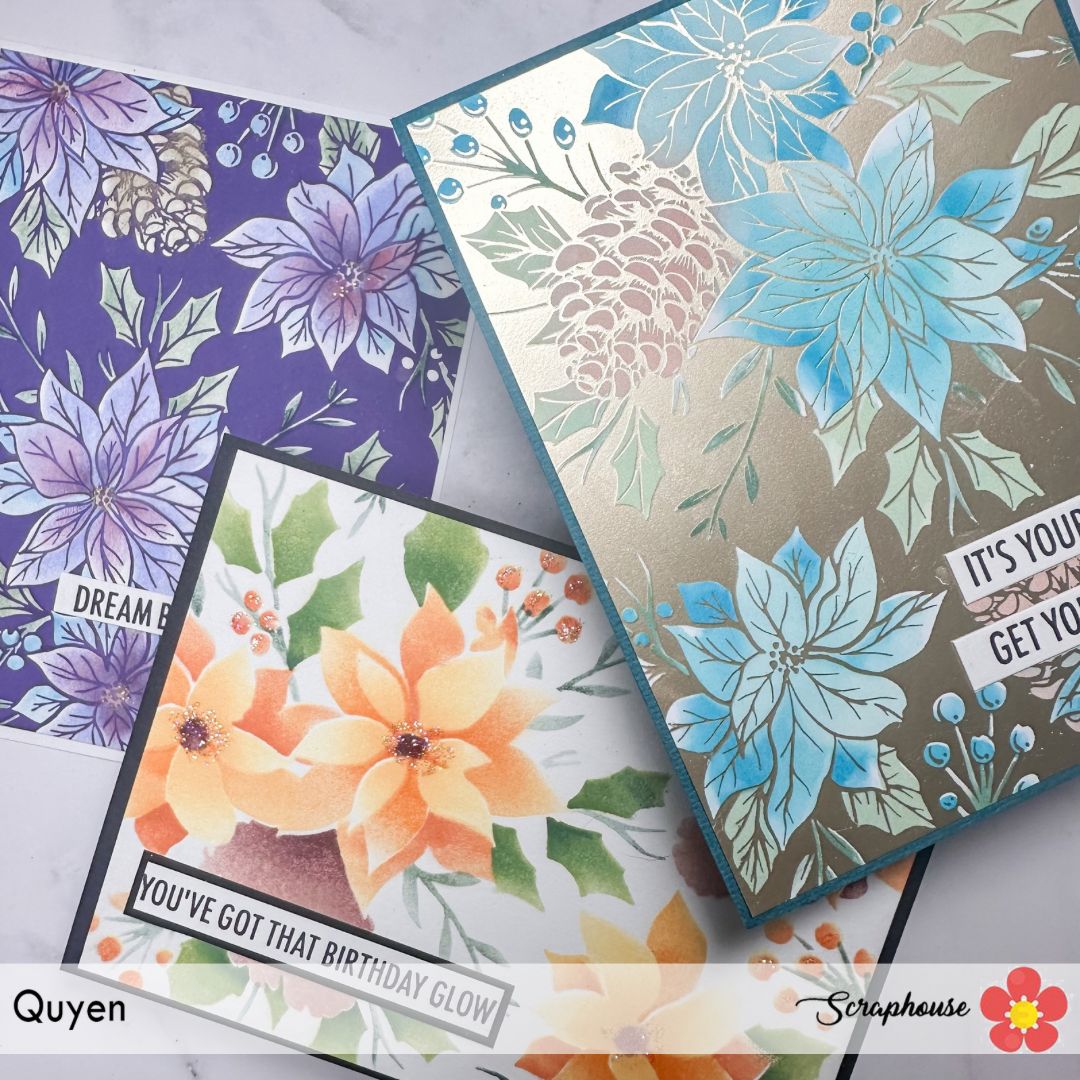
spero di trovarvi bene! Eccomi qui oggi ad usare la Festive Poinsettia set per creare delle card NON natalizie! Trovo davvero interessante che usando prodotti prettamente di natale ma abbinandoli a colori differenti da quelli che si userebbero per Natale, si possa ottenere delle card per tutte le stagioni.

Ho voluto usare differente tecniche. Ho cominciando a creare il primo sfondo usando la betterpress con il distress Oxide Villainous potion.


Good morning creative! 

I hope to find you well! Here I am today using the Festive Poinsettia set to create NOT Christmas cards! I find it really interesting that by using purely Christmas products but combining them with different colors than you would use for Christmas, you can get cards for all seasons.

I wanted to use different techniques. I started by creating the first background using betterpress with Distress Oxide Villainous potion.


mentre il secondo sfondo l'ho ottenuto usando la Glimmer machine con un foil dorato e l'ultimo ho solo usato gli stencil.
Ho usato lo stencil abbinato con gli inchiostri di Altenew fresh dye ink cube bundle . 
Ecco qui i risultati:


while the second background I got using the Glimmer machine with a gold foil and the last one I just used the stencils.
I used the stencil combined with Altenew fresh dye ink cube bundle inks
Here are the results:


Infine li ho incollato le basi su delle mattature colorate e abbellito con i sentiment di Spellbinders Shine bright strips.

Finally I glued the bases onto colored mattes and embellished them with sentiments from
s.


Quale versione preferite?
grazie per esser passate qui dal blog, vi auguro una splendida giornata


Which version do you prefer?
thanks for stopping by the blog, have a wonderful day

Quyen


samedi 25 janvier 2025

Busy backgrounds Part I

Hello crafty Friends.

Do you struggle sometimes with busy colorful backgrounds? Well, I really did. I love to create these great colorful backgrounds, but then sometimes didn’t now how to turn them into cards. I did some studies.   Here are some of my favorite ways to put these backgrounds into good use. And this is only part 1, there will be a second part, so stay tuned.


For all my backgrounds I used the Winter Florals Press Plate. You can use it with your
Bettepress Sytem or with the Hot Foil. I decided to Foil the outlines. Then I used the coordinating stencils to color all the flowers. I really like these florals, because they are perfect for Christmas or Winter season. But by changing up the colors you can use them all year around.


On the first cars I did like a frame with a matching cardstock and used the same paper to add my sentiment. I also wanted to stand my sentiment a little bit more out, but didn’t want to cover more of my background. So I added the same element a little bit taller with vellum. So, I didn’t cover up to much from my gorgeous background.


For my next card trimmed away a little bit of the background, so that is slightly smaller. Then I added on a square card. Like that I had space for my sentiment. I used the Merci Die from Lawn Fawn. I also added some matching paper behind my background and faux stitching just to add a little bit more interest.


Thanks for stopping by, and the second Part is coming soon.

 Adriana


Hallo Bastelfreunde.

Habt ihr auch manchmal Probleme mit bunten Hintergründen? Nun, ich habe das wirklich. Ich liebe es, diese farbenfrohen Hintergründe zu gestalten, aber manchmal weiß ich nicht, wie ich sie in Karten verwandeln kann. Ich habe ein paar Studien gemacht. :) Hier sind einige meiner Lieblingsmöglichkeiten, um diese Hintergründe gut zu verwenden. Und das ist nur Teil 1, es wird einen zweiten Teil geben, also bleibt dran.


Für alle meine Hintergründe habe ich die Pressplatte Winterblumen verwendet. Du kannst sie mit deinem Bettepress-System oder mit der Heißfolie verwenden. Ich habe mich dafür entschieden, die Umrisse zu folieren. Dann habe ich mit den passenden Schablonen alle Blumen ausgemalt. Ich mag diese Blumen sehr, weil sie perfekt für die Weihnachts- oder Wintersaison sind. Aber wenn man die Farben ändert, kann man sie das ganze Jahr über verwenden.


Bei den ersten Autos habe ich einen Rahmen aus passendem Cardstock gemacht und das gleiche Papier für meinen Spruch verwendet. Ich wollte meinen Spruch auch ein bisschen mehr hervorheben, aber nicht noch mehr Hintergrund verdecken. Also habe ich das gleiche Element mit Pergament etwas höher angebracht. So verdeckte ich nicht zu viel von meinem herrlichen Hintergrund,


Für meine nächste Karte habe ich ein wenig vom Hintergrund weggeschnitten, so dass sie etwas kleiner ist. Dann habe ich eine quadratische Karte aufgesetzt. So hatte ich Platz für meinen Schriftzug. Ich habe die Stanze Merci von Lawn Fawn verwendet. Ich habe auch etwas passendes Papier hinter dem Hintergrund eingefügt, nur um ein bisschen mehr Interesse zu wecken.


Vielen Dank fürs Vorbeischauen, und der zweite Teil kommt bald.

Adriana


samedi 11 janvier 2025

Love you lots

Hello!

Je suis ravie de vous retrouver avec une nouvelle carte avec l'adorable panda de Lawn Fawn. Vous trouverez ces tampons "I Heart Pandas", "Henry's Build a Sentiment: Love", ainsi que les dies de découpe "Scripty Love Die" et "Scripty Love Outline Add-On" et aussi le papier "Pearlescent Cardstock" (ce papier est magnifique, il brille, malheureusement on ne le voit pas bien sur la photo) de Lawn Fawn en boutique chez Scraphouse.


J'espère que cela vous plaira et vous inspirera!

A très bientôt!

Valérie

vendredi 10 janvier 2025

Love

Hello!

Valérie ici avec une nouvelle carte réalisée avec les nouveautés Lawn Fawn pour la Saint-Valentin. Je n'ai pas résisté, j'adore tout ce qui est mignon...

Pour ma carte, j'ai utilisé le die Doily Heart, le mot Scripty Love avec sa découpe. Cela donne un super rendu, cela fait ressortir le mot. Les moufettes sont également de Lawn Fawn, ici et . Elles sont adorables, non?


J'espère qu'elle vous plaira et surtout vous inspirera.

Belle journée et à bientôt!

Valérie

mercredi 8 janvier 2025

You're dino-mite

Bonjour à tous!

J'espère que vous avez bien commencé l'année! 

Je suis ravie de vous présenter une carte interactive avec un die Ta Da-Diorama et des tampons de Lawn Fawn. Les tampons ne sont pas en stock mais vous pouvez les remplacer par des adorables moufettes que vous trouverez ici.

Vue de la carte fermée (les dimensions sont un peu plus petites qu'une carte A6 standard comme ça elle passe dans une enveloppe). Moi, je l'ai collé sur une carte. 


Vue de la carte ouverte


Sympa, vous ne trouvez pas?

Merci de votre visite et rendez-vous en boutique!

Belle journée!

Valérie


samedi 28 décembre 2024

Cozy Winter Card

 Hello everyone


Hope you had some nice Christmas Days. Today I’m sharing a card to send out some warm hugs in cold days. I wanted to create a cozy winter card. 


For the background I used the Collection Arizona Stamps from Florilèges. I really like this stamp set because you can use all stamps together as a background or create really nice accents. I did some tone on tone stamping on a mint Paper from the Vintage Spring Paper Pad. Then I created the snowflakes and the sentiment with white embossing powder. They are from the Simon Hurley Sketched Snowman Set. I also used my favorite white glitter Paper from the Fairytale Paper Pad. This is so soft but sparkly.


For a little bit more interest I cut the edges with the Spellbinders Notched Corner Punch. 


Thank you for stopping by and a Happy New Year.


Adriana


Hallo zusammen


ich hoffe ihr hattet ein paar schöne Weihnachtstage. Heute zeige ich euch eine Karte, mit der ihr in den kalten Tagen ein paar warme Umarmungen verschicken könnt. Ich wollte eine gemütliche Winterkarte kreieren. 

Für den Hintergrund habe ich die Collection Arizona Stamps von Florilèges verwendet. Dieses Stempelset gefällt mir sehr gut, denn man kann alle Stempel zusammen als Hintergrund verwenden oder wirklich schöne Akzente setzen. Ich habe Ton in Ton auf ein mintfarbenes Papier aus dem Papierblock Vintage Spring gestempelt. Dann habe ich die Schneeflocken und den Schriftzug mit weißem Embossingpulver gestaltet. Sie stammen aus dem Simon Hurley Sketched Snowman Set. Außerdem habe ich mein liebstes weißes Glitzerpapier aus dem Papierblock Fairytale verwendet. Es ist so zart, aber glitzernd.

Für ein bisschen mehr Interesse habe ich die Ränder mit der Spellbinders Notched Corner Punch gestanzt. 


Vielen Dank fürs Vorbeischauen und ein frohes neues Jahr.


Adriana


samedi 14 décembre 2024

Panda's love is in the air


Buongiorno creative! come state? avete avuto modo di vedere la nuova mini release di San Valentino della Lawnfawn? questa volta trovo che questi panda siano bellissimi e versatili, da poter usare in tutte le occasioni e non unicamente per San Valentino.

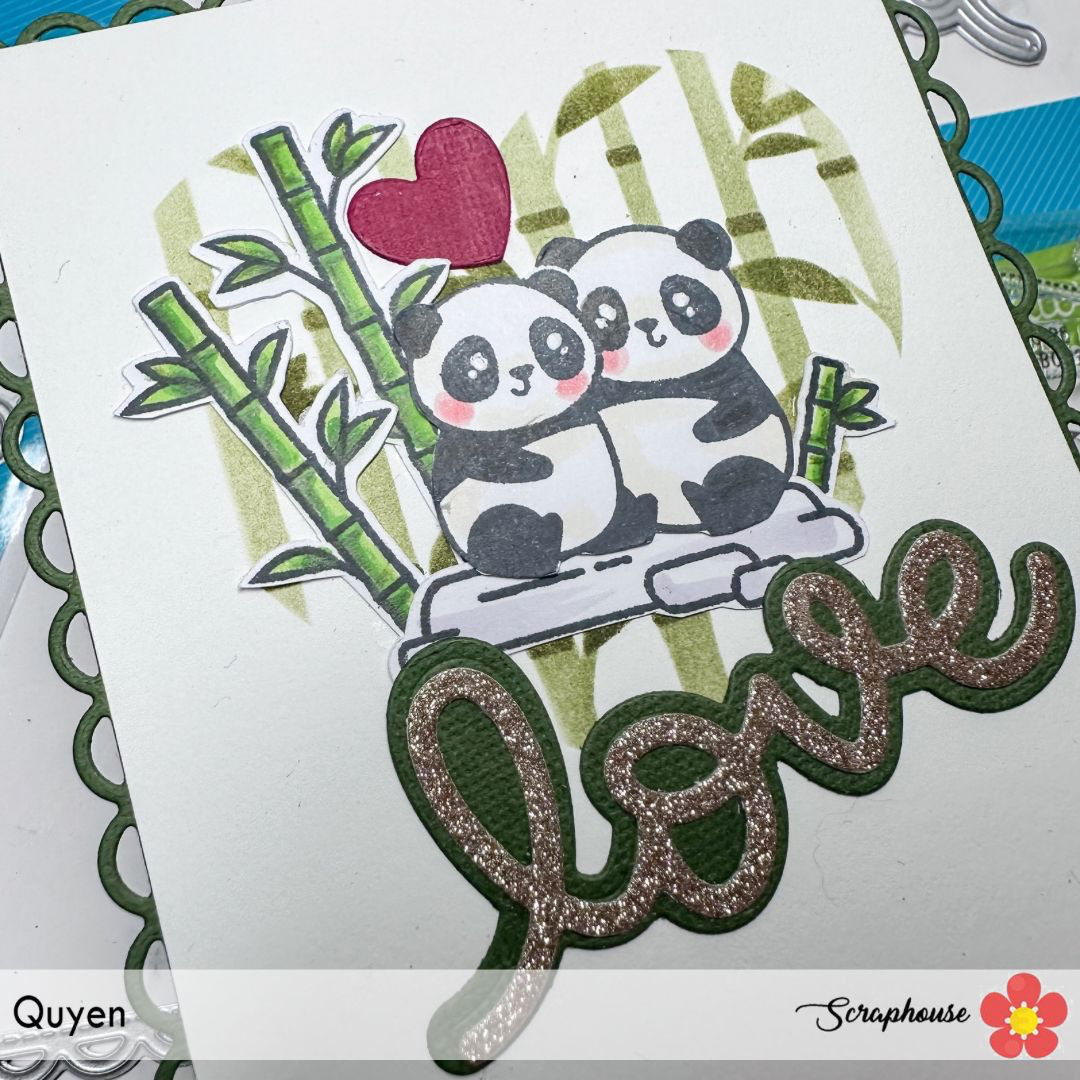
Ho voluto creare qualcosa di divertente. Con la fustella Stitched happy heart ho ritagliato un cartoncino di scarto da creare uno stencil.

Good morning creatives! how are you? did you get a chance to see the new Valentine's Day mini release from Lawnfawn? this time I find these pandas to be beautiful and versatile, that can be used for all occasions and not solely for Valentine's Day.

I wanted to create something fun. Using the Stitched happy heart die I cut out a scrap cardstock to create a stencil.


Per poter posizionare correttamente lo stencil cuore che ho creato, ho appoggiato la fustella cuore sul mio cartoncino base dove avrei voluto appoggiare il mio stencil come se fosse una dima. Una volta rimosso la fustella e fissato lo stencil in carta , ho usato gli stencils Bamboo.

In order to properly position the heart stencil I created, I placed the heart die on my base card where I wanted to place my stencil as if it were a template. Once I removed the die and secured the paper stencil , I used Bamboo stencils.


Ho colorato i velocemente i miei soggetti della plancia I heart pandas ( siii i panda son bianchi e neri quindi é stato molto semplice) e decorato con il sentiment della fustella Scripty love e Scripty love outlined. Infine il mio cartoncino l'ho incollato ad una cornicetta ottenuta dalla nuova fustella Lacy Rectangle stackable. 
Spero vi sia piaciuta la card ,
buona giornata

I colored the quickly my subjects  from the I heart pandas stamp set( yes the pandas are black and white so it was very easy) and decorated with the sentiment from the Scripty love die and Scripty love outlined. Finally my card I glued it to a frame obtained from the new Lacy Rectangle stackable die cut. 
I hope you enjoyed the card ,
have a nice day

Quyen


mercredi 11 décembre 2024

Sweet Christmas Deer


Hello crafty friends!


Less than two weeks until Christmas. I don’t know about you but I just love to do Christmas cards.

I’m sharing two cardswho features some Betterpress and Die cutting. 

I used the Day and Night Pine Pressplate to create this stunning background. I did two variations. Then I die cut the deer’s and the leaves from the Delightful Deer Die Set in different shades of brown and green. This die set is fabulous and you can add all the little details. I also added some floral die cuts with glitter cardstock from the Studio Light glitter Paper Pad. I find some sparkle adds that Christmas feel even more.

I assembled everything on a Oval I created with the Essential Modern Ovals. So, it has a nice platform to stand out.


Thanks for stopping by.


Adriana


Hallo Bastelfreunde!


Weniger als zwei Wochen bis Weihnachten. Ich weiß nicht, wie es euch geht, aber ich liebe es, Weihnachtskarten zu basteln.

Ich zeige euch heute zwei Karten, die mit Betterpress und Stanzformen gestaltet wurden. 

Ich habe die Day and Night Pine Pressplate verwendet, um diesen atemberaubenden Hintergrund zu gestalten. Ich habe zwei Varianten gemacht. 


Dann habe ich die Rehe und die Blätter aus dem Stanzset Delightful Deer in verschiedenen Braun- und Grüntönen ausgestanzt. Dieses Stempelset ist fabelhaft und man kann all die kleinen Details hinzufügen. Ich habe auch einige Blumen aus goldigem Glitterpapier aus dem Studio Light Glitter Paper Pad hinzugefügt. Ich finde, dass etwas Glitzer das Weihnachtsgefühl noch verstärkt.

Ich habe alles auf einem Oval montiert, das ich mit den Essential Modern Ovals erstellt habe. So hat es eine schöne Plattform, um hervorzustechen.


Danke fürs vorbeischauen.


Adriana