samedi 28 janvier 2023

Yana's Bloom


 Buongiorno carissime,
come state? son felicissima di mostrarvi queste due card che ho fatto con i prodotti di Spellbinders!


 Good morning dears,
how are you? i am so happy to show you these two cards i made with Spellbinders products!


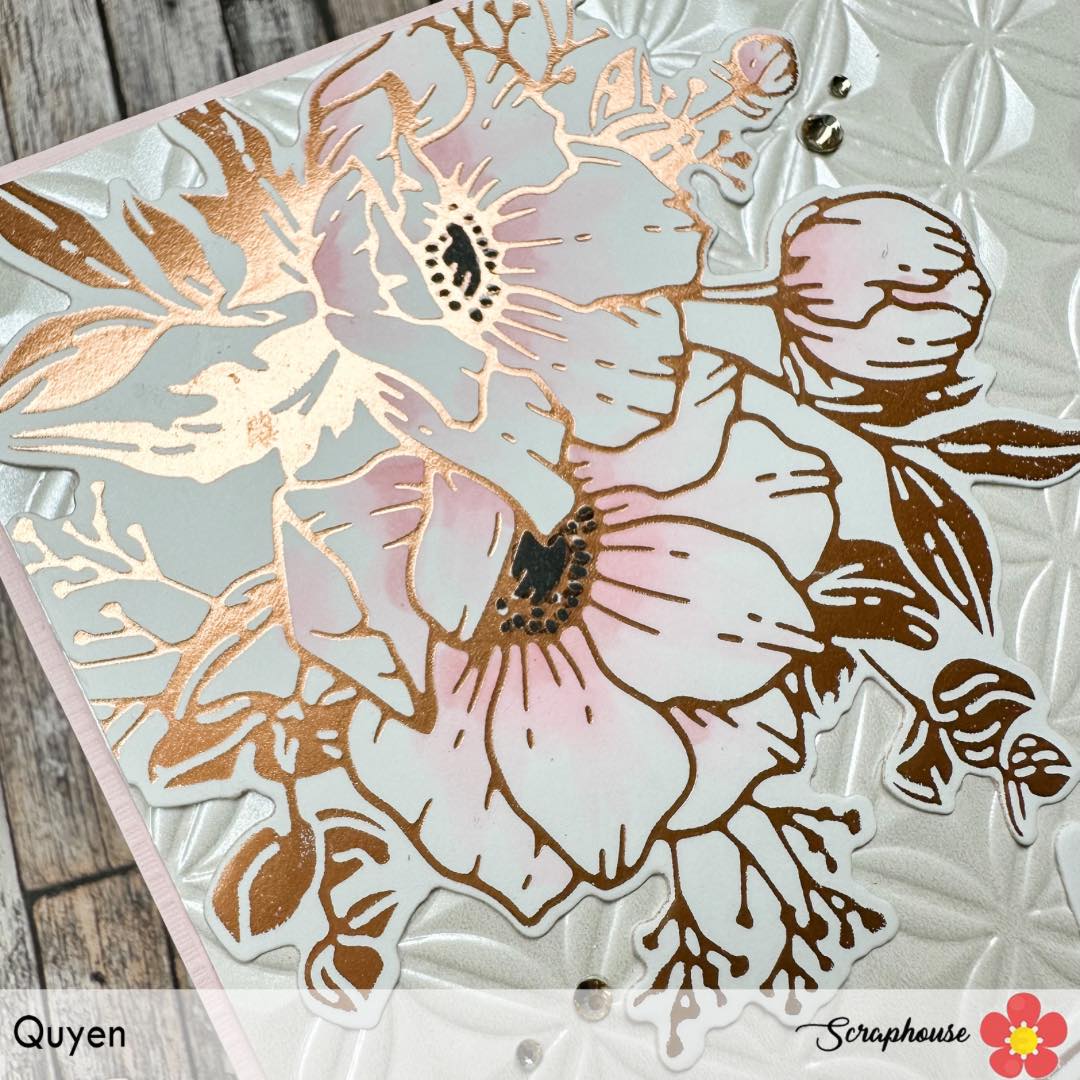
Di questa collezione Yana's Bloom il fiore della magnolia esiste sia nella versione foil sia fustella classica. Ero indecisa su che tipologia di card fare e alla fine ho deciso di usare entrambi i prodotti!
Ho cominciato con Magnolia Glimmer Hot Foil Plate & die set abbinando un foil oro dal Glimmer hor foil roll Metallics variety pack. Ho foilizzato due volte il fiore su un cartoncino rosa chiaro dal pad Pastels di StudioLight, ritagliato e poi colorato con il Distress ink Victorian Velvet. In seguito ho foilizzato più volto la Magnolia sul cartoncino che ho ritagliato come base per la mia cars. Ho aggiunto le magnolie colorate con del biadesivo spessorato per dare un po' di dimensione alla card. Infine ho aggiunto il sentiment Thanks dal set Yana's Layered script sentimen etched dies e delle mezze perle dorate di Pinkfresh studio.


From this Yana's Bloom collection, the magnolia flower exists in both foil and classic die cut versions. I was undecided on what type of card to make and finally decided to use both products!
I started with Magnolia Glimmer Hot Foil Plate & die set by matching a gold foil from the Glimmer hor foil roll Metallics variety pack. I foiled the flower twice on a light pink cardstock from StudioLight's Pastels pad, cut out and then colored with Distress ink Victorian Velvet. Next, I foil stamped more face Magnolia onto the cardstock that I cut out as a base for my cars. I added the colored magnolias with thick double-sided tape to give the card some dimension. Finally I added the sentiment Thanks from Yana's Layered script sentimen etched dies set and some gold half pearls from Pinkfresh studio.


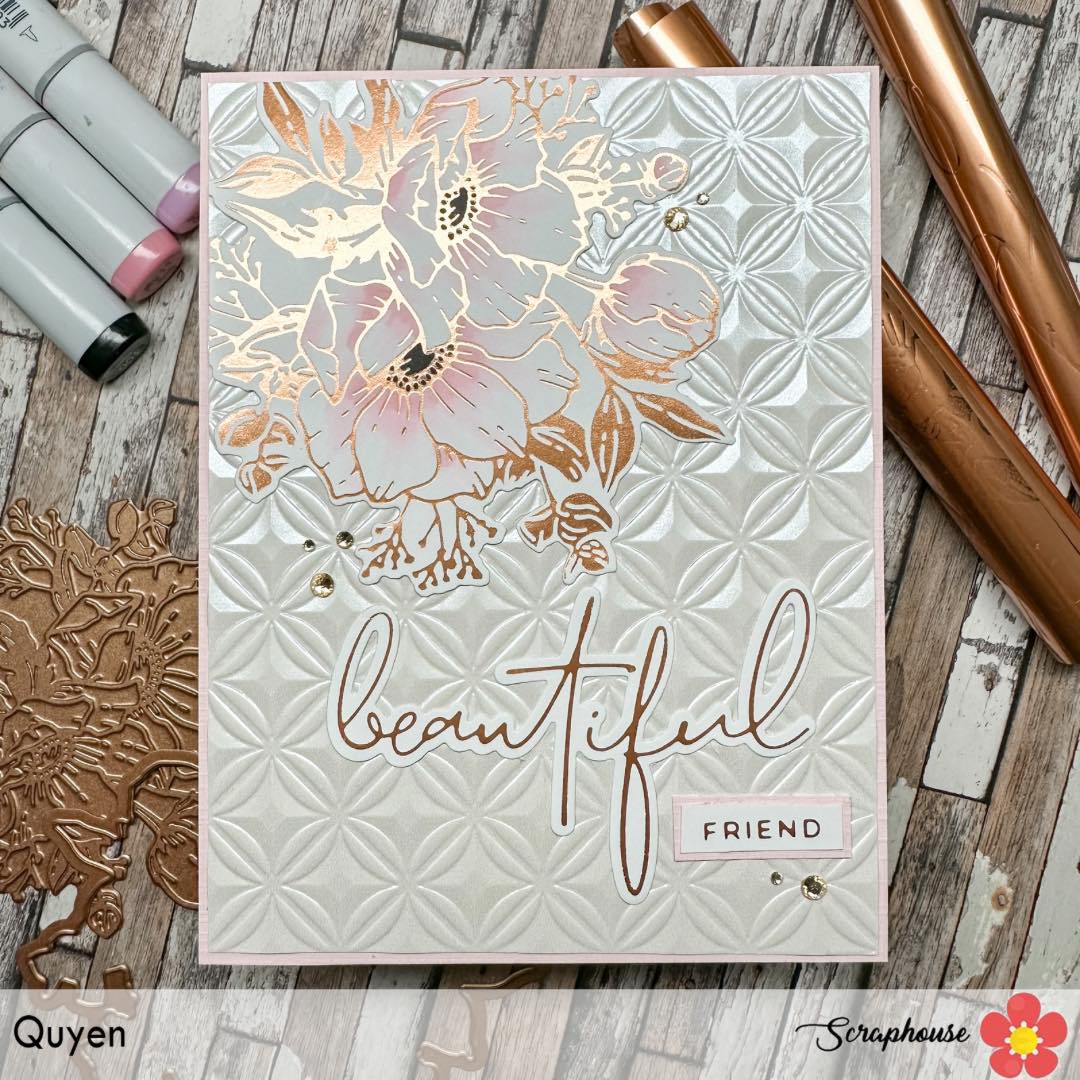
Per questa seconda card ho usato la fustella Magnolia Blooms Etched Dies, ho fustellato il fiore con un cartoncino lilla  , colorato il centro con il Distress ink Seedless preserves, rifustellato il fiore per ottenere il bordo dorato e la base in vellum. Per la base della mia card ho usato la Spellbinders Hot Foil Plate Diagonal Stripes Background ed ho aggiunto il sentiment da Hello, Friend SentimentsGlimmer Hot Foil Plate. 

Spero vi piacciano e che vi invogliano a provare la Hot foil Glimmer Machine!
Buon weekend!

For this second card I used Magnolia Blooms Etched Dies, die-cut the flower with a lilac cardstock , colored the center with Distress ink Seedless preserves, re-cut the flower to get the gold border and the vellum base. For the base of my card I used Spellbinders Hot Foil Plate Diagonal Stripes Background and added the sentiment from Hello, Friend SentimentsGlimmer Hot Foil Plate. 
I hope you enjoy them and that they will entice you to try the Hot foil Glimmer Machine!
Have a great weekend!
Quyen


samedi 21 janvier 2023

Crazy about Hot foil system

Buongiorno care creative,
sono cosi felice oggi di mostrarvi questa card! Recentemente ho iniziato ad appassionarmi alla Hot Foil Glimmer machine della Spellbinders! Per una creativa che adora i glitter e le cose luccicose, questa macchina é il top! Mi piace davvero tanto aggiungere questi dettagli brillanti con il foil e che con la polvere da embossing non si riesce ad ottenere un simile risultato.
Good morning dear crafty friends,
I am so happy today to show you this card! I recently started to be passionated about the Hot Foil Glimmer machine from Spellbinders! For a creative who loves glitter and shiny things, this machine is a must! I really love adding these shiny details with foil and that with embossing powder you can't get that kind of result.


Ho usato la nuovissima collezione di Yana Smakula per SpellbindersAnemones Glimmer Blooms Glitter Hot Plates and die set con il glimmer foil Satin rose gold, ed ho colorato l'interno dei fiori con i copic RV11, RV 00 e 100.

I used Yana Smakula's newest collection for Spellbinders, Anemones Glimmer Blooms Glitter Hot Plates and die set with Satin rose gold glimmer foil, and colored the inside of the flowers with Copic RV11, RV 00 and 100.


In seguito ho embossato un pezzo di cartoncino bianco perlato con l'embossing folder Orange peel quilt 3D, che vi confesso desideravo da tanto ed ero felicissima di aver trovato tutti queste novità nello shop.

Next I have embossed a piece of white pearl cardstock with the embossing folder Orange peel quilt 3D, which I confess I had been wanting for a long time and was overjoyed to have found all these new things in the shop.

Infine alla card ho aggiunto il sentiment dal set Hello, Friend Sentiments Glimmer Hot Foil Plate e ritagliato la scritta "beautiful" con la fustella coordinata Wonderful script sentiments etched dies e degli abbellimenti Color essentials gems Crystal mix.

Spero che con questo post sia riuscita a risvegliare un po' di curiosità su questi nuovi prodotti e che vi faccia appassionare alla glimmer! 
Buon weekend!
Un abbraccio

 
Finally I added to the card a sentiment from the set Hello, Friend Sentiments Glimmer Hot Foil Plate  and cut out the word "beautiful" with the coordinating Wonderful script sentiments etched dies and some Color essentials gems Crystal mix embellishments.

I hope that with this post I managed to arouse some curiosity about these new products and get you hooked on glimmer! 
Have a great weekend!
Crafty hug

Quyen


vendredi 13 janvier 2023

Long Time no Tea (Card with Lawn Fawn Cutting Dies)


Hello Everybody and Happy New Year!

I hope you arrived well in the New Year and am wishing you all the best.

Scraphouse is having a huge sale and the die cuts I am using for this card are also 25% reduced at the moment!! If I were you, I would check it out.

Today I am going to show you a rather simple card with a little fancy touch on the frame. I used the Teacup Diecuts as well as a sentiment from the stampset Tea-rrific and the "Woodgrain" Hotfoil stamp from Lawn Fawn.


Hallo zusammen und Frohes Neues Jahr!

Ich hoffe ihr seid gut im neuen Jahr angekommen und wünsche euch nur das Beste.

Im Moment ist bei Scraphouse eine grosse Aktion im Gange und die Stanzen, die ich für diese Karte benutzt habe, sind momentan auch um 25% reduziert!! Es lohnt sich vorbei zu schauen!

Heute zeige ich euch eine ziemlich einfache Karte mit einem Hauch mehr Extravaganz auf dem Rahmen. Dafür habe ich die Teetassen Stanze, einen Spruch vom Stempelset Tea-rrific, sowie den "Holzmaserung" Hotfoil Stempel von Lawn Fawn benutzt.


I started with cutting out the teacups with a thick paper and also a patterned paper to glue on top. The patterned paper I turned for one diecut so I could have the cups face eacht other. After adhering the two cup layers I die cut the cute little face and added some black paper behind the eyes and mouth as well as colored paper for "black tea with milk" and "greentea".
Then I put those aside and started with ink oxide blending my background with "Squeezed Lemonade", "Mustard Seed" and "Carved Pumpkin".


Zuerst habe ich die Teetassen aus dickem und aus dünnerem Design Papier ausgestanzt. Das Designpapier habe ich einmal von der Rückseite her gestanzt, damit die Teetassen einander anschauen können. Nach dem Zusammenkleben der Papierschichten habe ich das kleine, süsse Gesicht noch ausgestanzt. Danach habe ich schwarzes Papier hinter den Mund und die Augen geklebt sowie ein farbiges Papier für "schwarzen Tee mit Milch" und "Grüntee".
Dann habe ich die Tassen zur Seite gelegt und mit dem Inkblenden des Hintergrunds begonnen. Dazu habe ich Distress Oxide in den Farben "Squeezed Lemonade", "Mustard Seed" und "Carved Pumpkin" benutzt.


After the Inkblending I took out my Watercolors and some Sparkly color to speckle the background. Then I embossed the sentiment with Versamark Ink and black embossing powder.


Nach dem Inkblending habe ich meine Wasserfarben sowie eine glitzrige Farbe hervorgeholt um den Hintergrund zu besprenkeln. Danach habe ich den Spruch mit Versamark Tinte und schwarzem Embossing Puder embossed.


Then I got out my Spellbinder Hotfoil System and heated up the Woodgrain Stamp from Lawn Fawn,
attached it with washi tape over some yellow hotfoil to a brown paper and ran it through the die cut machine. After that I cut out the frame I wanted around my little scene.


Danach habe ich mein Spellbinder Hotfoil System hervorgeholt und den Holzmasserungs Stempel von Lawn Fawn aufgeheizt. mit Washi Tape über die gelbe Folie auf einem braunen Papier befestigt. Nachdem ich dies durch die Stanzmaschine gekurbelt hatte habe ich den Rahmen, den ich um meine kleine Szene möchte, aus dem Papier gestanzt.


Then I adhered everything on my Background. the cups with some smalle foamdots behind and the frame with a white shadow layer (which was not on purpose). 
And just like that the card is finished! It is quite simple except for the Hotfoiling on the frame.

Thank you so much for stepping by and I am wishing you a lovely Day!
Andrea


Danach habe ich alles auf dem Hintergrund befestigt, die Teetassen mit kleinen Abstandshaltern und den Rahmen mit einem weissen Schatten dahinter (war keine Absicht).
Et voilà schon ist die Karte fertig! Sie ist ziemlich einfach ausser das Hotfoilen auf dem Rahmen.

Vielen Dank fürs Vorbeischauen und ich wünsche Dir einen schönen Tag!
Liebi Grüessli
Andrea