vendredi 26 août 2022

Marianne Design, Lawn Fawn and Distress Oxides

  Good morning everybody 😃

I am very excited to join the scraphouse design team! 🥳 My name is Andrea Auf der Maur, I live in Schaffhausen with two cats (Muzzina & Zilly) and I started making cards two years ago after seeing a Lawn Fawn video on Youtube. Today I would like to share a short tutorial for a card using the swan from Marianne Design Collectables and the Bayou Backdrop as well as the Cattails Border from Lawn Fawn.

Guetä Morgä mitenand 😃

Ich freue mich sehr neu im Design Team von Scraphouse dabei zu sein! 🥳 Mein Name ist Andrea Auf der Maur, ich wohne in Schaffhausen mit zwei Katzen (Muzzina & Zilly) und habe vor zwei Jahren mit dem Karten basteln begonnen nachdem ich auf Youtube ein Lawn Fawn Video gesehen habe. Heute möchte ich euch in wenigen Schritten zeigen wie ich den Schwan von Marianne Design Collectables, sowie die Bayou Backdrop Stanze und Cattails Border von Lawn Fawn für eine Karte eingesetzt habe.


I started with inking the background with Ranger Distress Oxides in the colors Broken China, Cracked Pistacchio, Salvaged Patina and Shaded Lilac. Then I sprinkled some water and perfect pearl splatters over it for some texture.

Zuerst habe ich den Hintergrund mit Ranger Distress Oxides in den Farben Broken China, Cracked Pistacchio, Salvaged Patina und Shaded Lilac eingefärbt. Danach habe ich etwas Wasser sowie Perfect Pearls darüber gesprenkelt um dem Hintergrund mehr Effekt zu verleihen.

Then I die cut the Bayou Background in three different colors and the Cattails Border in two different greens for each card. The Bayou Background needed some persuading and the use of a craft knife as it wasn‘t properly cut through in all the places. Also I prepared the swans but I had done that on another day to have them ready.

Als nächstes habe ich für jede Karte drei verschieden farbige Bayou Backgrounds und je zwei unterschiedlich grüne Cattails Border ausgestanzt. Die Bayou Backdrops brauchten etwas Überredung und den Einsatz vom Bastelmesser, da sie nicht an allen Stellen sauber ausgestanzt waren. Die Schwäne hatte ich schon am Tag zuvor vorbereitet. 

All that was left was to glue it all together starting with arranging the colors from the Bayou Backdrop. Then I added the sentiment „I just swan to say have a happy day“ from the stampset Swan Soirée from Lawm Fawn to the cattails border with black embossing powder. And finally adhered the swan in the middle with some foam squares and then attached the Cattails border with even higher foam strips. All in all I created four cards like that.

Alles was es nun noch zu tun gab war das Ganze zusammenzukleben. Ich begann mit dem Arrangieren der Farben des Bayou Hintergrunds. Danach fügte ich den Spruch „I just swan to say have a happy day“ vom Stempelset Swan Soirée von Lawn Fawn mit schwarzem Embossing Puder auf die Cattails Border. Zu guter letzt setzte ich die Schwäne auf Foam Pads in die Mitte und klebte die Schilf Bordüre mit noch höheren Foam Streifen auf die Karte. Insgesamt sind so vier Karten entstanden.


After finishing those front panels I chose the colors for the cardbases and adhered the panels on it. Two I adhered on a white card, one on light green and one on lilac.
Et voilà, cards are done! 😃

Nachdem die Szene fertig gestellt wurde entschied ich welche Farben ich für die Faltkarten benutzen wollte. Ich entschied mich für zwei weisse und je einen mintgrünen und lilanen Kartenrohling.         Tadaaa, fertig! 😃


Thank you for stepping by and I hope you are having a lovely day! ☺️

Merci fürs verbii luegä und ich wünschä ganz en schöne Tag! ☺️


mercredi 24 août 2022

Mes P'tits Ciseaux - Pitchoun

Bonjour à toutes,

Me voilà de retour avec un mini album de naissance, réalisé avec une de mes collection favorite.

J'ai utilisé un certain nombre de découpes réalisées avec la CAMEO. J'adore cette machine, elle permet vraiment un grand nombre de réalisations tellement mignonnes. Il faut parfois un peu de patience pour les assemblages, mais le résultat en vaut la peine.

Je vous souhaite une toute belle journée

Manu 


jeudi 21 juillet 2022

Lavinia stamps and stencils


Buongiorno anime creative!
come state? avete visto che fino a questa settimana ci son offerte sui prodotti di Lavinia stamps
Io son rimasta subito affascinata dagli stencils che tra l'altro sono giganteschi!!! Se si calcolano bene le misure si possono creare almeno 2 card con uno sfondo fatto con questi stencils.
Vi spiegherò in breve come ho creato queste 2 card... 


Good morning creative soul!
how are you? did you see that until this week there are offers on Lavinia stamps products? 
I was immediately fascinated by the stencils which by the way are gigantic!!! If you calculate the measurements right you can create at least 2 cards with a background made with these stencils.
I will briefly explain how I created these 2 cards.... 


Per la card più piccola ho usato lo stencil Dynamic, dove ho sfumato il bellissimo nuovo colore di Tim Holtz Uncharted Mariner  e Chipped Sapphire Oxide inks. Lasciando sempre lo stencil attaccato al cartoncino, ho fatto degli schizzi con un acquarello argentato per dare un po' di effetto magico allo sfondo.
Inseguito ho timbrato con lo StazOn la fatina Freya sempre di Lavinia stamps su un vellum perlato della Lawn Fawn, e dopo aver ritagliato i contorni l'ho incollata allo sfondo ed ho aggiunto sulle ali un po' di Crystal Stickles. Il sentiment che ho usato é Fairy happy birthday che ho embossato con una polvere argento.

For the smaller card I used the Dynamic stencil, where I blended Tim Holtz's beautiful new color Uncharted Mariner and Chipped Sapphire Oxide inks. Always leaving the stencil attached to the card, I made some splashes with a silver watercolor to give some magical effect to the background.
Next I stamped the fairy stamps Freya , also from Lavinia stamps, on the pearlescent vellum from Lawn Fawn with StazOn ink, and after cutting out the outlines I glued it to the background and added some Crystal Stickles on the wings. The sentiment I used is Fairy happy birthday which I embossed with a silver powder.


Per la seconda card, la slimline, ho usato lo stencil Resplenish  con i seguenti Oxide inks: Tumbled Glass, Rustic WildernessBlack Sooth. Ho di nuovo timbrato la fatina dal set Fairytale sul vellum perlato. Le ali della fatina ho effettuato una seconda timbrata con il Versamark ed embossato con una polvere dorata glitterata. Infine ho aggiunto il sentiment Make a wish e di Modascrap.
Spero vi piaccia, a presto Quyen.

For the second card, the slimline, I used the Resplenish stencil with the following Oxide inks: Tumbled Glass, Rustic Wilderness, Black Sooth. I again stamped the fairy from the Fairytale set on the pearl vellum. The fairy's wings I did a second stamping with Versamark and embossed with a gold glitter powder. Finally I added the Make a wish sentiment and Modascrap sentiment.
Hope you like it, see you soon Quyen.


mercredi 29 juin 2022

Pimp My Notes


Buongiorno carissime!

come state? Sono felicissima se oggi siete qui a leggere questo mio post! Come vi ho accennato la volta prima, adoro i marchi di prodotti francesi ma non so bene come usarli. Oggi ho voluto fare un make over ad un block notes. Ho acquistato un semplice block notes alla Migros  e aggiungendo 4mm in più della misure dal blocco, ho tagliato 2 rettangoli di cartone vegetale da 1,5 mm.  Ho rivestito con la carta  di Florileges Les papiers effet toile. Poi successivamente ho usato lo stencil Pochoir Trio de Roses con la pasta della Lawn Fawn Stencil Paste Pearl.

 Good morning dear ones!

how are you? I am so happy if you are here today to read this post of mine! As I mentioned to you before, I love French product brands but I don't really know how to use them. Today I wanted to make a make over to a notepad. I bought a simple notepad at Migros and adding 4mm more than the measurements from the pad, I cut 2 rectangles of 1.5mm vegetable cardboard.  I covered them with Florileges Les papiers effet toile paper. Then next I used the Pochoir Trio de Roses stencil with Lawn Fawn Stencil Paste Pearl.


All'interno della copertina decorata con lo stencil ho incollato una mattatura di un cartoncino rosa cipria di Florileges della collezione Sakura,  poi ho unito i due cartoncini con della carta nera ed incollato il block notes. Per le decorazioni ho usato sempre la collezioni Liberty di Florileges: Outils De Decoupe Juste Nous , Tampon clear Flower Power.

On the inside of the stencil-decorated cover, I glued a matting of a powder pink card from Florileges' Sakura collection, then joined the two cards with black paper and glued the notepad. For the decorations I used the Liberty collections of Florileges: Outils De Decoupe Juste Nous,Tampon clear Flower Power.


Anche all'interno della copertina ho usato un sentiment del set Tampon clear Flower Power e abbellito con lo stencil paste.
Trovo che sia un progetto molto semplice e che sia carino per fare un pensierino agli amici! 
Grazie di tutto alla prossima!

Also on the inside of the cover I used a sentiment from the Tampon clear Flower Power set and embellished with stencil paste. I find it a very simple project and it's nice to make a little gift for friends! Thanks for everything, see you next time!

Quyen


jeudi 23 juin 2022

Best Day Ever

Buongiorno creative!

come state? avete progettato le vostre vacanze? Mio marito ed io andremo in vacanza settimana prossima ma prima di partire, volevo approfittare a fare un paio di card! Il biglietto che ho preparato oggi é per il compleanno di una delle mie migliori amiche che compirà 40 anni! Ho voluto fare una card un po'diversa dalle classiche card per i compleanni con cifre tonde, perciò ho optato per usare la sua iniziale!:D


Good morning creative!

how are you? have you planned your vacations? My husband and I are going on vacation next week but before we leave, I wanted to make a couple of cards! The card I made today is for the birthday of one of my best friends who will be turning 40! I wanted to make a card a little different from the classic birthday cards using numbers, so I used her initial!:D


Per lo sfondo della card ho usato il nuovo paper pad di Florileges Les papiers effet Toile della nuova collezione De fil en Aiguille. Adoro questo effetto jeans ma anche l'altro pad effetto tela!
Ho timbrato le rose Fleurs Effet Brodé in due maniere diverse, la prima su un cartoncino bianco ed embossato con della polvere nera, mentre la seconda su del vellum usando tre inchiostri di colori differenti ( VersaMagic Azur d'Egée e Profondeurs de l'océan e Memento Noir Tuxedo )


For the background of the card I used the new paper pad by Florileges Les papiers effet Toile from the new collection De fil en Aiguille. I love this denim effect but also the other canvas effect pad!
I stamped the Fleurs Effet Brodé roses in two different manners, the first on a white card and embossed with black powder, and the second on vellum using three different color inks ( VersaMagic Azur d'Egée and Profondeurs de l'océan and Memento Noir Tuxedo )


In seguito ho usato la fustella di Sokai Les couronnes che ho embossato in argento insieme al timbro L del set Lettre L di Florileges, che ho infine colorato con i Copic.
Ho assemblato insieme tutti gli elementi ed aggiunto delle mezze perle di Modascrap.
Spero vi piaccia il risultato finale!
Buona giornata di sole a tutti,

Next, I used the Sokai Les couronnes die that I embossed in silver along with the stamp L from the set Lettre L from Florileges, which I finally colored with Copics.
I assembled all the elements together and added half beads from Modascrap.
I hope you like the final result!
Have a great sunny day everyone,


Quyen Rabet


dimanche 19 juin 2022

Valérie // Welcome baby

Bonjour!

J'espère que vous allez bien avec cette canicule! C'est incroyable! Je ne sors que le soir quand le soleil est couché, sinon il fait trop chaud! Je suis donc dans ma scraproom à bricoler. J'avais envie de faire une carte pour une naissance. 


Pour cette carte, j'ai utilisé le die "landau" de Mes P'tits Ciseaux


Le fond imprimé texte est tamponné avec la Distress Oxide Saltwater Taffy.


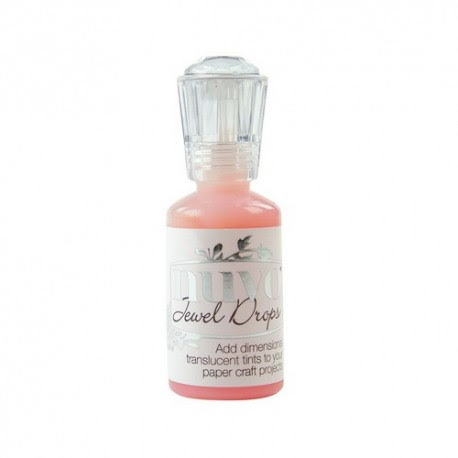
Pour terminer, j'ai ajouté quelques Nuvo Jewel Drops en Rose Water.


Je vous souhaite une excellente fin de week-end et je vous dis à très bientôt!


Valérie


lundi 6 juin 2022

When in doubt, just add Glitter!


Buongiorno Creativi!

Come state? spero che con questo post di oggi vi possa far cominciare la giornata in maniera luminosa e luccicante! Finalmente dopo parecchio tempo sono riuscita ad usare la Platform Pop-Up di Lawnfawn!!! Yuppieeeee!!! Non é una fustella meravigliosa? Vi lascio qui il video ufficiale per vederne l'assembaggio:


 Good morning crafty friends,

How are you? With this post I wish that your day may be bright and shiny! Finally after quite some time I was able to use Lawnfawn's Pop-Up Platform!!! Yuppieeee!!! Isn't that a wonderful die cut? I'll leave you the official video here to see how it works:


Ho usato il paper pad All the Dots per ritagliar base della mia platform e un foglio di Bazzil color Blue Calypso per gli abbellimenti, seguendo le procedure del video. I personaggi di questa card sono delle plance Just add Glitter e Bubbles of Joy che ho colorato con i Copics. Ho ritagliato da un cartoncino glitterato le lettere per comporre la parola GLITTER con la fustella Henry's ABCs.


I used the All the Dots paper pad to cut out the base of my platform and a sheet of  Bazzil Blue Calypso for the embellishments, following the procedures in the video. The characters on this card are from Just add Glitter and Bubbles of Joy stamp sets that I colored with Copics. I cut out from glitter cardstock the letters to make up the word GLITTER with Henry's ABCs die cut.


Dopo di che ho ritagliato dell'acetato resistente alle temperature alte ed ho embossato della polvere glitter intorno al cerchio e poi incollato i sentiments.

After that I cut out some high temperature resistant acetate and embossed some glitter powder around the circle and then glued the sentiments.


Infine ho incollato tutto alla base della struttura della platform. 
Spero che vi piaccia questa card glitterosa e vi auguro una splendida giornata!

Vi mando tanta luce

Finally, I glued everything to the base of the platform structure. 
I hope you enjoy this glitter card and have a wonderful day!

Sending you lots of light


Quyen Rabet


lundi 23 mai 2022

Buon lunedì care creative, 

come state? come avete passato questo weekend? chissà se avete modo di creare? con tutte i prodotti nuovi che sono usciti, penso che ci sia l'imbarazzo delle scelta su cosa usare per prima...
Oggi. voglio mostrarvi un'altra card che ho realizzato usando uno dei nuovi timbri di Chou&Flowers Fleur d'ete.


Happy Monday dear creatives, 

How are you? how did you spend this weekend? Wonder if you got a chance to create? with all the new products that have come out,  I think there is too difficult to choose on what to use first... :D
Today. I want to show you another card I made using one of the new Chou&Flowers Fleur d'ete stamps.


Esattamente non sapevo che genere di card avrei voluto fare, ma ho cominciato partendo dalla colorazione del fiore con i copic. Mi sembrava abbastanza importante come figura e quindi ho pensato che per dargli risalto sarebbe stato bello creare uno sfondo che richiamasse il fiore ma che rimanesse neutrale. Per cui ho timbrato il sentiment e appoggiato il mio fiore colorato e ritagliato dove mi sarebbe piaciuto posizionarlo. Con l'aiuto della plastica del timbro, ho guardato dove posizionare le varie timbrate di sfondo.

I didn't know exactly what kind of card I wanted to make, but I started by coloring the flower with Copic markers. It was quite big and it seemed an important element for the card itself, so I thought that to emphasize it, it would be nice to create a neutral background that would stand out the flower. So I stamped the sentiment and placed my colored and cut-out flower. With the help of the stamp plastic, I looked at where to place the various background stamps.


Infine ho completato la card mettendo una monocromatica di Florileges Design Rose Framboise che richiamasse il colore del fiore stesso.
Finally, I completed the card by placing a monochrome of Florileges Design Rose Framboise that echoed the color of the flower itself.


Spero che vi piaccia questa slim card, vi auguro una splendida giornata,
I hope you like this slim card, wish you a wonderful day,
Quyen, @shiny_scrap

vendredi 20 mai 2022

Valérie // Cartes en Sokai

Bonjour à tous!

J'espère que vous allez bien! Je suis ravie de vous montrer mes deux dernières réalisations pour Scraphouse avec les produits en boutique. J'adore la marque française Sokai alors lorsque j'ai vu les dies, les tampons et les papiers de cette marque, il me les fallait absolument.

J'ai donc décidé de faire 2 cartes format 11x11cm dans un style clean and simple avec les papiers et les dies "fleur de lys" et "anémones". Vous trouverez les produits en boutique.


Pour ma 1ère carte, j'ai découpé un papier imprimé papillon de 10x10cm ainsi qu'une bande de papier vert déchiré sur les bords. J'ai découpé la fleur de lys dans un papier blanc et ajouté un petit noeud avec de la twine rose. Le sentiment n'est pas de Scraphouse. J'ai terminé en ajoutant quelques dots de Nuvo Crystal Drops.


Pour ma 2ème carte, j'ai découpé un morceau de papier blanc que j'ai maté avec un bout de papier vert. J'ai ensuite ajouté des goutelettes de peinture rose et découpé les anémones dans un papier blanc et le fond en papier imprimé. Un sentiment et quelques dots de Nuvo Crystal Drops.


Voilà, j'espère que cela vous plaît!

Je vous dis à bientôt!

xx

Valérie

lundi 16 mai 2022

Week-end Breton

 Ciao care creative!

Che emozione, questo é il mio primissimo post per Scraphouse! Sono stra felice di far parte di questo DT e di poter condividere con voi le meraviglie che ha in negozio Margaretha! Premetto che adoro tantissimo i marchi francesi , trovo che abbiano questo stile fresco, moderno e romantico, ma che purtroppo non so bene abbinare. Per me sarà una grandissima sfida creare dei progetti, ma la accolgo con gioia perchè mi piace mettermi alla prova e imparare nuove tecniche.


Hello dear crafty friends!

How exciting, this is my very first post for Scraphouse! I am so happy to be part of this DT and to be able to share with you the amazing crafty items of Margaretha's store! I will preface by saying that I love French brands so much , I find that they have this fresh, modern and romantic style, but unfortunately I don't know how to match it well. It will be a huge challenge for me, but I welcome it because I like to challenge myself and learn new techniques.


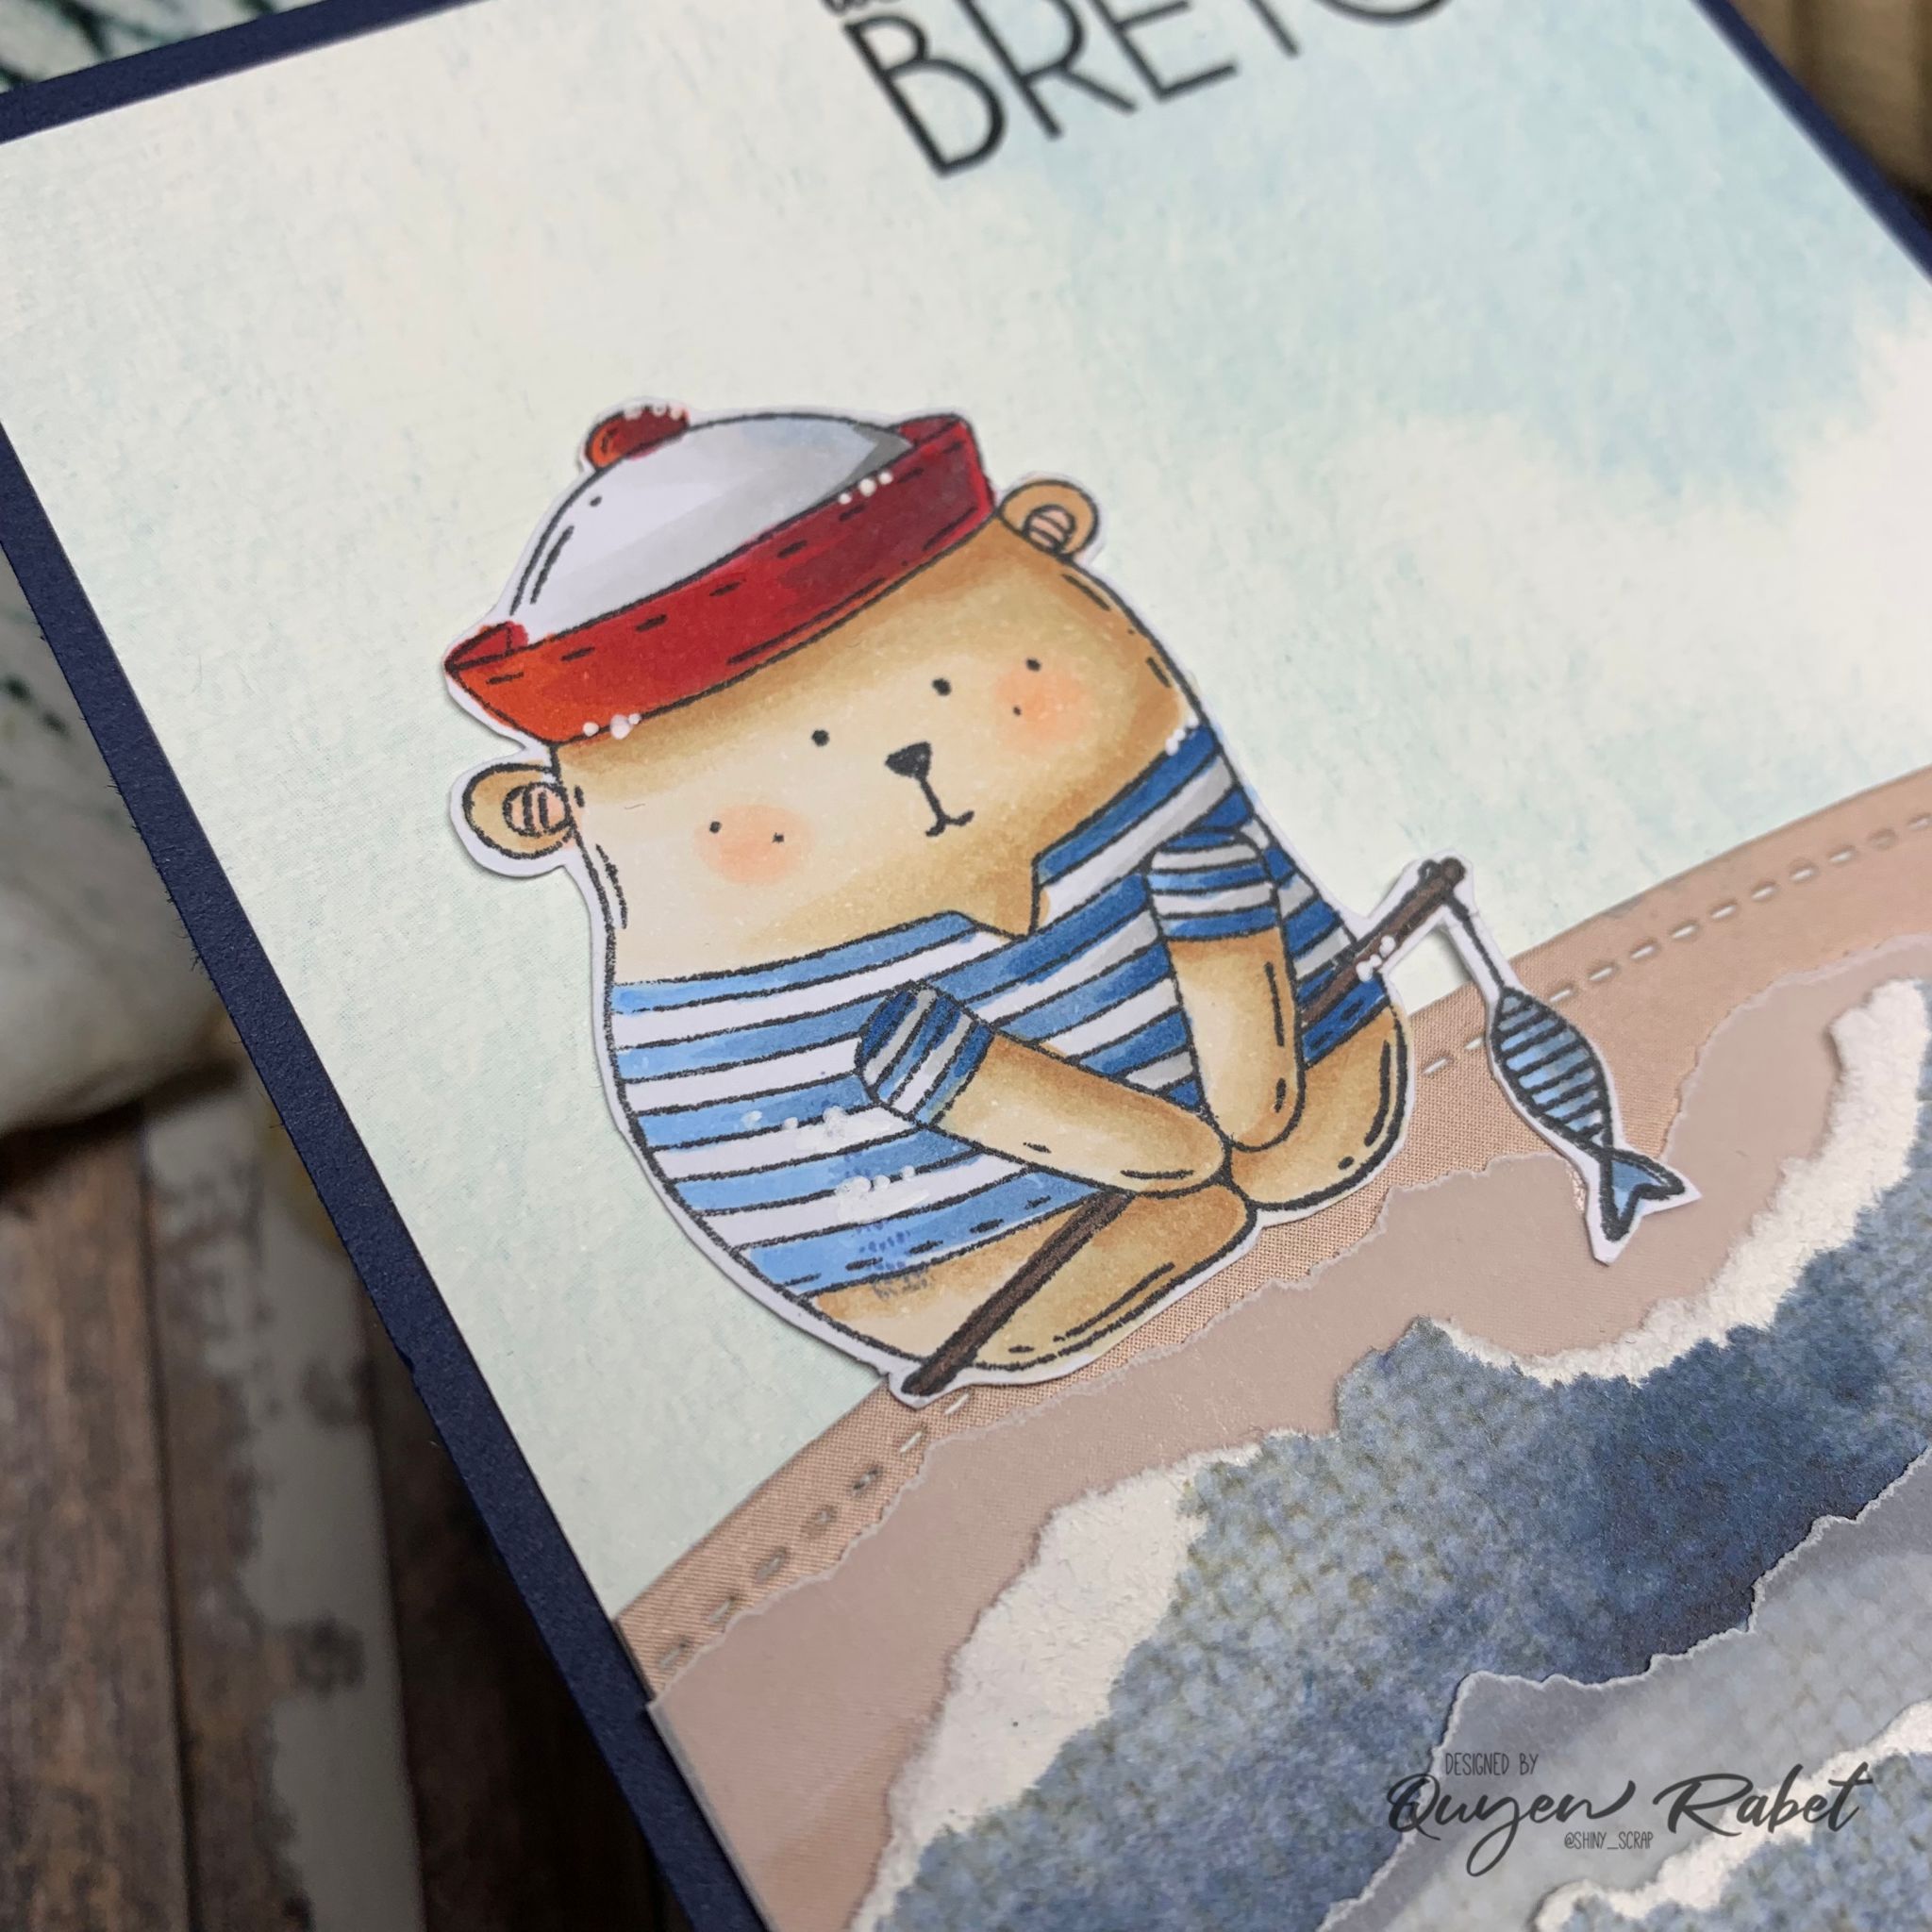
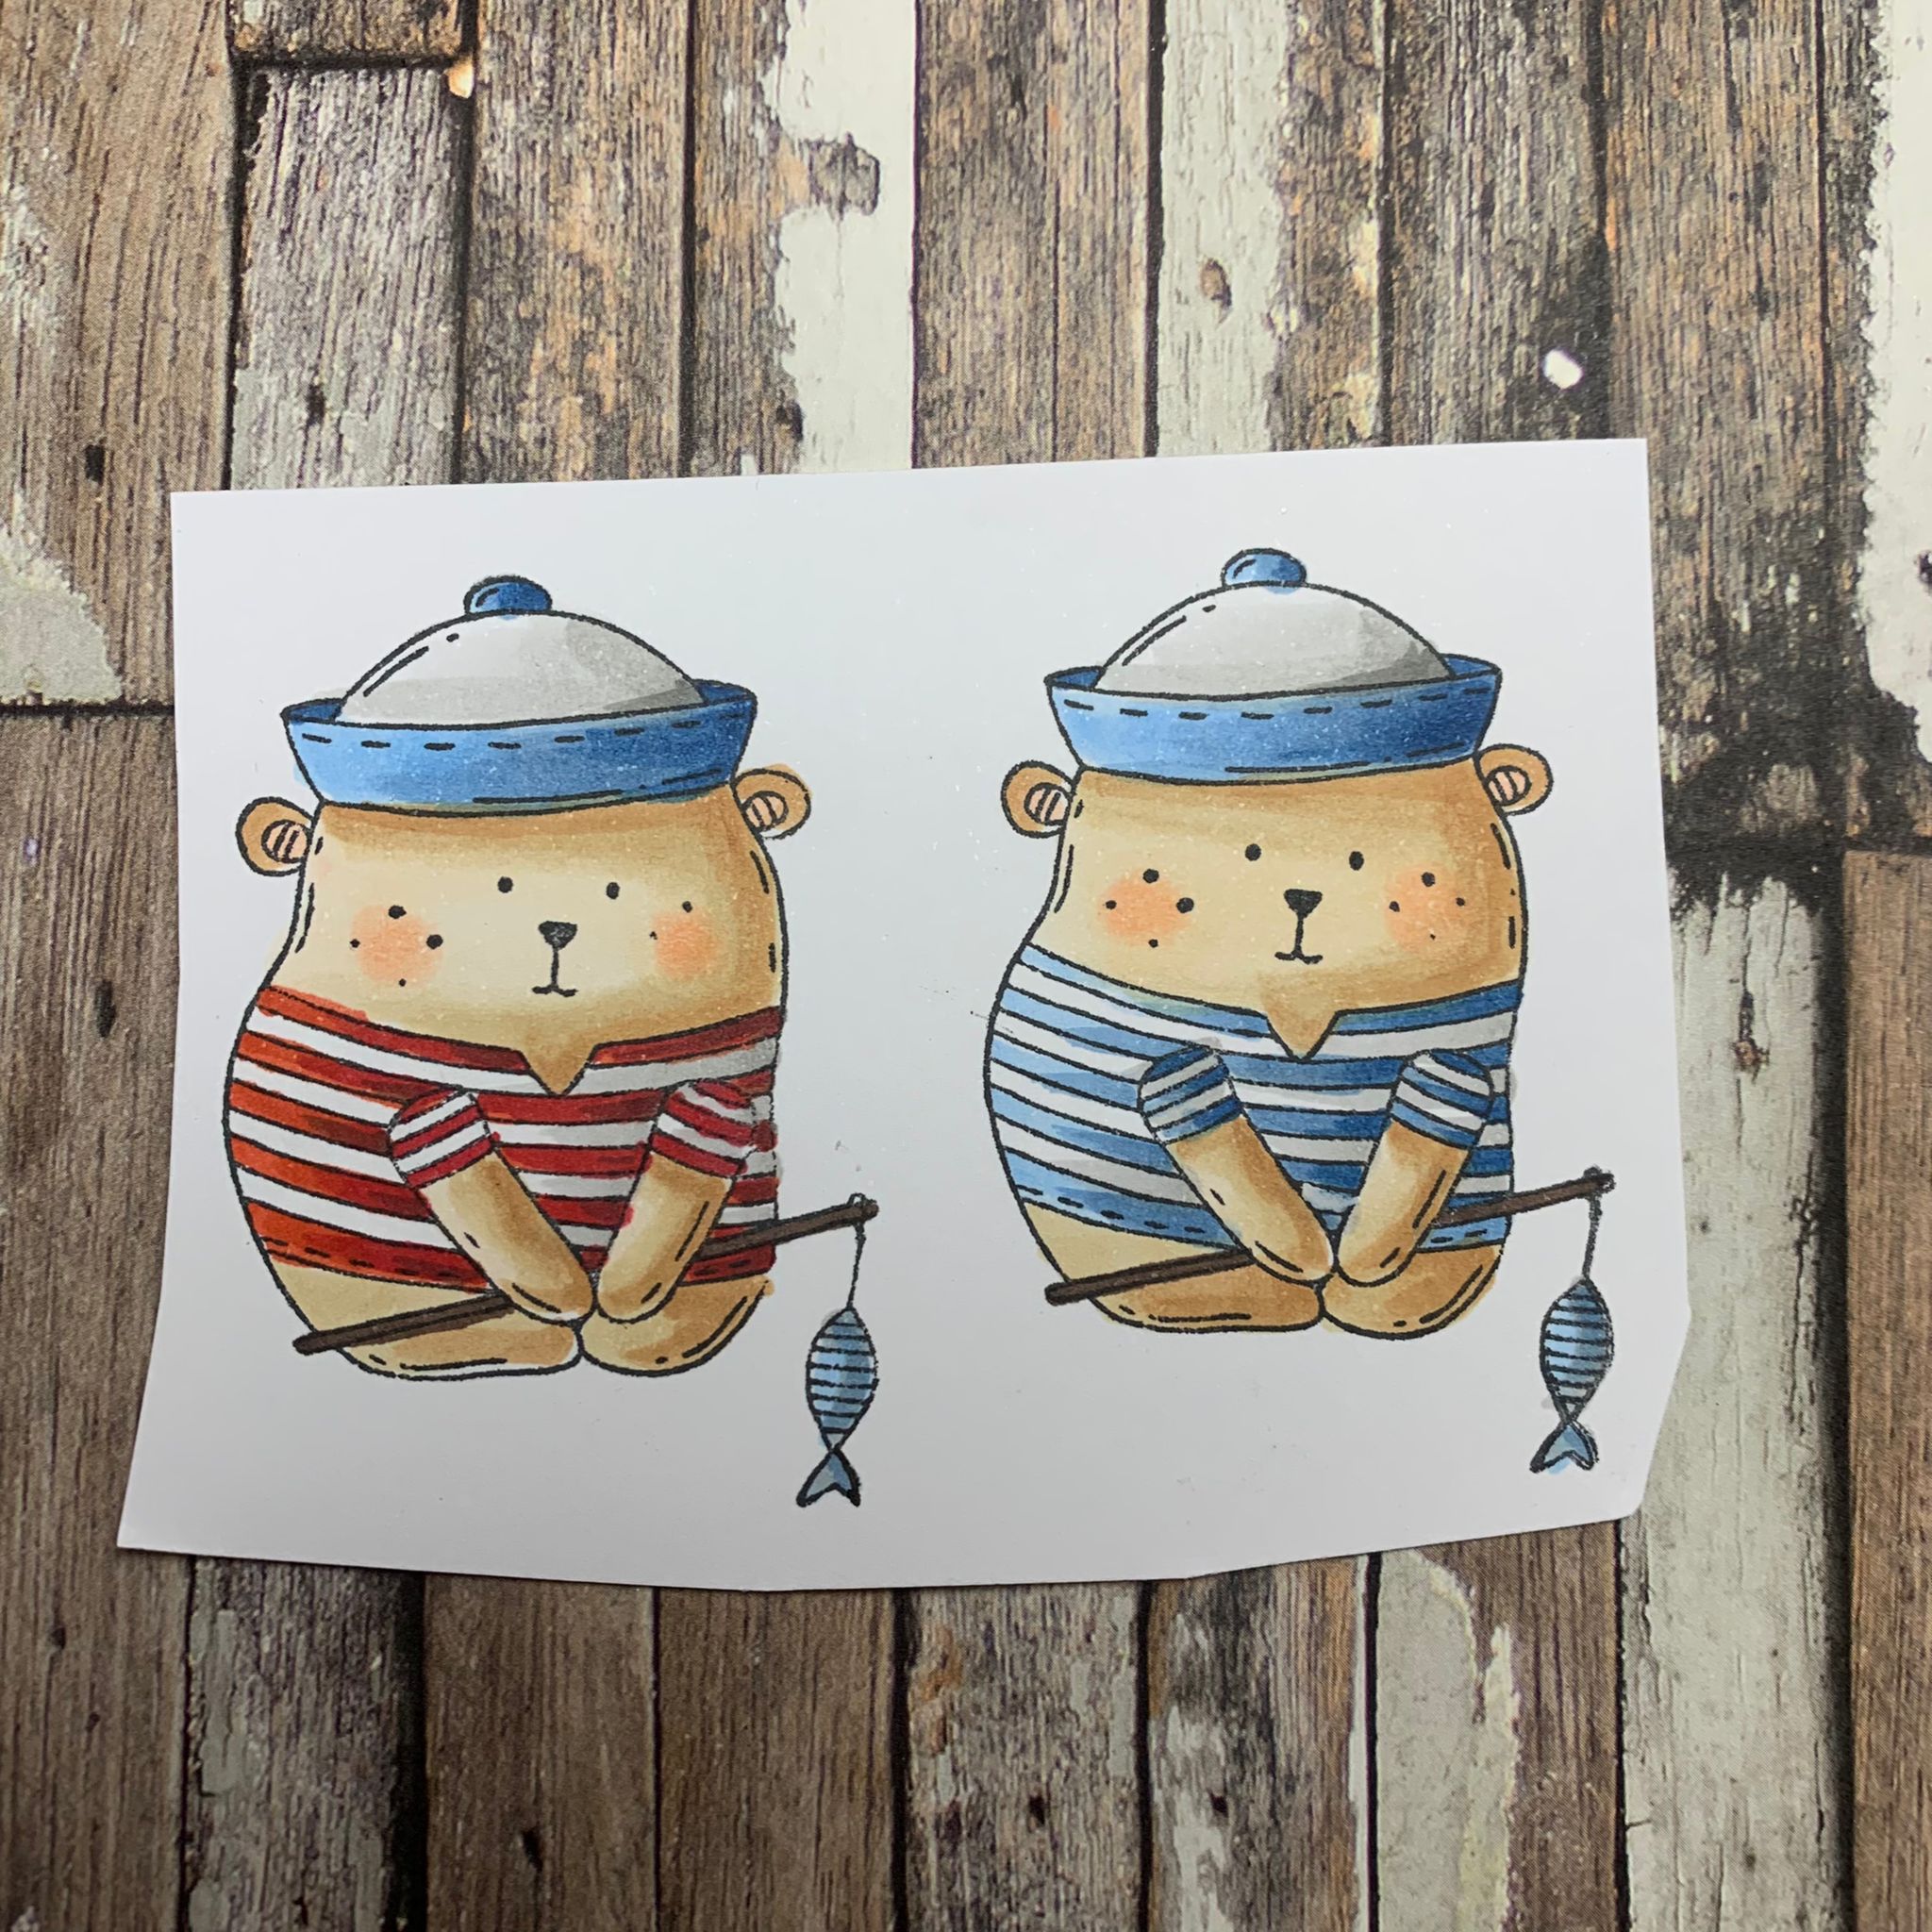
Ho cominciato a timbrare sulla carta Transotype il timbro Doudou Marin di Chou&Flowers e l'ho colorato con i pennarelli Copic. Ho fatto un paio di prove per vedere quale combinazioni di colori dell'orsetto potesse piacermi di più. Alla fine quello che preferivo era quella con il cappellino rosso. Chissà a voi quale ha colpito di più?


I started stamping Chou&Flowers' Doudou Marin stamp on Transotype paper and colored it with Copic markers. I did a couple of trials to see what color combinations of the teddy bear I liked best. 
In the end the one I preferred was the one with the red cap. I wonder which one did you like the most?


Ho pensato di creare una piccola isoletta di sabbia con la fustella Lawn fawn Slimline Simple Stitched Hillside Borders con la carta dal pad Essentials paper pad Naturals di StudioLight.
Ho voluto creare l'effetto delle onde del mare strappando da carta di ModaScrap Memories on Canvas e del vellum e li ho incollati in maniera alternata all'isoletta.

I planned to create a small island with Lawn fawn Slimline Simple Stitched Hillside Borders die cut using a sand color paper from StudioLight's Essentials paper pad Naturals.
I wanted to create the effect of sea waves by ripping from ModaScrap Memories on Canvas paper and some vellum and glued them to "the little island".


Per lo sfondo della card ho trovato che la carta uni Bleu Glacier di Florilèges design fosse perfetta per creare l'effetto del cielo e mi sembrava stesse bene anche con il colore blu jeans del mare.
Infine ho incollato per ultimo un cartoncino blu scuro Bazzill per incorniciare la card. Per completare la card in bellezza ho aggiunto il sentiment Week-end Breton dal set Coeur Breton di Chou & Flowers.


For the background of the card, I thought that uni Bleu Glacier paper from Florilèges design could be perfect for creating the effect of the sky, and it also seemed to go well with the denim blue color of the sea.
After that, I glued everything on a dark blue Bazzill cardstock. To complete the card, I added the Week-end Breton sentiment from the  Coeur Breton by Chou & Flowers.


Non vi sembra di sentire la brezza del mare? se chiudo gli occhi la riesco a sentire!
Spero vi sia piaciuta la card!

Can you feel the sea breeze? If I close my eyes I can feel it!
I hope you enjoyed the card!


Crafty hugs

Quyen Rabet