mardi 20 septembre 2022

Individuelle Toblerone Verpackung

 Hallo miteinander :)

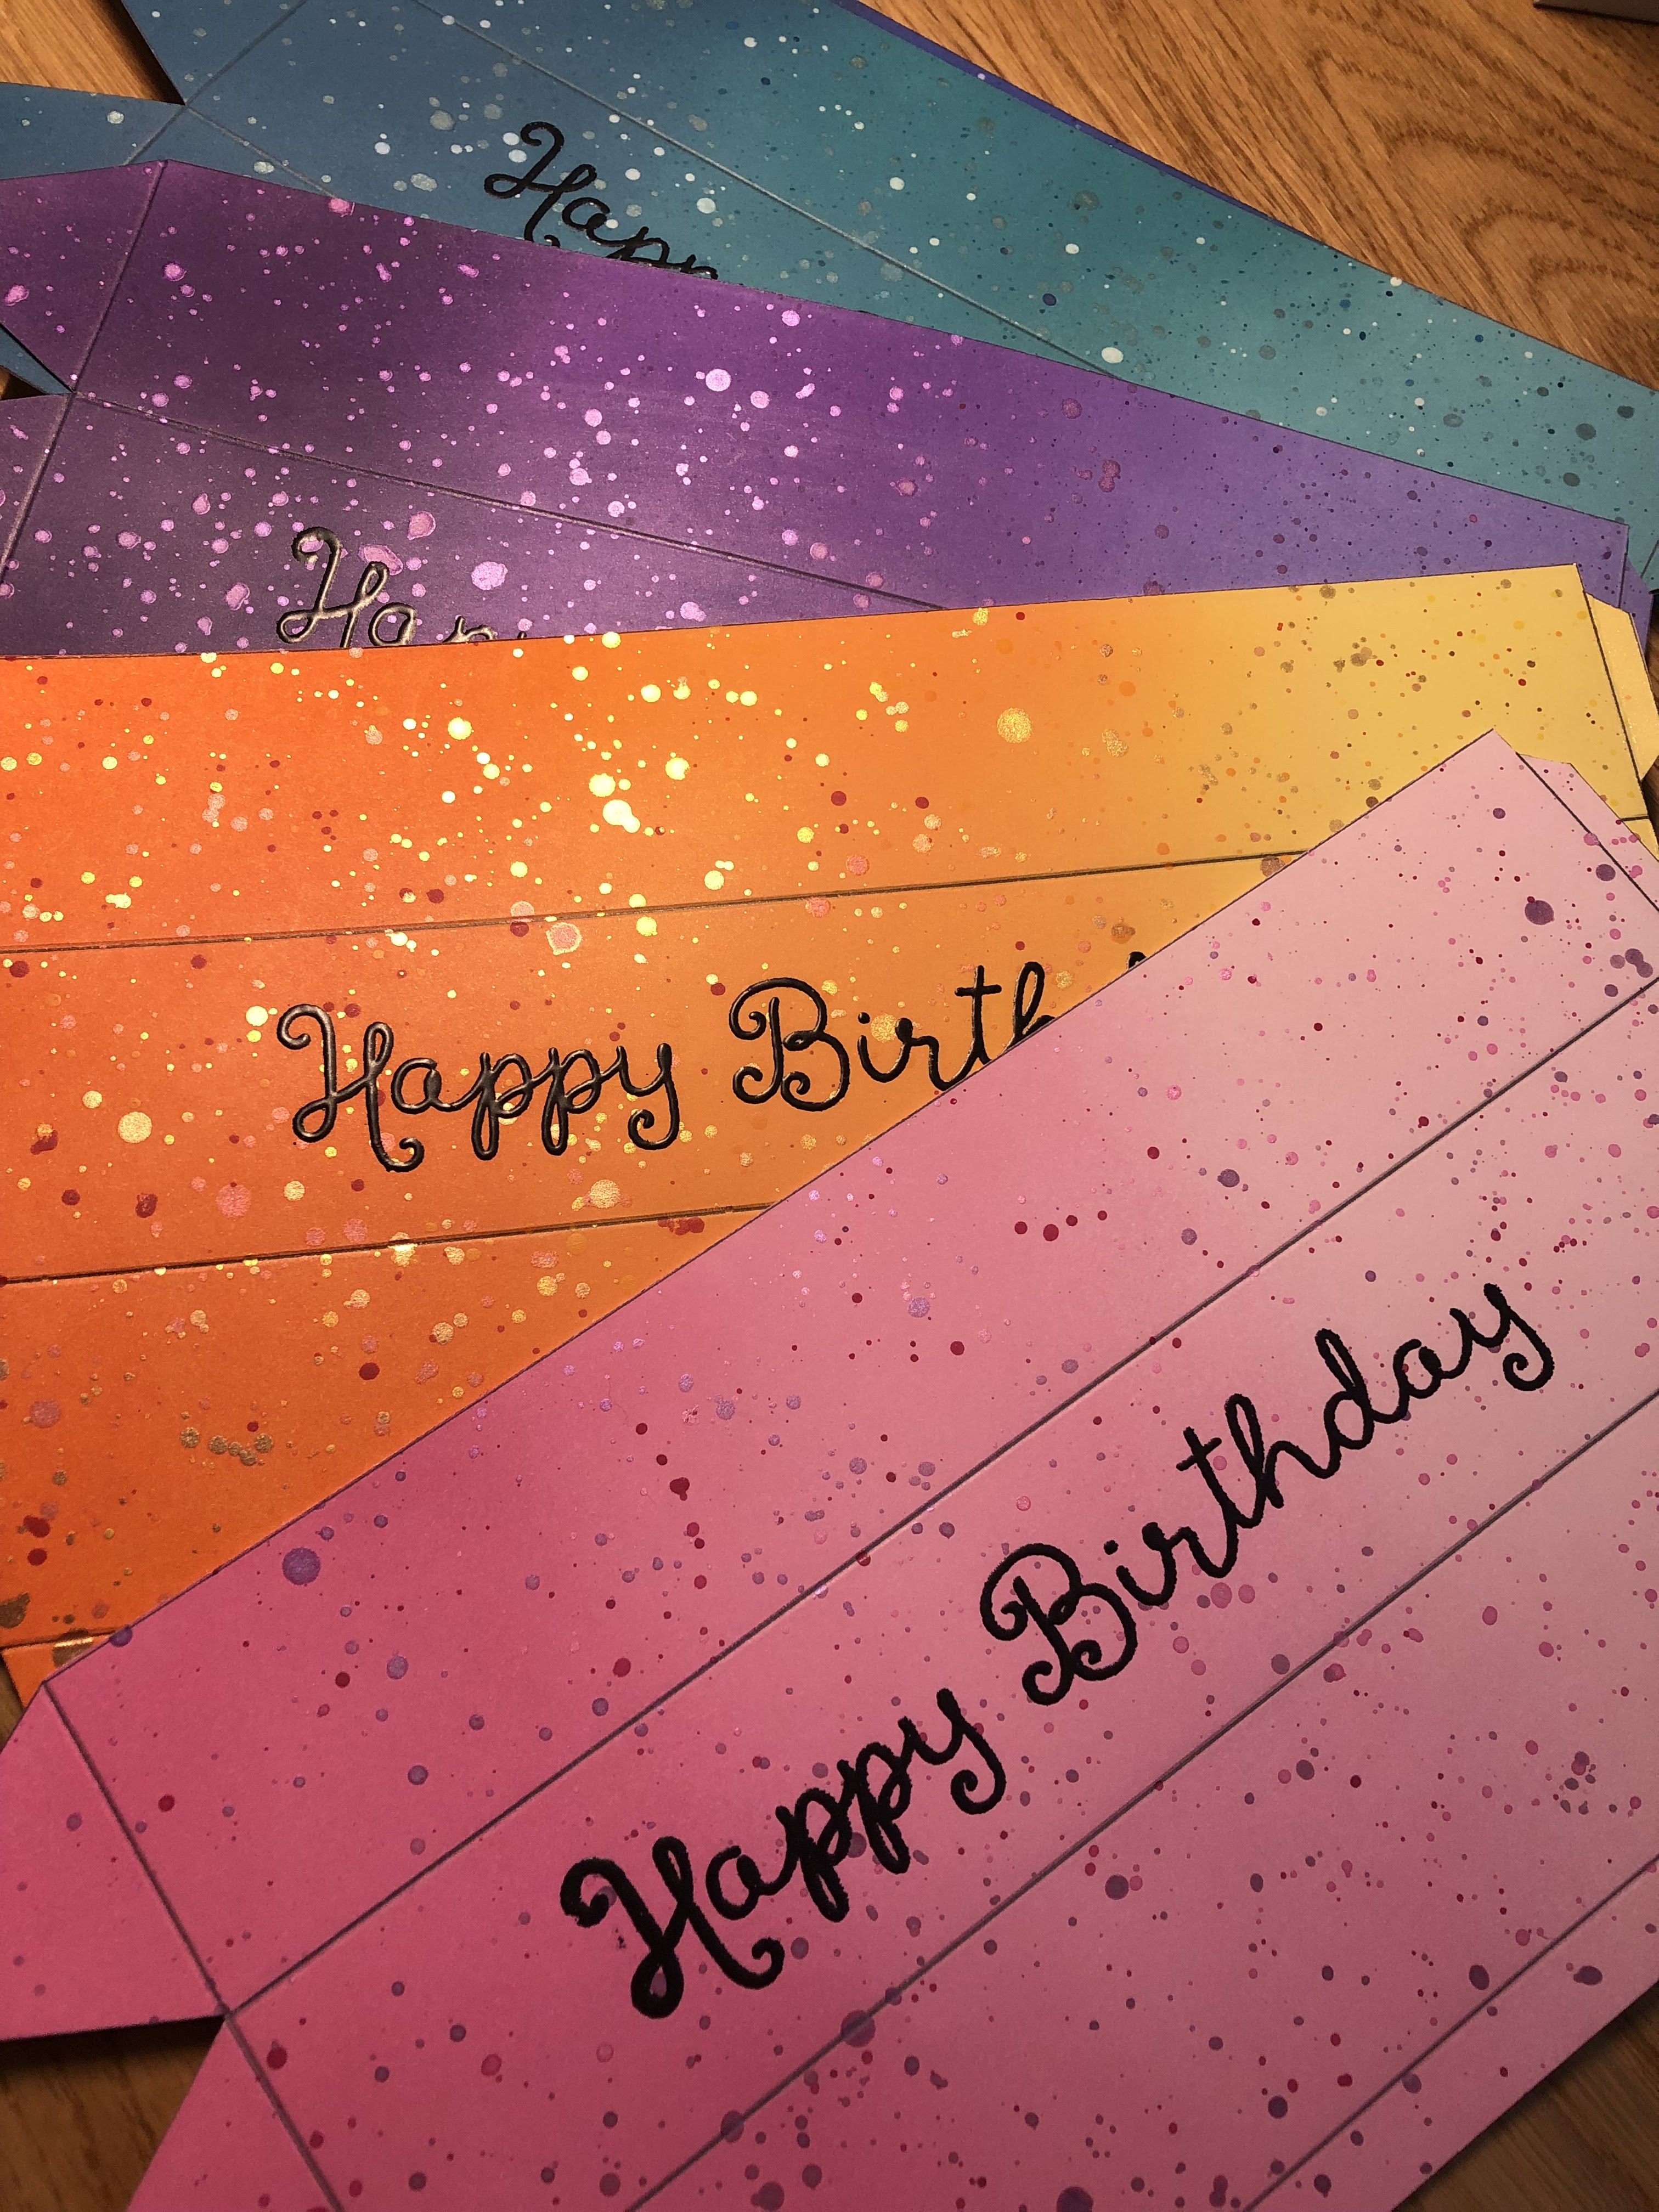
Heute möchte ich euch eines meiner letzten Projekte kurz vorstellen: Verpackung einer 100 grämmigen Toblerone selber herstellen. Hier sind einige dekorierte Beispiele mit Stempeln von My Favorite Things, Lawn Fawn, Hello Bluebird und Marianne Design Stanzen.

Hello everybody :)

Today I would like to present to you one of my latest projects: a homemade packaging for a 100 gr Toblerone. Here are a few decorated examples with stamps from My Favorite Things, Lawn Fawn, Hello Bluebird and Marianne Design die cuts.


Für die Verpackung habe ich im Office Word einen Grundriss erstellt und mir diesen auf 300 Gramm Papier ausgedruckt. Das Foto ist eine A4 Seite, dann sollten die Dimensionen für die Verpackung stimmen.

I prepared a template in an Office Word document for the packaging and printed it onto 300 gr heavy cardstock. This picture is of a full A4 page so if you print it in those dimensions, it should work out.
Zuerst habe ich die Teile mit Distress Oxiden eingefärbt, dazu habe ich jeweils drei Farbkombinationen verwendet.

First I colored all the parts with Distress Oxides, for that I used three different color combinations per packaging.


Danach habe ich alle Teile mit Wasserfarbe und Perfect Pearls besprenkelt. Als sie trocken waren dann ausgeschnitten und ein "Happy Birthday" mit Versamark Tinte gestempelt und mit schwarzem Puder embosst.

Then I cut out all the parts and used watercolors and perfect pearls to make speckles. When they were dry I cut them all out and used versamark ink to embosse a "Happy Birthday" with black embossing powder onto them.


Vor dem Falten habe ich alle Falzlinien mit einem Falzbein vorbereitet, um danach schöne saubere Kanten zu haben. Dann hat die Kleberei begonnen. Für den Deckel habe ich Flüssigleim verwendet. Es war ein bisschen schwierig da irgendwie alle Teile zur selben Zeit geklebt werden. Die kleine Lasche geht unter die andere (siehe Foto unten rechts). Eventuell müsst ihr einige Ecken ein bisschen mehr trimmen als es auf der Vorlage gezeigt ist. Ich hoffe das klappt bei euch!

Before I folded all the lines, I scored them to get sharp, neat creases. Then the gluey part started. I used liquid adhesive for the lid and it was a bit tricky as all the parts kind of needed to be glued and attached at the same time. The smaller flap goes under the other one (as shown in the picture to the right). Maybe you would have to cut a bit off those parts in order to make it work. I do hope you get it to work!


Den Hauptkörper habe ich zusammen geklebt mit einer Toblerone in der Mitte um die Klebelaschen besser andrücken zu können. Für die lange Kante habe ich doppelseitiges Klebeband verwendet, für die Dreieckseiten Flüssigleim. Et voilà, dekorieren und fertig. :)
Ich hoffe ihr probiert es auch aus mit dem eingefügten Grundriss für diese Toblerone Schachtel.

Herzlichen Dank fürs Vorbeischauen und bis zum nächsten Mal.
Liebi Grüessli
Andrea

The long side of the main body I adhered with score tape and the triangle parts with liquid adhesive. To make the whole assembling easier I wrapped it around a Toblerone so it wouldn't collapse when I put pressure onto the parts which needed to stick together. And just like that you can decorate it and are finished! :)
I do hope you try it out with the inserted picture of the template.

Thank you so much for stepping by and cya in the next one.
Hearty Greetings
Andrea


samedi 17 septembre 2022

Hello Fall


Buongiorno care amiche creative!

Sta per cominciare l'autunno ed é la stagione che più mi affascina per i suoi bei colori caldi! Per questa card ho usato il nuovo timbro di  CHOU & FLOWERS , Fôret Enchantée Guirlande d'automne. Ho timbrato con l'Archival ink jet black e colorato con i Zig clean color : 23, 24, 43, 46, 50, 60, 61, 65, 72.

Ho usato la fustella MFT Watercolor Wash Free Form ho ritagliato un cartoncino marrone e poi embossato a freddo con Sizzix 3-D Texture Fades Embossing Folder - Lumber ed ho evidenziato l'effetto legno con il Distress Walnut stain.
Il sentiment Fall é del set della Lawn Fawn Scripty Autumn Sentiments che ho embossato con una polvere d'oro e la scritta Happy sono dei sentiment stripes di Modascrap.
Spero vi piaccia, buon pomeriggio 


Good morning dear creative friends!

Fall is about to begin and it is the season that fascinates me the most for its beautiful warm colors! For this card I used the new stamp from CHOU & FLOWERS , Fôret Enchantée Guirlande d'automne. I stamped with Archival ink jet black and colored with Zig clean colors: 23, 24, 43, 46, 50, 60, 61, 65, 72.

I used the MFT Watercolor Wash Free Form die cut out a brown cardstock and then cold embossed with Sizzix 3-D Texture Fades Embossing Folder - Lumber and highlighted the wood effect with Distress Walnut stain.
The Fall sentiment is from the Lawn Fawn Scripty Autumn Sentiments set that I embossed with a gold powder and the word "Happy"  are from Modascrap sentiment stripes.
I hope you like it, 
good afternoon 


Quyen


jeudi 8 septembre 2022

Small Birthdaycards with the Fangtastic Bats from Lawnfawn

 Hello Everybody 😊

I hope you are doing well and you can enjoy the cooler days. I do love autoumn and am looking forward to this cozy season.🥰

Today I want to show you some small Birthdaycards using the new Fangtastic Friends from Lawn Fawn and watercolor backgrounds.

Hallo miteinander 😊

Ich hoffe euch gehts gut und ihr geniesst die kühleren Tage. Ich liebe den Herbst und freue mich sehr auf diese gemütliche Jahreszeit. 🥰

Heute möchte ich euch ein paar kleine Genurtstagskarten mit den neuen Fangtastic Friends von Lawn Fawn auf Aquarell Hintergründen zeigen.


Thank you for stopping by and I hope you are having a lovely day!

Merci fürs verbii luegä und ich hoff Du häsch en guetä Tag!
Liebi Grüessli
Andrea


mercredi 7 septembre 2022

Nouveau mini de naissance

Bonjour à toutes,

J'espère que vous allez bien par ces belles journées qui nous incitent plus à la balade qu'au scrap...mais en toute bonne fan je suis sûre que vous trouvez du temps pour votre passion😉.

Je reviens avec un mini réalisé avec des papiers très "tropicaux", par contre je ne me rappelle absolument plus de quelle collection il s'agit (trop vieux ! 😁). Sans nul doute vous trouverez de magnifiques papiers sur la boutique.

Comme souvent, les personnages sont réalisés avec la Silhouette Cameo. Sauf le dodo qui a été vectorisé à partir d'une image Internet.

Le tampon de la dernière page est  un clear de Chou & Flowers, "Dans notre maison".

Une toute belle journée à vous et à la prochaine création

Man


dimanche 4 septembre 2022

Christmas Tags

 Buongiorno a tutti! 
oggi vi voglio mostrare quanto sono adorabili questi piccoli personaggi del set Say what? holiday critters della Lawnfawn. Sono davvero veloci da colorare e perfetti per abbellire una card con un grande sentiment oppure delle tags!

Good morning everyone! 
Today I want to show you how adorable these little characters from the Say what? holiday critters set from Lawnfawn are. They are really quick to color and perfect for embellishing a card with a great sentiment or tags!


Ho timbrato e colorato i miei soggetti con i Copics e li ho ritagliati con la Scan and Cut! Se ancora non l'avete ve la consiglio vivamente perché é comodissima. Il modello che acquistato é un po' vecchiotto, ma a me quello che più interessava era solo l'opzione di scansire il disegno e poi ritagliarne i contorni.

In seguito ho usato la fustella della Lawnfawn Stitched Ornaments, ho scelto la dimensione della fustella più grande ed ho ricavato 3 bocce di natale con il nuovo paper pad Let it shine starry skies. Da un cartoncino glitter oro ho tagliato la chiusura della boccia ed il fondo.
Ho assemblato tutti i pezzi e voilà, ho ricavato 3 tags semplici e veloci.


I stamped and colored my subjects with Copics and cut them out with the Scan and Cut! If you don't have it yet I highly recommend it because it is so convenient. The plotter I purchased is a little old, but cheaper, what I was most interested in was just the option to scan the design and then cut out the outlines.

Next, I used the Lawnfawn Stitched Ornaments die cut, chose the largest die size and cut out 3 Christmas bowls with the new paper pad Let it shine starry skies. From gold glitter cardstock I cut the bowl closure and the bottom.
I assembled all the pieces and voila, I made 3 quick and easy tags.


Io le trovo adorabili, spero che piacciano anche a voi!
Buona Domenica!


I find them adorable, hope you like them too!
Have a great Sunday

Quyen

lundi 29 août 2022

Light It Up

Buongiorno care creative!
spero che stiate tutti bene e che abbiate trascorso delle belle vacanze! Oggi in Ticino ricominciano le scuole e ormai l'estate sembra un ricordo lontano e come ad ogni anno mi ritrovo sempre all'ultimo a fare le card natalizie!
Ieri mi son messa alla mia scrivania ed ho pensato di colorare questi gatti della All&Create Light it up. Dopo averli colorati con la classica timbrata in nero con il Memento Tuxedo black, ho voluto provare la colorazione no line su carta Kraft.


Good morning dear creative ladies!
I hope you are all well and had a great vacation! Today in Ticino school starts again and now summer seems like a distant memory and as with every year I always find myself at the last minute making Christmas cards!
Yesterday I got to my desk and thought of coloring these cats from All&Create Light it up. After coloring them with classic black stamping with Memento Tuxedo black, I wanted to try no line coloring on Kraft paper.


Su un normale Bazzil Kraft ho timbrato il micio usando il tampone Versamark perché volevo fare una colorazione no line, poi ho colorato con i Copic Markers e accentuato le ombre con le matite colorate. Mi piace un sacco l'effetto di questa colorazione!

On a regular Bazzil Kraft I stamped the kitty using Versamark pad because I wanted to do a no line coloring, then colored with Copic Markers and accentuated the shadows with colored pencils. I really like the effect of this coloring!


Le seguenti colorazioni sono state fatte sempre con i Copic ma con la timbrata classica nera.
Per lo sfondo di queste due cars ho usato il timbro di MFT Christmas background che ho timbrato con due marroni differenti per dare un po' di interesse allo sfondo. Ho poi ritagliato il cartoncino timbrato a metà in modo di poterci creare due sfondi per due cards ed ho usato la fustella Stitched hillside borders della Lawn Fawn.

The following coloring was done again with Copics but with the classic black stamping.
For the background of these two cars I used the MFT Christmas background stamp which I stamped with two different browns to give the background some interest. I then cut the stamped cardstock in half so that I could create two backgrounds for two cards and used the Stitched hillside borders die from Lawn Fawn.


Per lo sfondo di questa card ho tamponato con il Versamark lo stencil di MFT Sunrise radiating rays, ed embossato con una polvere glitter della WOW embossing powder.

For the background of this card, I dabbed MFT's Sunrise radiating rays stencil with Versamark, and embossed with a glitter powder from WOW embossing powder.


Lo sfondo di questa card é stata realizzata con lo stencil della Lawnfawn Snowflakes background con gli Oxide Stormy sky e Speckled egg. In un secondo momento ho voluto aggiungere un po' di luccichio ed ho embossato con una polvere color platino.

The background of this card was made with the Lawnfawn Snowflakes background stencil with the Oxide Stormy sky and Speckled egg. At a later date I wanted to add some shimmer and embossed with a platinum colored powder.


Infine mi avanzavano questi due gatti ed ho voluto fare due mini cards, usando il nuovo paper pad della Lawnfawn Knit picky winter che penso che si abbinino benissimo a questi gattini che bevono la cioccolata calda! 

Finally, I had these two cats leftover and wanted to make two mini cards, using Lawnfawn's new Knit picky winter paper pad that I think would go great with these kittens drinking hot chocolate! 


È la prima volta che da un set di timbri creo così tante cards. Sono felice di aver ottimizzato i tempi! Spero vi siano piaciute!  
A presto 

This is the first time I have created so many cards from one set of stamps. I'm glad I was able to optimize the time! I hope you enjoyed them!  
See you soon 

Quyen aka @shiny_scrap


dimanche 28 août 2022

New Lawn Fawn Release: Fangtastic Friends


Hello Everybody 😊

I hope you are doing well! Finally the new Lawn Fawn Release is available and I am very excited to experiment with it. The super cute bats from the set „Fangtastic Friends“ were perfect for a reveal wheel which I had messed up a bit in my preparations. I had stamped the words upside down on the wheel and thought I would have to turn the card around and create something this way…but with the bats… upside down works! 😃

Hallo mitenand 😊

Ich hoffe euch geht es gut! Endlich ist das neue Lawn Fawn Release erhältlich und ich freue mich sehr damit zu experimentieren. Die super süssen Fledermäuse vom Set "Fangtastic Friends" waren perfekt für ein Reveal Wheel welches ich bei den Vorbereitungen etwas versaut hatte. Ich hatte die Wörter kopfüber gestempelt und dachte ich müsste nun die Karte um 180° drehen und etwas so herum kreieren... aber mit den Fledermäusen... Kopfüber passt! 😃


First I cut out a panel with the reveal wheel speech bubble add on and the frame. The spinning reveal wheel was a leftover one from another cardmaking session. Also I prepared the stamps which I might use. In the end I didn‘t use the ones from „Fangtastic Friends Add-on“.

Als erstes stanzte ich das Reveal Wheel Haupt Panel mit dem Sprech Blasen Add-on, sowie dem Rahmen dazu, aus. Das drehende Rad war ein Übrigbleibsel von einer anderen Kartenbastelaktion. Dann habe ich noch die Stempel hervorgesucht welche ich gebrauchen könnte. Am Ende habe ich diejenigen aus dem Set "Fangtastic Friends Add-on" doch nicht benutzt.


Then I got out my Distress Oxides in the colors: salty ocean, blueprint sketch, chipped sapphire and black soot and started ink blending my main panel. I splattered some white watercolor speckles on it as well as Gansai Tambi's Opal Colors.

Danach habe ich meine Distress Oxide hervorgeholt und zwar in den Farben Salty Ocean, Blueprint Sketch, Chipped Sapphire und Black Soot und habe begonnen meine Vorderseite zu kolorieren. Abschliessend habe ich weisse Wasserfarben Tröpfchen sowie Gansai Tambis Opal Colors darüber gesprenkelt.


After that I stamped out my images on notecards from Coop. They work very well with copics and are easy to fuzzycut (if you don‘t have the customized dies). Then I colored the images with Copic alcohol markers. For the treebranch and leaves I used: E44 / E47 / E49 // G17 /G29
For the Bats I used those very dark blue-violets (BV): 23 / 25 /29 / 31 / 00

Als nächstes habe ich die Fledermäuse auf Notizkarten von Coop gestempelt. Diese eignen sich gut für das Anmalen mit Alcohol inks und sind leicht auszuschneiden (falls man die passenden Stanzen nicht hat). Dann habe ich die Bildchen mit Copic Alcohol Marker ausgemalt. Für den Ast mit den Blättern habe ich E44 / E47 / E49 // G17 /G29  und für die Fledermäuse die sehr dunklen blau-violett Töne BV23 / 25 /29 / 31 / 00 benutzt.


After running them through my die cut machine I had to arrange them on my panel and adhere them with glue and foam pads. I thought it could use another image so I cut some holographic cardstock into a square and wrapped twine around it, making it looke like a parcel.

Nach dem Ausstanzen arrangierte ich meine kleine Szene und befestigte alles mit Leim und 3-D Abstandspads. Da ich dachte es könnte noch ein weiteres Sujet gebrauchen schnitt ich ein Viereck aus holographischem Papier aus und wickelte einen Faden rund herum um es wie ein kleines Geschenk aussehen zu lassen.


The last step to finish the interactive part was to prepare my panel with foam pads all around the reveal wheel but being carefull not to touch it. I used a lot of foam squares - I am rather safe than sorry - as my experience has shown me sometimes more is better. 😉😃

Der letzte Schritt zur Fertigstellung des interaktiven Teils war die Vorbereitung mit 3D-Klebestreifen rund ums Rad herum ohne es zu berühren. Dafür habe ich ne Menge 3D Klebe Vierecke benutzt - ich bin lieber auf der sicheren Seite - da ich aus Erfahrung weiss mehr ist manchmal besser. 😉😃


As my bat on top was looking over the panel, otherwise I couldn‘t make it work with the speech bubble, I had to prepare an individuel cardbase which is quite tall. I chose black as I thought that was fitting but then I realised it would be hard to write womething on the inside if one wouldn‘t have a white gel pen. So I took another Coop card, rounded the corners and adhered it in there.
And with that I was finished!

Da die Fledermaus ganz oben über das Panel hinaus schaute, damit das mit der Sprechblase funktionierte, musste ich eine Kartenbasis individuell zuschneiden, die sehr hoch war. Ich wählte schwarz, da dies sehr passend zur Szene war, bemerkte dann aber, das es schwierig wäre, in der Karte etwas zu schreiben wenn man keinen weissen Gel Pen hätte. Daher nahm ich eine weitere Notizkarte von Coop, rundete die Ecken ab und klebte diese in die Karte. Somit war diese Karte fertig!


What do you think? Can you read the upside down words?
Hope you enjoyed the process of this card. Thank you for stepping by and have a lovely day! 😘
Andrea

Was denkt ihr? Könnt ihr die kopfüber Wörter lesen?
Ich hoffe euch hat dieser Kartenprozess gefallen.
Merci vielmol fürs verbii luegä und hebed än schönä Tag! 😘
Andrea


vendredi 26 août 2022

Marianne Design, Lawn Fawn and Distress Oxides

  Good morning everybody 😃

I am very excited to join the scraphouse design team! 🥳 My name is Andrea Auf der Maur, I live in Schaffhausen with two cats (Muzzina & Zilly) and I started making cards two years ago after seeing a Lawn Fawn video on Youtube. Today I would like to share a short tutorial for a card using the swan from Marianne Design Collectables and the Bayou Backdrop as well as the Cattails Border from Lawn Fawn.

Guetä Morgä mitenand 😃

Ich freue mich sehr neu im Design Team von Scraphouse dabei zu sein! 🥳 Mein Name ist Andrea Auf der Maur, ich wohne in Schaffhausen mit zwei Katzen (Muzzina & Zilly) und habe vor zwei Jahren mit dem Karten basteln begonnen nachdem ich auf Youtube ein Lawn Fawn Video gesehen habe. Heute möchte ich euch in wenigen Schritten zeigen wie ich den Schwan von Marianne Design Collectables, sowie die Bayou Backdrop Stanze und Cattails Border von Lawn Fawn für eine Karte eingesetzt habe.


I started with inking the background with Ranger Distress Oxides in the colors Broken China, Cracked Pistacchio, Salvaged Patina and Shaded Lilac. Then I sprinkled some water and perfect pearl splatters over it for some texture.

Zuerst habe ich den Hintergrund mit Ranger Distress Oxides in den Farben Broken China, Cracked Pistacchio, Salvaged Patina und Shaded Lilac eingefärbt. Danach habe ich etwas Wasser sowie Perfect Pearls darüber gesprenkelt um dem Hintergrund mehr Effekt zu verleihen.

Then I die cut the Bayou Background in three different colors and the Cattails Border in two different greens for each card. The Bayou Background needed some persuading and the use of a craft knife as it wasn‘t properly cut through in all the places. Also I prepared the swans but I had done that on another day to have them ready.

Als nächstes habe ich für jede Karte drei verschieden farbige Bayou Backgrounds und je zwei unterschiedlich grüne Cattails Border ausgestanzt. Die Bayou Backdrops brauchten etwas Überredung und den Einsatz vom Bastelmesser, da sie nicht an allen Stellen sauber ausgestanzt waren. Die Schwäne hatte ich schon am Tag zuvor vorbereitet. 

All that was left was to glue it all together starting with arranging the colors from the Bayou Backdrop. Then I added the sentiment „I just swan to say have a happy day“ from the stampset Swan Soirée from Lawm Fawn to the cattails border with black embossing powder. And finally adhered the swan in the middle with some foam squares and then attached the Cattails border with even higher foam strips. All in all I created four cards like that.

Alles was es nun noch zu tun gab war das Ganze zusammenzukleben. Ich begann mit dem Arrangieren der Farben des Bayou Hintergrunds. Danach fügte ich den Spruch „I just swan to say have a happy day“ vom Stempelset Swan Soirée von Lawn Fawn mit schwarzem Embossing Puder auf die Cattails Border. Zu guter letzt setzte ich die Schwäne auf Foam Pads in die Mitte und klebte die Schilf Bordüre mit noch höheren Foam Streifen auf die Karte. Insgesamt sind so vier Karten entstanden.


After finishing those front panels I chose the colors for the cardbases and adhered the panels on it. Two I adhered on a white card, one on light green and one on lilac.
Et voilà, cards are done! 😃

Nachdem die Szene fertig gestellt wurde entschied ich welche Farben ich für die Faltkarten benutzen wollte. Ich entschied mich für zwei weisse und je einen mintgrünen und lilanen Kartenrohling.         Tadaaa, fertig! 😃


Thank you for stepping by and I hope you are having a lovely day! ☺️

Merci fürs verbii luegä und ich wünschä ganz en schöne Tag! ☺️