samedi 8 juillet 2023

Ready to Be Impressed?

Buona sera creative, 

avete visto anche voi la novità dell'anno di Spellbinders? La Betterpress!!!Da ora é disponibile anche nello shop di Scraphouse!!!Evvivaaaa!!! Ad esser sincera all'inizio ero indecisa sull'acquisto, avevo guardato diversi video di dimostrazione, ed alla fine spinta dalla curiosità di provarla , l'ho acquistata! Cosa posso dire? Innanzi tutto é facilissima da usare ed é compatibile con la mia Big shot :D , grazie alle griglie e linee guida, é molto semplice capire dove voler posizionar gli elementi sulla card. Insieme alla Betterpress, c'é un kit di partenza: cartoncini in cotone per acquarello, un tape, una plate e un'inchiostro. Ho voluto creare qualcosa di diverso con la plate in dotazione ed ho ricreato una cornice di fiori.


Good evening creative, 

have you also seen Spellbinders' new product of the year? The Betterpress!!!It is now also available in the Scraphouse shop!!!Yayaaa!!! To be honest at first I was undecided about buying it, I had watched several demonstration videos, and finally driven by curiosity to try it , I bought it! What can I say? First of all, it's super easy to use and it's compatible with my Big shot :D , thanks to the grids and guidelines, it's very easy to figure out where you want to place the elements on the card. Along with the Betterpress, there's a starter kit: cotton watercolor cards, a tape, a flower plate+sentiments and ink. 

For my card I wanted to create something different with the supplied plate and recreated a frame of flowers.


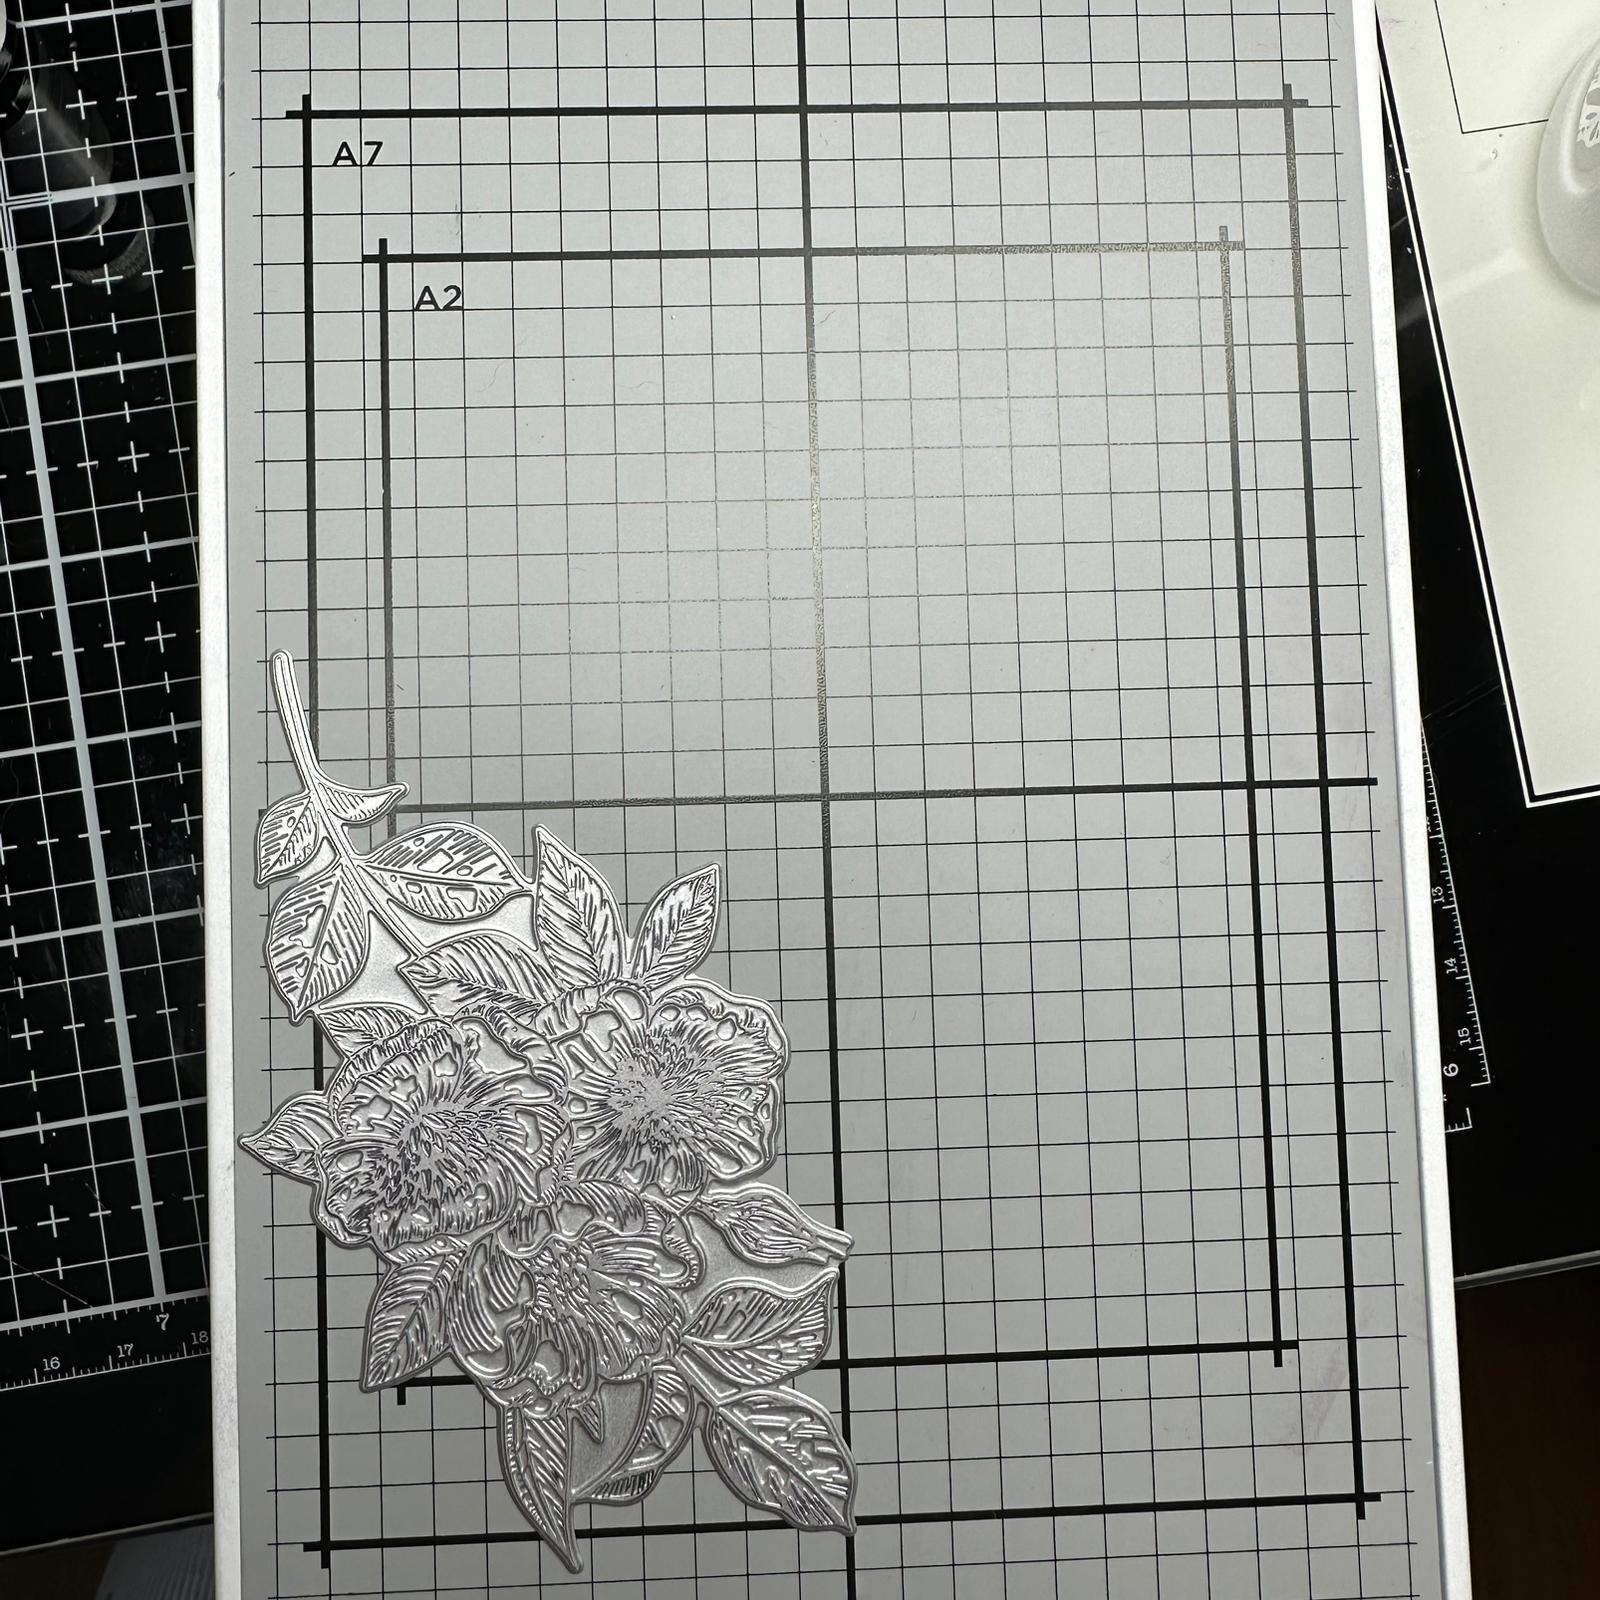
Come vi ho anticipato precedentemente, la Betterpress é dotata di questo tappetino magnetico con griglia, quindi sapendo dove avrei posizionato il mio cartoncino, é stato facile posizionare la plate fiore. Ho cominciato mettendo il fiore del rettangolo in basso a destra, inchiostrato e passato attraverso la mia bigshot. Al secondo giro, ho solo girato la placca in plexiglass dall'altro verso. Poi ho messo la plate nell'angolo in basso a sinistra e rifatto i medesimi passaggi. 

As I mentioned earlier, the Betterpress comes with this magnetic mat with grid, so knowing where I would place my cardstock, it was easy to place the flower plate. I started by placing the flower from the bottom right rectangle, inked and passed through my Bigshot. On the second round, I just turned the plexiglass plate the other way. Then I put the plate in the lower left corner and did the same steps again.


Una volta fatto la mia cornice di fiori ho posizionato al centro il sentiment che era nel kit.
Ho voluto colorare i fiori in maniera un po' astratta ed ho usato i seguenti Distress ink reinker ed aggiungo delle gocce dorate con la Nuvo spray oro.

Once I made my flower frame I placed the sentiment that was in the kit in the center.
I wanted to color the flowers somewhat abstractly and used the following Distress ink reinker and added gold drops with Nuvo gold spray.


Ed infine per completare la mia card ho incollato il cartoncino di carta d'acquarello su un cartoncino nero e uno oro. 
Che cosa ne pensate? Vi ispira la Bettepress?
Un abbaccio 

And finally to complete my card, I glued the watercolor paper card to a black and a gold card. 
What do you guys think? Does the Bettepress inspire you?
A hug

Quyen


lundi 26 juin 2023

Make a Wish

Buona sera amiche creative!

Vi é piaciuta la nuova release della Lawn fawn? Oggi vi mostro cosa ho fatto con le novità:D 


Good evening creative friends!

Did you enjoy the new Lawn fawn release? Today I show you what I did with the new features:D


Mi sono subito innamorata della fustella Make A Wish, forse perché da qualche parte mi piace sognare ed esprimere desideri!;)
Ho cominciato a creare l'erba con il nuovo stencil Slimline Grassy con i distress ink Moved Lawn e Twisted citron. Poi come coperto l 'erba con lo stesso stencil ed ho colorato il cielo con Tumbled glass e Mermaid lagoon.
Poi ho colorato i personaggi con i copic usando i set Yappy Birthday  e Yappy Birthday add-on. Per la base ho usato un cartoncino nero, poi ho incollato lo sfondo erba-cielo, la scritta make a wish ricavata da un cartoncino oleografio ed infine i cagnolini e i palloncini. 
Buona serata a tutti 

I immediately fell in love with the Make A Wish die, maybe because somewhere I like to dream and make wishes!;)
I started creating the grass with the new Slimline Grassy stencil with Moved Lawn and Twisted citron distress inks. Then i masked the grass with the same stencil, and then I colored the sky with Tumbled glass and Mermaid lagoon.
Then I colored the characters with Copics using Yappy Birthday and Yappy Birthday add-on sets. For the base I used a black cardstock, then I glued the grass-sky background, the make a wish sign made from an oleographic cardstock and finally the little dogs and balloons. 
Have a nice evening everyone

Quyen


mercredi 21 juin 2023

Hello Sunshine


 Buona sera care creative,

stasera vi presento una nuova card! come sapete adoro usare la glimmer hot foil e quindi stavolta ho voluto combinare diverse tecniche! 


Good evening dear creatives,

tonight I want to show you a new card! As you know I love to use glimmer hot foil so this time I wanted to combine different techniques!


Ho voluto creare uno sfondo dai bei riflessi del foil Rainbow di Spellbinders insieme al hot foil plate di Lawnfawn Stitched trails . Ho fissato sia il foil al cartoncino bianco e le sagome della hot foil plate al foil con del washitape e passato per la Hot foil machine e poi attraverso alla mia big shot. Dopo di che ho colorato i 4 lati del cartoncino con il distress ink Picked Raspberry.


 I wanted to create a background from the beautiful shades of the Rainbow foil from Spellbinders along with the hot foil plate from Lawnfawn Stitched trails . I attached both the foil to white cardstock and the hot foil plate to the foil with washitape and passed through the hot foil machine and then through to my big shot. After that I colored the 4 sides of the cardstock with Picked Raspberry distress ink.


Poi ho usato la fustella Giant Hello Sunshine e l'ho embossata con le polveri della Wow embossing in 3 tappe, il primo terzo della scritta con la polvere Mai tai, il centro con Mojito e per ultimo Strawberry daiquiri.

Then I used the Giant Hello Sunshine die cut and embossed it with Wow embossing powders in 3 stages, the first third of the lettering with  Mai tai, the center with Mojito and lastly Strawberry daiquiri.


Ho incollato tutti gli elementi insieme ed ho aggiunto i soggetti del Just Plane Awesome colorati con i copic! Spero vi piaccia il risultato!
Buona serata 

I glued all the elements together and added the Just Plane Awesome subjects colored with copics! I hope you like the result!
Have a nice evening

Quyen


dimanche 11 juin 2023

Happy Birthday card

 Buona sera creative! 

Spero di trovarvi bene! Stasera voglio parlarvi delle card di compleanno! chi di voi si é ritrovata all'ultimo a dover preparare un biglietto di compleanno, alzi la mano! :D io sono una tra queste! Ho marcato sul calendario le date dei compleanni, ma poi capita sempre non contando le tempistiche di spedizione, di arrivare all'ultimo a preparare la card. Quindi oggi vi voglio proporre una soluzione veloce per fare al volo una card.

Good evening creative! 

I hope to find you well! Tonight I want to talk to you about birthday cards! those of you who have found yourselves at the last minute having to prepare a birthday card, raise your hands! :D I am one of them! I have marked on the calendar the dates of birthdays, but then it always happens not counting the timing of shipping, to arrive at the last to prepare the card. So today I want to propose a quick solution to make a card on the fly.


Per lo sfondo ho usato l'embossing folder di Spellbinders Orange peel quilt, un cartoncino sfumato lilla dal pad di Studio Light White fade ed una mattatura viola più scuro dal pad Spooky colors.
In seguito ho usato la plate Just for you e colorato fiori e foglie con i Copics.
Ho voluto incorniciare il fiore con l'esagono hot foil plate di Pinkfresh Studio Nested Hexagons ed infine un sentiment sempre di Pinkfresh Studio Perfect Sentiments hot foil plate.
Spero vi piaccia!
Buona serata 
un abbraccio

For the background I used the Spellbinders Orange peel quilt embossing folder, a lilac shaded cardstock from the Studio Light White fade pad and a darker purple matting from the Spooky colors pad.
Next I used the Just for You plate and colored flowers and leaves with Copics.
I wanted to frame the flower with the Pinkfresh Studio Nested Hexagons hot foil plate and finally a sentiment also from Pinkfresh Studio Perfect Sentiments hot foil plate.
I hope you enjoy it!
Have a great evening 
a hug

Quyen


mercredi 7 juin 2023

Foiling, sewing and stitched dies

 Buongiorno creative!

spero di trovarvi in forma! Mi dispiace che sia passato quasi un mese dal mio ultimo post... mio marito ed io abbiamo passato delle splendide vacanze in Olanda! Se non ci siete ancora mai state, ve lo consiglio vivamente!:D Intanto torniamo alla card che vi voglio mostrare oggi! Sono stata un po' di parte visto che questa estate compirò 40 anni :D


Good morning creative!

I hope to find you well! Sorry it's been almost a month since my last post.... my husband and I had a wonderful vacation in Holland! If you have never been there yet, I highly recommend it!:D 
Meanwhile, back to the card I want to show you today! I've been a little carried away about my big birthday... I'm turning 40 this summer :D
$


Ho cominciato ad usare la foil plate Stylish Oval Thanks con un foil turchese del set Spellbound pack hot foil roll ed un cartoncino perlato. In seguito ho fustellato 3 volte il la parte del numero 40 dal set Stitched numbers etched dies, dove ci sono i fori per ricamare e li ho incollati uno sopra l'altro per aver più spessore e facilitarne il ricamo. È la prima volta che eseguo un ricamo e mi son divertita molto. Ho voluto provare a creare delle roselline per creare un effetto un po' diverso, usando dei fili da ricamo che richiamassero il colore del foil e del cartoncino. 
Spero vi piaccia!

Vi auguro una splendida giornata


I started using the Stylish Oval Thanks foil plate with a turquoise foil from the Spellbound pack hot foil roll set and a pearl card. Next, I die-cut 3 times the number 40 part from the Stitched numbers etched dies set, where the embroidery holes are and glued them on top of each other to have more thickness and make it easier to embroider. This is my first time doing embroidery and I had a lot of fun. I wanted to try making little rosettes to give more interest to the card, using embroidery threads that would echo the color of the foil and cardstock. 
I hope you enjoy it!

Have a wonderful day

Quyen


vendredi 12 mai 2023

You are my lucky charm!

 Buongiorno carissime creative!

Come state? Spero tutto bene! Sono in partenza per le vacanze ma prima di andare via, volevo mostrarvi questa card! Onestamente le fustelle a forma di quadrifoglio avevano catturato la mia attenzione quando erano state presentate lo scorso anno da Lawnfawn ma non avevo fatto in tempo ad acquistarle. Quindi appena ho visto questa fustella di Marianne design Lucly clovers, l'ho presa subito! Mi piace molto poter avere le due misure di quadrifoglio, voi cosa ne pensate?


Good morning dear creatives!

How are you? I hope all is well! i'm off on vacation but before i leave i wanted to show you this card! Honestly the clover shaped die cuts had caught my attention when they were introduced last year by Lawnfawn but i hadn't gotten around to buying them. So as soon as I saw this die cut by Marianne design Lucly clovers, I grabbed it right away! I really like being able to have the two clover sizes, what do you guys think?


Ho fustellato diverse volte i quadrifogli usando un cartoncino verde dal Studio light essentials pad Lemonade ed ho un po' scurito le estremità delle foglie con in Distress ink Lucky clover e poi schizzato dell'acquarello dorato da un set di Kuretake. In seguito con l'alfabeto Henry's ABC della Lawnfawn ho ritagliato la scritta Lucky prima con un cartoncino glitterato e poi con un cartoncino di Tonic Studios Iridiscent inca gold, mentre la scritta "You are my" e "Charm" l'ho ottenuta stampandola dalla macchinetta MakeId. Una volta pronti tutti i miei elementi, ho ritagliato un rettangolo di vellum dorato di Tonic Studios (pearled gold) che ho attaccato a sua volta su un cartoncino bianco, per poter dare un po' di rigidità alla card. Infine ho incollato una cornicetta verde ricavata dalla fustella Stitched rectangle frame sempre della Lawnfawn ed aggiunto tutti gli elementi decorativi preparati in precedenza.

Spero vi piaccia la mia card e vi auguro uno splendido weekend!

un abbraccio 

I die-cut the shamrocks several times using a green cardstock from the Studio light essentials pad Lemonade and somewhat darkened the ends of the leaves with in Distress ink Lucky clover and then splattered some gold watercolor from a set of Kuretake. Next with Henry's ABC alphabet from Lawnfawn I cut out the Lucky lettering first with glitter cardstock and then with cardstock from Tonic Studios Iridiscent inca gold, while the words "You are my" and "Charm" I got by printing them from the MakeId machine. Once all my elements were ready, I cut out a rectangle of Tonic Studios gold vellum (pearled gold), which I attached to a white cardstock , in order to give the card some rigidity. Finally, I glued a green frame made from the Stitched rectangle frame die also from Lawnfawn and added all the decorative elements prepared earlier.

I hope you enjoy my card and have a wonderful weekend!

a hug

Quyen


jeudi 27 avril 2023

Cat Baby Mini Album


Buona sera care creative,

avete visto che bella la nuova collezione di Florileges design? I due nuovi paper pads sono a tema nascita e le ho adattate al nostro gattino Mac che abbiamo adottato dalla Sicilia più di un anno fa e ci da tanto amore. 

Dato che il nostro micio é un maschietto ho optato per il pad maschile A petits pas boy ed un foglio Uni duo vert sage.

Ho tagliato due rettangoli di carta vegetale da 1 mm della misura di 10 cm x 14 cm e le ho rivestite con una carta del pad. Ho usato un anello triplo per rilegare l'album e per fare i buchi ho usato la Crop-a-dile.

Ho decorato la copertina con la fustella orsetto Outils de découpe cadre ours e ritagliato diversi elementi decorativi dalle carte del pad. Anche le pagine dell'album sono state decorate con ritagli a mano, mezze perle dorate e filo dorato. Alcune pagine, prima di incollare le foto,  ho usato 2 plance di timbri per gli sfondi della Sokai So' celebrate Fond 1 e Fond 2.

Spero vi sia d'ispirazione, buona creativà a tutte


Good evening dear creatives,

have you seen what a beautiful new collection from Florileges design? The two new paper pads are birth themed and I adapted them to our kitten Mac who we adopted from Sicily over a year ago and gives us so much love. 

Since our kitty is a boy I opted for the male pad A petits pas boy and a Uni duo vert sage sheet.

I cut two 1 mm vegetable paper rectangles measuring 10 cm x 14 cm and lined them with a paper from the pad. I used a triple ring to bind the album and used Crop-a-dile to make the holes.

I decorated the cover with the Outils de découpe cadre ours bear die and cut out several decorative elements from the pad papers. The album pages were also decorated with hand cut-outs, gold half-pearls and gold thread. Some pages, before pasting the photos, I used 2  backgrounds stamp sets from the Sokai So' celebrated Fond 1 and Fond 2.

I hope you are inspired, good creativity to all


Quyen


dimanche 16 avril 2023

From Me to You


Buonasera creative! 
Come state? Spero tutto bene! Stasera vi mostro un'altra card "firmata" Spellbiders! Devo confessare che per pigrizia ci ho messo un po' ad usare la hot foil plate Magnolia Bouquet che foilizza e taglia queste mini Magnolie, perché mi sembrava un po' impegnativo rispetto alla plate della Magnolia grande. Pensavo anche che fossero troppo piccoline, invece devo dire che molto belle da usare.
 Per realizzare questa card ho cominciato a foilizzare Magnolia Bouquet glimmer hot foil plate con un foil rosa su un cartoncino bianco ed ho scelto 2 tonalità di rosa delle Prismacolor ed ho colorato il fiore.

Good evening crafty friends! 
How are you? Hope all is well! Tonight I show you another "signed" Spellbiders card! I must confess that out of laziness it took me a while to use the Magnolia Bouquet hot foil plate that foils and cuts these mini Magnolias, because it seemed a bit challenging compared to the large Magnolia plate. I also thought they were too small, instead I must say very nice to use.
 To make this card I started foil Magnolia Bouquet glimmer hot foil plate with a pink foil on a white cardstock and chose 2 shades of pink from Prismacolor and colored the flower.


In seguito ho timbrato Elegant Diamonds clear stamps ed embossato con una polvere nera ed il sentiment "from me to you" al centro della card. Per dare maggior risalto alla card ho sfumato gli angoli con il Distress Oxide Victorian Velvet.
Prima di incollare gli elementi alla card, li ho posizionati finchè non ero soddisfatta del risultato. Le foglie le ho incollate con la colla, mentre i fiori per dare un po' di dimensione, ho usato del biadesivo spessorato e aggiunto dei drop di Pinfreshstudio per abbellire. 

Next I stamped Elegant Diamonds clear stamps  and embossed with a black powder and the sentiment "from me to you" in the center of the card. To give the card stand out more I shaded the corners with Distress Oxide Victorian Velvet.

Before gluing the elements to the card, I positioned them until I was satisfied with the result. The leaves I glued on with glue, while the flowers to give some dimension, I used thick double-sided tape and added Pinfreshstudio drops to embellish.


Mi piace molto come sia uscita la card! Voi cosa ne pensate? 
Buona serata 

I really like the way the card came out! What do you guys think of it? 
Have a great evening 

Quyen


mercredi 12 avril 2023

Sending Health and Happiness

 Buona sera carissime creative!

spero che stiate bene! Scusate per questo post serale , solitamente pubblico la mattina, ma purtroppo stiamo avendo dei problemi con la rete internet a casa e stasera gentilmente la mia famiglia mi ha ospitata per attingere al loro wifi :D 
Ormai cosa ve lo dico a fare che amo i prodotti di Spellbinders? sono molto grata a Marjolein di aver le novità in negozio!
Oggi ho voluto usare un embossing folder Tufted 3 D, la fustella Four Petal Floral edged e la hot foil plate Making me smile.


Good evening dear creative darlings!

I hope you are all well! Sorry for this evening post , I usually post in the morning, but unfortunately we are having some problems with the internet at home and tonight kindly my family hosted me to tap into their wifi :D 
By now, what can I tell you that I love Spellbinders products? I am very grateful to Marjolein for having the new items in the store!
Today I wanted to use a Tufted 3D embossing folder, the Four Petal Floral edged die and the Making me smile hot foil plate.


Son partita con la placca da embossing ed ho embossato un cartoncino nero. Per far risaltare di più la texture, ho usato una pasta dorata della Nuvo che ho poi spalmano con il mio indice. Sapevo che avrei voluto aggiungere dei dettagli color oro, quindi mi sembrava una buon abbinamento e devo ammettere che il risultato mi piace parecchio.
Ho fustellato i fiori con i bellissimi vellum di Tonic Studio Craft perfect pearled gold e pearled silver vellum,  li ho un sovrapposti per aver un gioco di colori, mentre il gambo ed il centro dei fiori di ho fustellati con un cartoncino oro matte.

I started with the embossing plate and embossed a black cardstock. To make the texture stand out more, I used a gold paste from Nuvo that I then smeared with my index finger. I knew I wanted to add some gold details, so it seemed like a good match and I have to admit I like the result quite a bit.
I die-cut the flowers with beautiful Tonic Studio Craft perfect pearled gold and pearled silver vellum, I overlapped them to have a play of colors, while the stem and the center of the flowers I die-cut with a matte gold cardstock.

Per completare la card ho aggiungo un sentiment ottenuto con l'hot foil ed aggiunto un fiocchetto al gambo della composizione floreale. Spero vi piaccia e vi auguro una buonanotte!

un abbraccio Quyen

To complete the card I added a sentiment obtained with hot foil and added a bow to the stem of the flower arrangement. I hope you like it and wish you a good night!

a hug Quyen


lundi 27 mars 2023

Happy Spring Card with Lawn Fawn Easter Bunnies

 Hello Everybody 😊

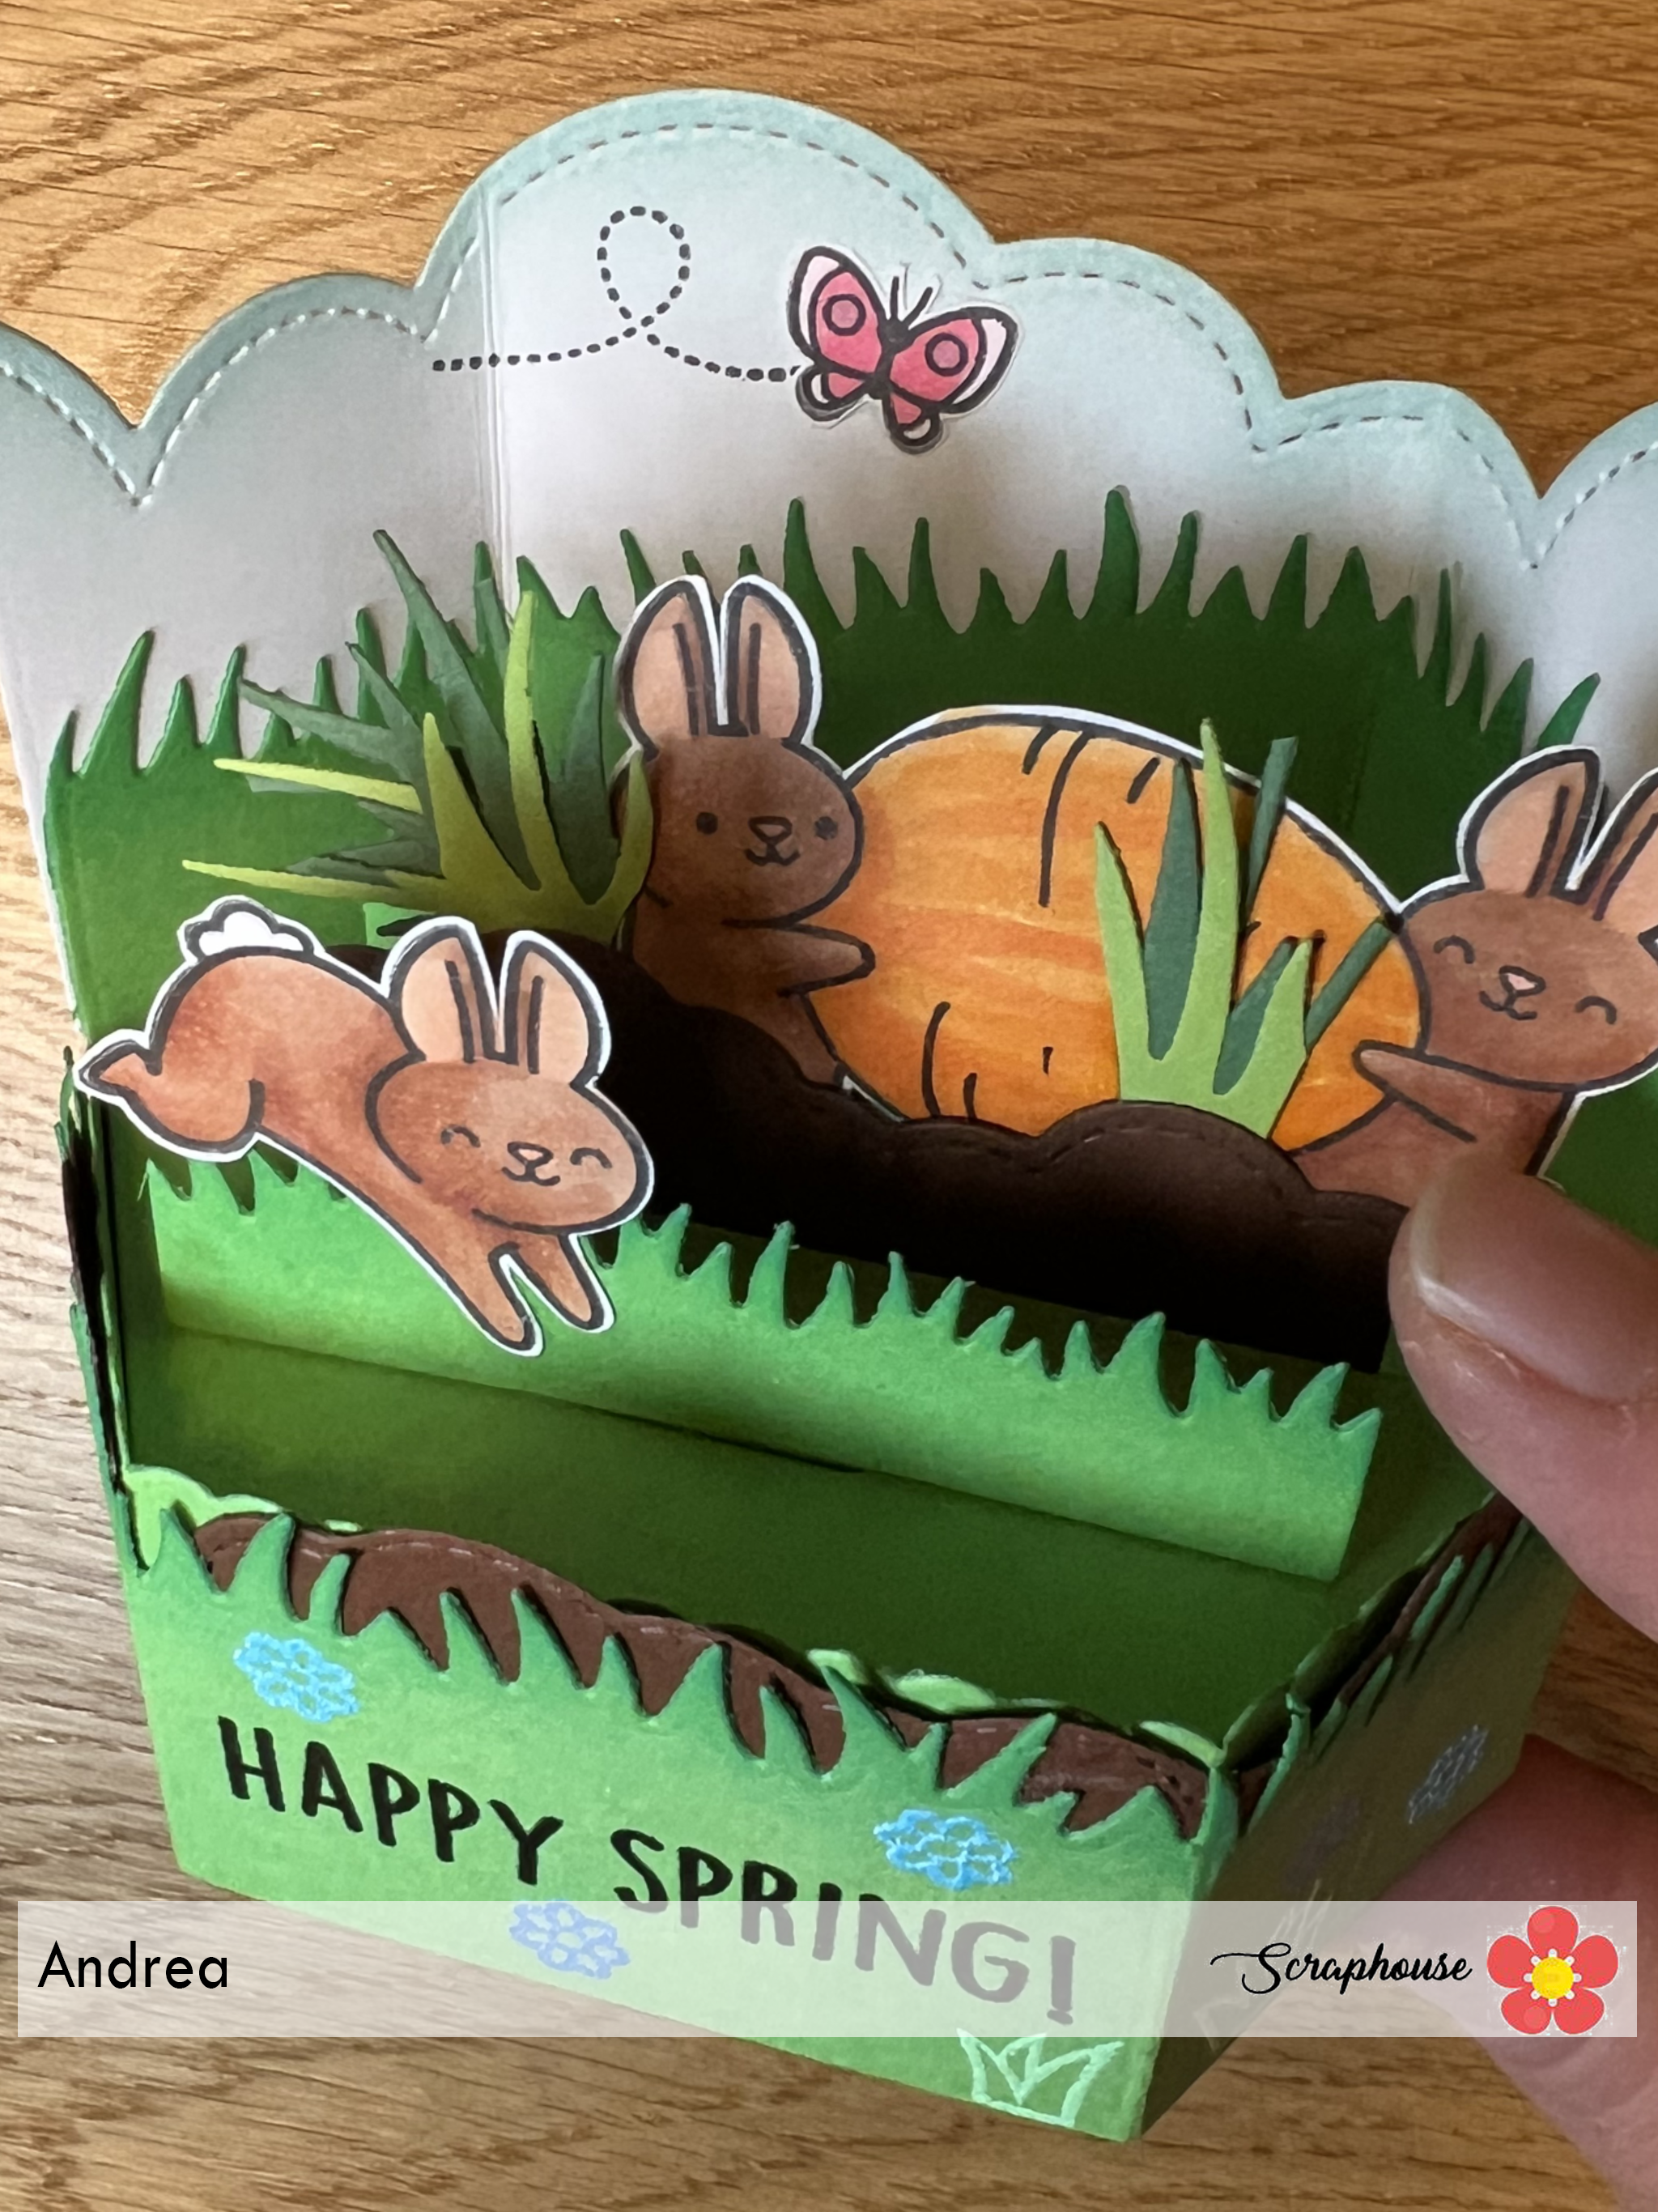
Here is a card where I turned the "Eggstra Ordinary Easter" Bunnies carrying an egg into spring bunnies with a huge carrot.😃

Huhu mitenand 😊

Do e Charte woni d'Osterhäsli vom Set "Eggstra Ordinary Easter" wo es Osterei träged i Häsli miteme grosse Rüebli verwandlet han. 😃

I used the platform pop-up die, the cloud wrap around where I cut the edges with a grassy border, the cloud inserts for the soil, the grassy border inserts and the background pop up add on I also cut down with the cloudy border.

Do defür hani d Platform Pop-up Stanze bruucht, wie au d'cloud wrap around Stanze woni aber no mitere Gras Stanze bearbeitet han, dänn hani die Cloud inserts bruucht für d Erde und die normale grassy inserts. Als Hintergrund hani es pop up add on no mit ere cloudy border Stanze in Form brocht.

Then I used some different embossing powders for the „Happy Spring!“ and the flowers on the wrap around.

Dänn hani verschiedeni Embossing Puder usprobiert für s "Happy Spring!" und d Blüemli ufem Wrap Around.

I am wishing you a good start into the new week!

Andrea

Ich wünsch eu ganz en guete Wuchestart!

Andrea